Wow! Can you believe it’s finally time??
The big day is inching closer and closer. Once ground breaking day is here, you will be in the middle of a whirlwind for a few weeks.
I thought I was prepared for those first few weeks of building, but the reality is that I basically took 6 weeks off of life and devoted 85% of my attention to overseeing the building of our dream home. I knew it would be a big time commitment, and I was mentally prepared for it. But it was significantly more than I thought it would be, so as far as putting the rest of my life on hold, I was not prepared.
So step 10 is devoted to getting EVERYTHING prepared to break ground so that you are better prepared than I was.
So here are the big things you should have already done:
- Planned out every detail of your home and finalized house plans
- Obtained building permits
- Lined up sub-contractors for the first few jobs
- Researched anything you will be doing yourself
- Requested take-offs and compared lumber and material prices
- Set up all necessary utilities
For a complete and extensive checklist of everything you need to do before breaking ground, visit the checklists, schedules, and printables page HERE.
Now take a moment to look at all you have done so far. Planning and preparing really is half the job of building a home, which means you are nearly half way to having the home of your dreams. The fun is about to begin!
The first things that are going to happen at your house site are the excavation work, the prep work for the foundation, and the foundation pouring.
Excavation
By now you should know who will be doing your excavation work. If you are hiring someone to do it, call them at least twice to check in and confirm scheduling.
Construction work is always changing, so the people you hire need to know whether you are on schedule, early, or falling behind. It also helps to remind them about you and your job. Some people don’t write anything down ….. yes really! … and they will forget about jobs entirely. Not to mention prices and negotiations that you made. I suggest calling 1 month before, two weeks before, 5 days before, and 1 day before you need them. It may seem excessive, but babysitting is absolutely a requirement when you are building your own house. It’s better to call a few extra times then it is to have someone not show up when they are suppose to.
Tip-
Set aside 1 day a week to make reminder phone calls. You don’t need to call everyone every single week, but at least you can go down your checklist and see who is coming up soon. You will avoid the problem of forgetting someone until the day you need them.
If you are doing the excavation work yourself then you need to be sure you have the equipment lined up. Again, you need to call and follow up a few times so you can be sure you will have an excavator on the day you need it.
The excavator will need to know exactly where you want your house. This is something you can absolutely do yourself.
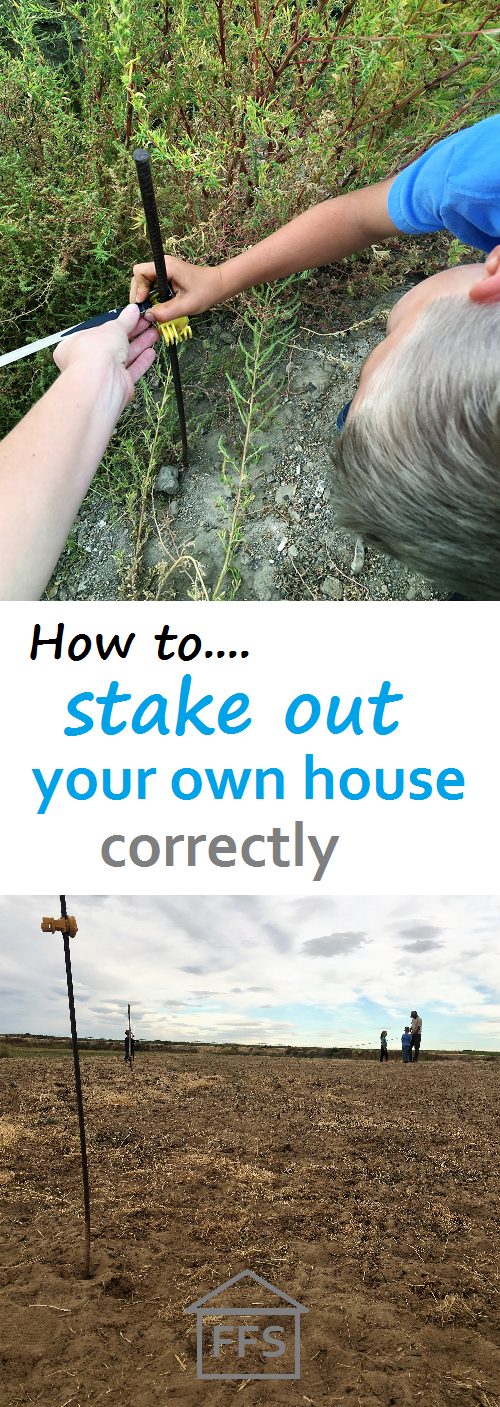
A few weeks before ground breaking day, gather several stakes to mark your house footprint. They don’t need to be fancy, they just need to mark all the corners. We used some old rebar stakes we had laying around the farm. You will also need your house blueprints and a measuring tape (100 foot tape works best).
I started by marking where I wanted my front door. Then we decided what angle we wanted the house to face. Consider where the sun rises and sets, which way the wind usually blows, and any other weather factors your area experiences normally.
Then we began measuring out the walls from the front door. Following your blueprints, set stakes where all the corners of your house will be. If your home has lots of angles and jut outs, start by marking the outside four corners. Then you can measure in to create the rest of the footprint.
How to check for square
You will be measuring and re-measuring everything on your house every step of the way. The best way to avoid headache is to be as accurate as you possibly can every time. Even when you are marking out where your house will sit, you need to make sure everything is square and properly staked.
To check if your house layout is square, mark your four corners at their correct lengths (A, B, C, and D). Then measure diagonally across the rectangle. If the diagonal measurement is exactly the same from point A to point C as it is from point B to point D, then your corners are square. You will have to do this with each area of your house, unless it is a perfect rectangle, then you would only have to do it once!
Once you are finished staking out your house, think about what will be around your house. Drive up and down where your driveway will be a few times to make sure it is where you want it. Also consider any outbuildings or permanent structures you will have in the future. Does everything fit the way you want it to? Do you have a view you want to see? Is your house positioned properly for that? Making changes now to where your house sits will be a lot easier then later on.
When everything is staked out, you need to check one last thing, and that is your dirt. It may be a good idea to call the excavator and talk to him about any problems that may arise.
One week before we were supposed to break ground, Farmer took his tractor to the house site to level out the ground. We discovered quickly that the dirt was far too dry to excavate. The sand was just running right back into any hole that was dug. We had to put a sprinkler on it for several days before it was ready to excavate. We are lucky we found the problem a few days early or we would have had to postpone our excavating.
Call your excavator and ask him what potential problems you should be aware of. Talk about the types of dirt in your area, how deep they usually hit rock, and what problems he has ran into on other jobs in your area. Finish your call by asking him what you can do to make his job easier. That should win you a few brownie points and he might even give you an assignment that saves you some money.
Now everything is staked out, you checked your dirt, and you followed up with whoever is doing your excavation. That’s job number one.
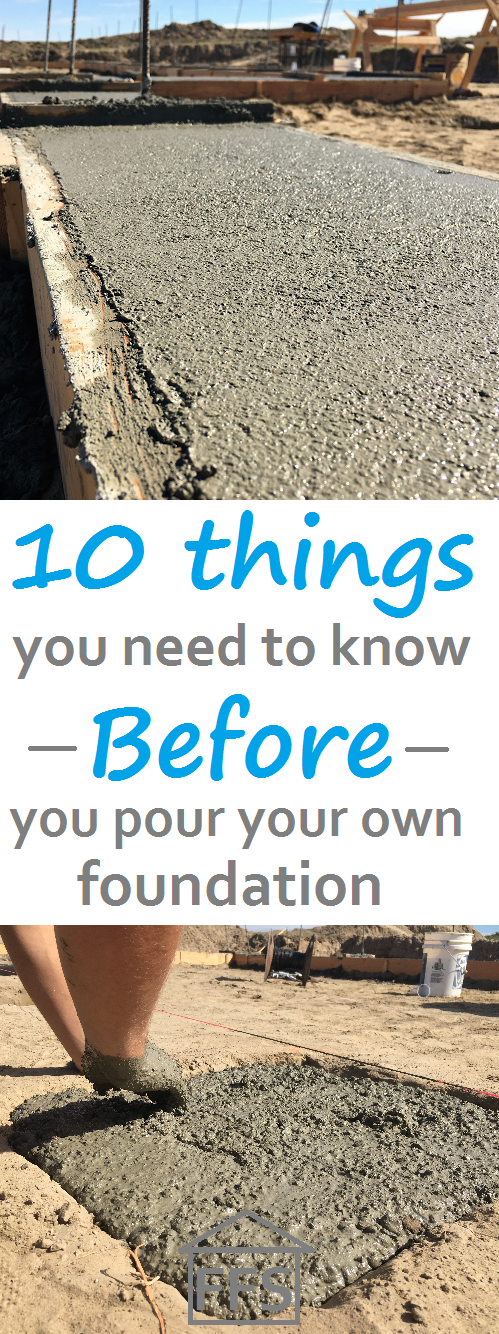
Job number two and three are the prep work for the foundation, followed by pouring cement.
Again, you should know by now who is doing your foundation. Same as the excavation, you need to follow up with the sub-contractor you hired to do your foundation, or spend some time researching if you are doing it yourself.
For the foundation and the framing, we ended up with the perfect situation for our family. I couldn’t be happier with the option that we found.
Farmer and I wanted to be a big part of this build. We wanted to do as much of the work as we could handle. The biggest obstacle standing in our way was his job. Farm hours are completely unpredictable. One day he might have no choice but to put in 20 hours of work, then the next day the weather might turn sour and he spends all day home. We knew he would have some time to spend working on the house, but we had no way of knowing how much. I was willing and eager to work on the house, but knew so little that I needed someone there to tell me what to do.
Now, add on top of that our four kids under 8 that I homeschool, and you see why I am not worth much when it comes to the actual construction. What I COULD do however, was run for materials, make phone calls, and organize everything.
When you decide who to hire and what you will do yourself, think hard about what your strengths and weaknesses are. Then consider the life situation you are in. Be realistic about what you can and can not handle.
Farmer and I did that, which is why we ended up choosing the person we did to work on a large portion of our house.
We found a very experienced framer, who happened to have a decent amount of experience building houses start to finish, who was willing to work entirely around our schedule. Basically he was willing to come to work every day and do whatever we threw at him. If Farmer could take a day to work on the house, he would use him. If I showed up with three unexperienced helpers, he would use them. And worst case scenario, if something happened on the farm and he ended up with no help at all for two weeks, he would make it work.
It was absolutely perfect for us because we had an experienced contractor overseeing our job, and we were still able to put in as much time or as little time as we could. We knew Farmer would be able to spend a lot of hours working on the house, we just didn’t know when. This arrangement allowed us to save thousands of dollars in work hours, but not be obligated to be there every day.
To top it all off, this guy was one of the cheapest hourly workers we could find, and he drove across three states to come work for us.
Ya, sweet right?!?!
Call your foundation guy, if you have one, and talk specific things over, just like with excavation.
For your foundation, you will need a lot of things. The person you hire should go over all of these things with you, but they probably won’t if you don’t ask them to.
Here are the things you need to be prepared for on the foundation.
- Are you doing a crawl space or a slab? A crawl space is where you can crawl around under your house when you need to. If you are having a crawl space, you will be pouring cement around the edge of the house and then building the floor on top of that, probably out of wood. If you are building on top of a slab, it is just one big slab of cement. There are other options for foundations (I heard of one recently being built on stilts!) but these are by far the most common.
- You will need something to act as “form boards” for your cement. You have to have something to hold the cement exactly where you want it when you pour. Sometimes they use regular boards to build walls around where you will pour the cement. Sometimes they use concrete forms which are very sturdy, uniformly sized, manufactured pieces that hook together to make forms.
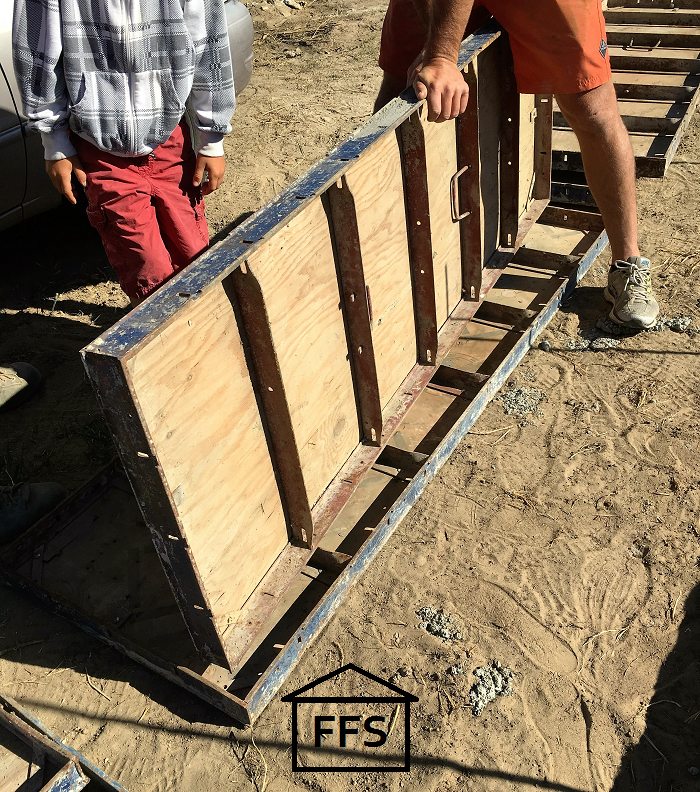 And sometimes they dig perfect walls into your dirt and pour the cement straight into the “dirt forms”.
 - If you are pouring a slab, most builders recommend laying 6-12 inches of gravel before pouring your cement to reduce cracking. You will need to have your gravel supplier lined up.
- In most cases, you are not simply pouring cement. Most homes have rebar, fiber mesh, or some other form of reinforcement material in them for extra strength. There are also bolts to be put in, vent cavities to build, and other specifications that need to be prepared for long before cement pouring day. Go over your blue prints thoroughly to see what your home and your county requires. You will need to have materials purchased and waiting at the house site on pour day. We will go over all of these things and more when I write my post about pouring the foundation.
- There are many special tools for cement work. Your job will be much harder if you don’t have them. These will also be discussed more when I write about pouring the foundation.
- You will need to have the cement company lined up. You shouldn’t need to know the exact amount of cement necessary until much closer to pour day, but you will need a rough guess.
- You need to have water at your site to wash everything off at the end. We didn’t have a well drilled yet, so we strung hoses from a pond nearby. Just be aware that without water, you can’t clean the cement off any tools or even your hands.
- Building cement forms can be done by one man if needed, but pouring cement can not. If you are doing the cement work yourself, you will need a crew of people there on pour day. We had 6 people, (3 with experience, plus Farmer, his little brother, and me) for a 4,000 square foot crawl space foundation, and it was fine. I wouldn’t dream of doing it without at least 3.
- Will you need a pump truck or will a regular cement truck do? Cement trucks are rather limited on where they can pour. The boom (the part that swings out the back or the front of the truck to pour the cement where you need it) usually has a 10-20 foot reach depending on the truck. It also can not pour upwards, because it relies on gravity. If a regular cement truck can’t reach everywhere that you need to pour, you will either need to wheelbarrow it in (not a good option if you are pouring more then a small amount) or you will need a pump truck which can pour just about anywhere. If you need a pump truck, it is often times a completely different company than the cement truck.
- It’s also a good idea to call your inspector about a week before you start building. He will be performing a few inspections over the first few weeks of your build. Do everything you can to be on the good side of your inspector. Ask his thoughts and opinions on things, and always ask what he is looking for specifically. That way you won’t end up doing something wrong that has to be ripped out and re-done before you can pass that inspection. Don’t make that phone call until you have done all your research though. He should not be the one teaching you how to do things, only giving you tips, pointers, and letting you know what he is looking for specifically. If you have a question, certainly ask him! Just don’t call and say “So how do we pour a foundation?”
Being overly prepared, and confirming with all the different companies and people you will be working with, will make ground breaking day and the weeks to follow, much more enjoyable. Double check the dates with everyone, always ask what you can do to help or make their job easier, and stay organized. Writing things down and even signing contract agreements, will keep everyone on the same page and avoid disagreements. One of the hardest things to deal with as a general contractor are communication issues. You can bypass most of them by typing everything up and giving everyone a copy of what was decided upon.
Blueprint copies
Before ground breaking day you will need to make a few copies of your blueprints. You have to keep the original copy, with the county notes on it, in good condition. You won’t want to use it if you can help it because it has to last the entire job and must be available for all inspections.
I started out with just two copies, and I expect to go through a few more. However, they are kind of spendy for the huge blueprint copies so I recommend starting with 2 copies plus the original. Then you can try to make the copies last as long as possible before you go make another set.
Copy prices vary all over the place. I was told, but didn’t double check, that staples charges about $5 per copy. Another guy I asked charged $5.25 for one. And a third guy charged $7. But you are not just copying one piece of paper. You will probably have around 10 pieces of paper you have to copy. So it adds up to quite a lot more then I originally expected to pay on copies.
If you live anywhere in the area, get your copies done at the Purple Coyote in Ephrata, WA. They charge $2.88 per copy, which came out to considerably less than all my other options around here.
Another thing to remember before ground breaking day is money. After you break ground the expenses come in fast. In many cases, you don’t have a few days to get the money sorted out, you need to pay right that moment. Have a plan in place for how you will pay for everything. Are you writing checks for everything? Are you putting it on a card and then paying it off at the end of the month? What is your card limit? How many checks do you have left in your checkbook? Things like that need to be figured out before someone is on the phone with you asking how you will pay.
The last thing you need to do before ground breaking day is prepare for life as a general contractor.
Once the excavation starts, you will be physically needed at the job site just about every day. I go check in with my husband and my guys every morning between 8 and 9 AM, as soon as I can get all four of my kids fed, dressed, and ready to go. Some days they have a job for me to help with there. Many days they need me to run to the store for materials. And other days they need me to call some people to arrange something. Almost every morning for the first six weeks of our build, I spent working on house things. Probably 2 or 3 times a week, it took me well into the afternoon to get everything done. Part of that is because Farmer and I are working on it with our crew, but it’s mostly because I am the one in charge.
So how do you prepare for that? By planning ahead.
- Make meals to freeze. I can’t tell you how much I wish I had made meals ahead of time and frozen them. It would have saved us at least a few hundred dollars, (and a few pounds) to have freezer meals ready to go instead of buying fast food every time I ran into town. We have eaten more then twice the amount of fast food and convenience food we usually eat since starting our house.
- Get ahead on cleaning your house and doing laundry. Getting your laundry and cleaning done while overseeing a build is inconvenient at best. Not only do you have significantly less time then you are used to, you are also going to and from a dirty house site everyday … literally! I homeschool, so this is probably not going to be the case for all of you, but I have four kids playing in the dirt every single morning. They all go with me to the house site, so they all play around in the dirt. My 7 year old comes home with torn clothes, liquid nails all over his hands, and sawdust in his hair. My 5 year old daughter is certainly the cleanest, but has boots that seem to pick up a pound of dirt every day and dump it on our kitchen floor. My 2 year old son loves mud more then just about anything. And my crawling 1 year old insists on not being held. Even if you won’t have any of those same problems, you will be dealing with more dirt and sawdust then you are used to. Clean house and do laundry the week or two before you break ground because it definitely won’t be happening as much after.
- Schedule ahead. Recognize that you are actually starting a new job the day you break ground. If you had been at home and were preparing to get a job, wouldn’t you schedule your life a little differently? Try to simplify your life as much as possible. Are there any things you do that you could pause for a few months? Do your kids have activities that you could arrange rides for so you don’t have to be the one taking them? Tell your friends and family what is happening and when so that they can be aware of the situation.
Basically what you will lose for the first few weeks of your build is time. Whatever you normally spend your time doing will be cut into significantly. After a few weeks of getting used to things, it slows down a little, but I still recommend going to the house site every day unless no one is working there that day. So plan ahead to hopefully not completely turn your life upside down. It’s a big time commitment, plan accordingly.
Aside from all that other preparing, there is still the ground breaking day itself. Depending on how you plan to do it, you may have a big day ahead of you, or you may not. But either way, you need to be prepared.
Showing up early is always a good idea. Come prepared with everything you think you will need for the day, so you don’t have to run home ten times. Which is exactly why I created the “everything you need on ground breaking day” checklist. A list of everything I needed on day 1.
I actually prepared 2 checklists for this post so you can print them and mark them off when you have them done. Hopefully it will ease your mind because you will know you are ready to break ground.
- Everything you need to take with you on ground breaking day
- Ready to break ground checklist
These are both available on my FREE checklists, schedules, and printables page.
You can sign up here, for unlimited access to all of the lists and schedules that I created to help while building your home.
If you are already a subscriber, CLICK HERE for your free checklists.
Do you need to go back to Step 9? CLICK HERE
Wishing you the best of luck on your house building journey!
~Farmer’s Wife
FREE checklists and schedules
Access to the resources I created that helped Farmer and I save over $75,000 building our own custom dream home.
Is there any chance you could make of the color of the text on your page here black instead of light grey. I can barely read it. Thanks in advance.
I will try my best to figure out how to change that. Sorry about that!