With cement time fast approaching, there are just a few more things to do before you are ready.
By now you should have all of your concrete forms built and all of your rebar set. Before you can make it all permanent by pouring cement everywhere, you have to get the “okay” from the people who get to tell you how to build your house. Okay maybe that was a little mean, but I really wish I didn’t have to follow some of the rules that the building departments has set up.
Unfortunately, I have zero influence in that department. I am just a lowly owner-builder who has to comply with all of the guidelines and protocol they have set up. And I have bad news for you…. you fall under the same category as I do. Follow the rules, or else.
So congratulations! It’s time for your first inspection. Go ahead and throw a party, it’s a big deal.
Inspection cards in each county will probably look a little different. Our framers made several comments about the different inspections they had to have, or didn’t have to have, in Utah. Different rules in different places. Which is exactly why a week or two before your inspection, you will want to make a phone call to your inspector.
When you got your building permits, you should have received an actual permit to build and also a list of inspections. Each inspection will have a space for a signature from the inspector after he passes it off. It’s as simple as making your way down the list. A phone number to get ahold of your inspector should be on that paper. If it isn’t, then give your building department a call and ask how to get ahold of them.
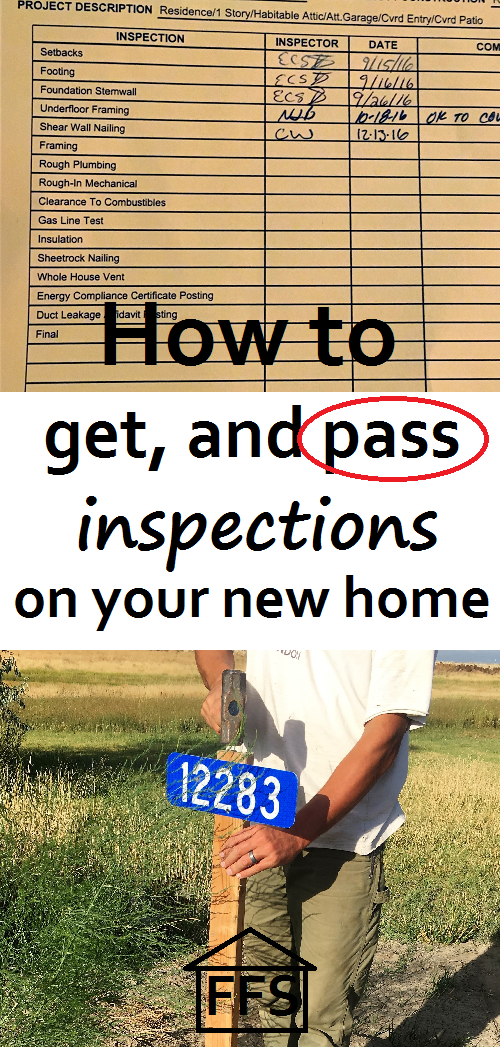
^^^Secrets to passing your house inspections
It is very important that you come across as “likeable” during this phone call. Think back to high school for a minute. Did you have any teachers that didn’t like you? Now how about teachers that loved you? Which class was easier to get a good grade in? See what I mean.
Your inspection card is like your house report card. Only instead of giving you a grade, you only have a pass or fail option. Thankfully, if you fail, you can retake the test later. But it takes extra time, and doesn’t help your teacher like you any better because they have to make another trip out to your house site.
The good news is, your inspector is NOT out to fail you. His job really is to help you build a better, safer, and more energy efficient house. If you give him a call a week or two before your first inspection, it helps you out in a few different ways:
- You can introduce yourself and get to know your inspector.
- You can get on his good side early, before calling for an inspection.
- You can ask him questions.
- You can find out exactly what things he will be looking for in his inspection.
I encourage you to ask your inspector questions, especially if you don’t know what you are doing. Their job is to tell you what you need to do and how to do it. Then they come out to make sure you did it the right way.
Here is what our inspection card looks like.
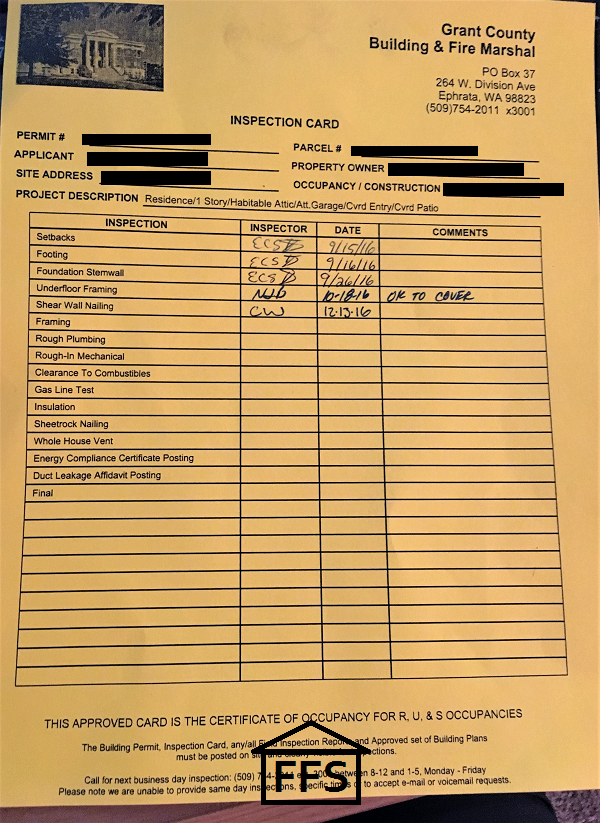
Every time we complete one of the things on this list, we have to call the inspector and have him come check it off. Usually we have to wait to start the next thing because they don’t want you moving forward until it’s been inspected.
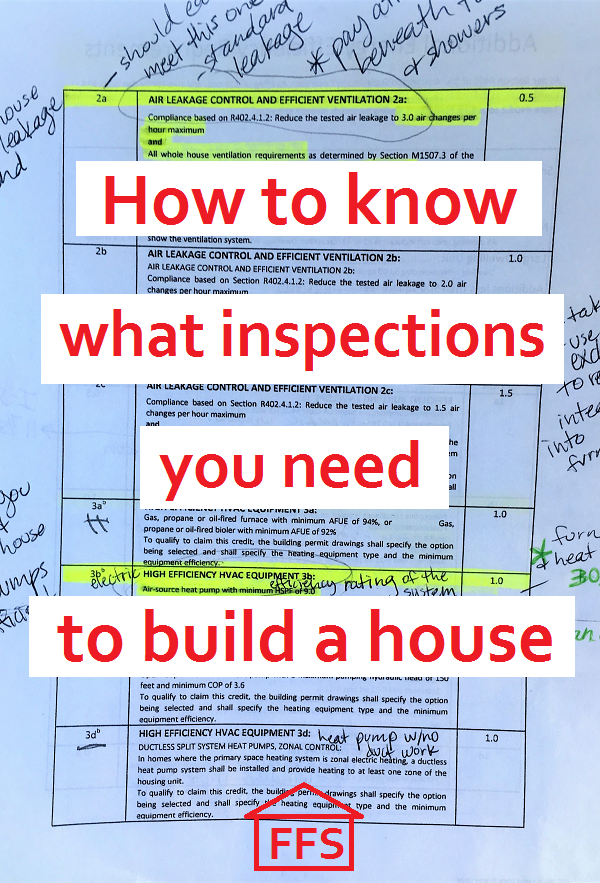
^^^What inspections you need before you pour your cement.
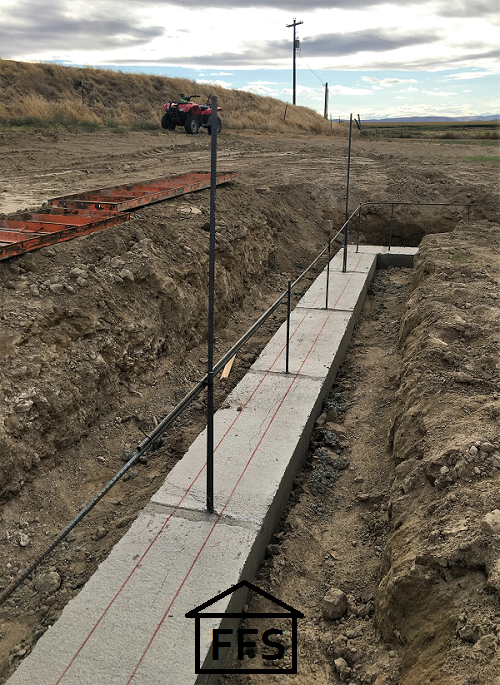
So before you pour your cement, you need to schedule an inspection. We actually did our first two inspections on the same day because “setbacks” was to make sure we were building far enough away from the canal (and we knew for sure that we were), and the second inspection “footing” was to check the forms and the rebar.
After you have called your inspector and asked all your questions, you should know exactly what he will be looking for when he comes out. In our case it was to make sure we had the forms in the right place, we had the proper amount of rebar and it was spaced appropriately, and that it was all continuous and at least two inches from touching any dirt. For this inspection, they really just want to make sure you are following what your plans say and putting your rebar where it goes. They don’t want you pouring any cement and making it all permanent, if it’s not all in the right spot.
Once you know you are ready, call to schedule your inspection. In our county, you have to call the day before you want the inspection, and you don’t really know when they will be showing up. Sometimes you can call the morning of the inspection and they will tell you whether they are coming in the morning or afternoon.
The hard part for me was that we were totally on their time. We didn’t know when they would be there. We couldn’t leave the house site because if no one is there when they come they won’t perform the inspection. We had to be totally ready for the inspection in case it came at 8 A.M. but couldn’t really do any work because you have to get your inspection checked off before you can move forward. So if the inspector doesn’t come until 3 in the afternoon then your day is pretty much shot. We had several days like that, waiting on inspections. Oh well.
^^^What you will need for a house inspection
When the inspector comes you must have the stamped set of blueprints, your building permit, and your inspections card for him to sign. Your stamped set of blueprints has to last the entire build so take care of them. Don’t leave them at your new house, get copies made for that. You can choose to have them laminated or something to keep them nice, but if you make sure to always keep them out of the weather and protected, they will make it just fine.
^^^What to expect for a new house inspection
I was nervous for our first inspection. Don’t be. It was actually a huge let down for me because of how uneventful it was. I expected it to be some big ordeal when really all that happened was the guy came out and looked at things for about 5 minutes, signed the paper, and then chatted with the guys for half an hour about hunting. I stood there and pretended to be interested for a little while, and then decided to go home because there was no reason for me to be there.
If all your stuff is done, it will be fast and painless. If all your stuff is not done, he will tell you what you need to do or change to finish up. Then he will come back the next time and it will be even faster because he already checked everything once.
When your inspection card is signed, take a few minutes to celebrate and then get back to work. It’s time for cement, ahhhh! Everything is about to get A LOT more permanent.
Cement sounds scarier than it is. I LOVED learning how to work with cement. Yes, you need to be careful because you are creating something that is very hard to undo. But, it’s also a pretty simple thing to do. It requires a little elbow grease, and I was absolutely sore the next day, but it was so cool to be part of this big step in the construction of our house.
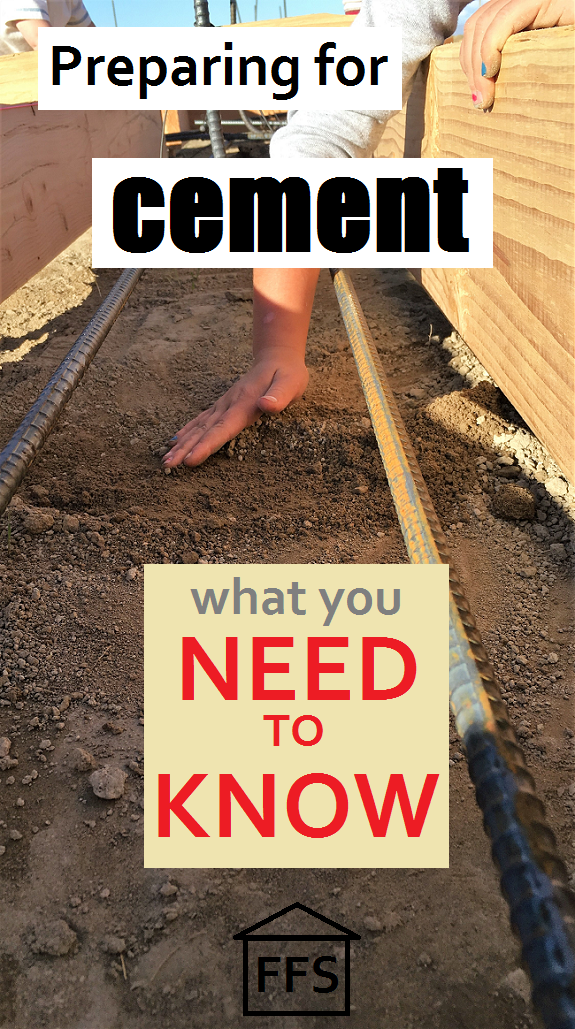
There are several things you will need to have before you pour your footings.
- Clothes and shoes that can be ruined
- Gloves if you like, but not necessary
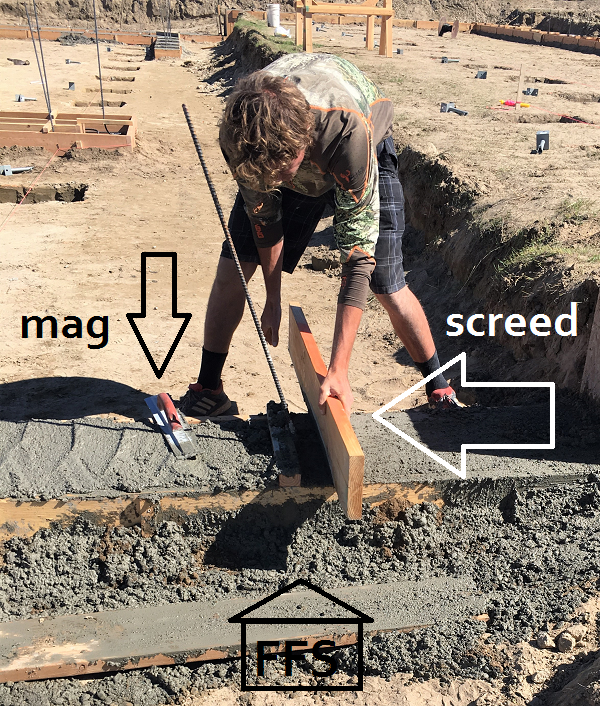
- A screed (something you scrape across the top of the forms to work the cement around and level it off a little better)
- A sledge hammer or vibrator tool (to work the air bubbles out)
- A mag (a smaller hand tool that smoothes out the cement)
- A shovel or spade of some sort
- A wheelbarrow
- Water
- Buckets
- Anything you may be placing in the top of your cement (we will talk about this in a minute)
- Cement truck
- Extra people
If you know anyone who does cement or has a lot of tools, these are great things to borrow. You don’t need them for very long, and they aren’t something that gets damaged easily as long as you clean them off really well when you are finished. There are also a lot of things you can make work if you don’t know anyone you can borrow from.
Gloves-
You don’t NEED gloves, but my hands did get pretty beat up after playing with cement all day.
Screed-
We actually just used a 2×6 board for a screed. It is heavier, but all you really need is a flat side to scrape the wet cement around.
Sledge hammer or vibrator tool-
We didn’t use a vibrator tool, I don’t even know what one looks like to be honest. We used a sledge hammer instead, to pound on the sides of the forms and shake the air bubbles out. For the footings we didn’t even have to do very much, it was the stem wall (which you will be pouring next) that really trapped the air bubbles.
Mag-
You do, for sure, need a mag. It’s just a little hand tool with a super smooth plate. that you rub over the top of the wet cement to smooth it all out real pretty like. Without a mag, your cement will be really crusty and uneven on the top. You don’t want crusty cement on your house!
Shovel-
You will need a shovel or spade or something to move the cement around with. It’s really heavy. Don’t try and use anything wimpy.
Wheelbarrow-
In many cases you won’t need a wheelbarrow, but if you end up needing one and you don’t have one there, it could make things really difficult or impossible. If you have to move cement farther than the boom truck can reach, how do you plan on moving it? Just borrow a wheelbarrow guys. Trust me.
Water-
Water is necessary, which can be difficult if you don’t have water at your site yet. We didn’t have our well drilled yet, so I had to bring like ten 5 gallon buckets full of water to the site. It was a pain, but it worked out fine for what we needed. You HAVE to have water to clean off your tools. You also need water if the cement starts to dry a little too fast. It’s imperative, so don’t even think about trying to get by with little or no water.
Buckets-
The buckets are for the water. It’s nice to have one for each person who is there helping. You will want to dip your hands or your mag in it every few minutes to rinse off.
“Anything you may be placing in the top of your cement” will be different for each house. It will also be different for each cement pour. Our spot footings (the little squares dug into the dirt in the middle of our house) needed a post holder placed in the center before the cement dried. The stem walls needed J bolts (bolts with a J on the bottom which stick up out of your stem wall so you can attach your floor to the foundation wall) every few feet. Your plans will tell you where you need to these types of things.
Our footings didn’t need anything other than the rebar that was already sticking up out of it. The rebar was meant to help hold the footings and the stem wall together better, and keep everything from shifting. Also, we waited to pour the spot footings until later, because we knew it would be easier to do those when the pump truck was here for the stem wall. So we didn’t need any of the post holders just yet.
One thing to think about is whether or not you want to put your electrical grounding rods in before you pour. I suggest asking an electrician about that.
We put two grounding rods in before pouring, but later decided we wanted our electrical meter box somewhere else. Not a huge deal, but something we didn’t have decided, so it cost us a little time and money. They are just two rods that need to go down into the ground and then later you tie in your electrical. Again, please ask an electrician in your area about them. They should gladly tell you where you will want to put them, no big deal. They should even be able to do it over the phone.
Obviously, on cement day, you will need some …. you guessed it … cement. Call your preferred cement company at least a week ahead of time to get on their schedule. Cement companies have a lot of last minute calls, so don’t wait until the day before or you may not get your mud when you want it.
Did you notice I called it “mud”? I am pretty proud of myself when I can work in a real construction term every once in awhile. They call a lot of things mud, and one of those things is wet cement.
When you call the cement company, you will need to talk some specifics. You will want to know pretty close to exactly how much cement you need. You have no idea how to do that, right? Ya neither did I.
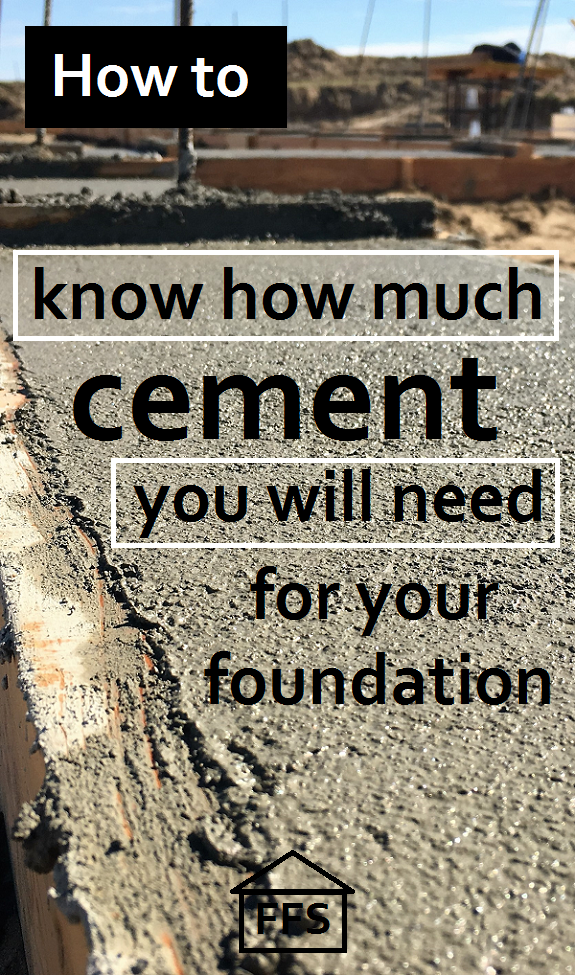
Option 1. Josh had a pretty handy cement calculator app on his phone. I don’t know what it was called, or if it was free, or anything about it really. But I do know they exist!
Option 2. Is to ask the cement company. We kind of did both and took an average because there was a small difference in what the app told us to do and what the cement company said. All you need to know to determine how much cement you need are the measurements of your cement forms. You need to know how deep you are pouring your cement (look at your blueprints. They will tell you exactly how thick your footings are supposed to be). And you need to know how many square feet of that depth you will be pouring. When you call them up, try to sound a little pathetic and helpless, sometimes it helps.
Option 3. Figure it out yourself. Oh boy, here we go. This is going to blow your mind.
You order cement in cubic yards. If you are a math wiz like Farmer is, just go ahead and skip this elementary math lesson. If you aren’t so great with numbers, let me explain it to you the way he had to explain it to me.
Ok you take the total length of all of your forms boards. If you remember back to when we talked about ^^^how to find out how much rebar you need, we determined that I had 490 lineal feet of cement forms. Then you take the width, but we are talking about feet here remember, not inches. Our forms were 16″ wide which translates to 1.33 feet. 490 x 1.333 =653.17 square feet.
Take that 653.17 square feet and multiply it by how deep you will be pouring your footing. Ours needed to be 8 inches, which equals .67 feet. 653.17 x .67 = 437.62 cubic feet.
There are 27 cubic feet in a cubic yard so you take your 437.62 (I don’t have a divide sign on my keyboard dang it!) divided by 27 = 16.2 cubic yards. Yay, you are a math genious!
But before you call up the cement company, a few more things …. You do not want to run out of cement, especially if they are bringing it from an hour away like we were. I would give yourself an extra cubic yard to be safe. If you are using a pump truck you need 1 more cubic yard on top of that. We will talk about pump trucks when we pour the stem wall.
Doing your own math is great, but I would still run your numbers through the cement company. It’s great to get a second opinion and have a professional tell you how much they would order.
You also need to know what type of cement you are ordering. They call this “bags”. It has to do with the ratio of concrete to rocks to whatever else they put in there. Your choices are 5 bag, 5 1/2 bag, or 6 bag. 6 bag is generally used for slabs (so I am told). 5 and 5 1/2 are used for foundation walls. This is an easy question for the cement company to help you out with. Just tell them what you are using the cement for and they can instruct you a little in what they would do. It may be different depending on where you live. We used 5 1/2 bag.
If you have rebar in it, you are covered for strength. If you don’t, in some cases it is smart to have them add fiber mesh to your mixture. It looks like tiny shreds of metal all over in your cement. Usually foundation footings and stem walls will have rebar in them. We did put fiber mesh in the cement when we poured our garage slab though. We wanted to prevent cracking if we could. It just adds a little strength when needed.
So here is everything you need to know when you call the cement company (or what you need to ask them about):
- The date you need cement
- The address, and probably directions too
- How much cement you will need. You may want to talk to them about how many yards fit in each cement truck. We squeezed enough in two trucks so that they didn’t have to send out three. It saved time and the hassle of sending out another truck with a tiny amount of cement in it.
- How long their “boom” is (the slide that sends the cement wherever you need it). You need to know how far they can reach. They probably need to be able to drive all the way around the house to reach everywhere that needs cement. The trucks we used only had a 10-12 foot boom. They couldn’t reach the spot footings near the middle, which is why we waited to pour those with a pump truck when we did the stem walls. You also need to consider that the boom works with gravity. It just slides down where you need it. You can not pour uphill from where the truck is. That’s another reason why the truck needs to be able to drive around to different spots.
- How many “bag” cement you want. 5, 5 1/2, or 6
- Whether or not you want fiber mesh in it
- When, and how, you will need to pay. It was cheaper for us if we paid with a check rather than a card. We didn’t have to pay until after all the cement was delivered.
- What their hourly charge is. If our pour took over a certain amount of hours, or they had to wait for us after they were already there, they started charging extra. Make sure you are ready to go when they show up.
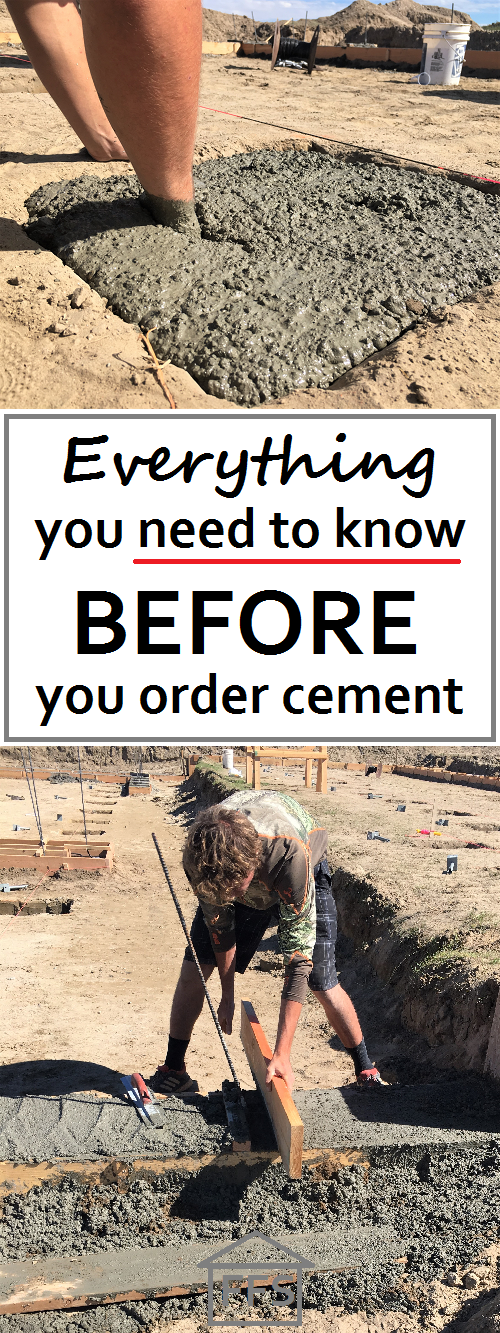
Cement pouring days were the only times when it was imperative that we have extra help. Please do not try and do this by yourself, or even with two or three people. If cement “gets away” from you and dries out before you can get to it, you will have some serious problems. That doesn’t mean you need experienced cement workers. A few extra willing hands will be just fine. You will need extra tools for all the people who will be helping. Several shovels, gloves, screeds, mags, and buckets of water are necessary. Everyone doesn’t need their own set of tools, but make sure you have extras of everything.
^^^How many people you need to pour your foundation
Just for an idea on numbers, we were pouring footings around our 5,000 square foot house footprint. We had 2 experienced cement guys, 2 capable (but inexperienced) guys, myself, and little man(7). It was a good amount, but we were all needed the entire 3 hours so it was exhausting.
When we poured our stem wall a week later, we had similar numbers and I would have preferred to have two more.
However, when we poured our garage slab we had 3 experienced cement guys, Farmer, and myself, and the two of us were only needed part of the time.
Just make sure you have plenty of help that day. It’s just one day so grab a few friends that don’t mind getting their hands dirty. You will be way more happy to have extra people standing around, than to be short on help and have a cement emergency.
Alrighty, you had your inspection, you have all the tools and supplies ready, you called up a handful of friends to help, and you ordered your cement. You are all set!
Next step is pour day! Take a deep breath and get ready for the most exciting step so far. You are about to have something solid on your property.
~Farmer’s Wife
Need to go back to step 13? CLICK HERE
Ready for Step 15: Pouring cement footings CLICK HERE
FREE checklists and schedules
Access to the resources I created that helped Farmer and I save over $75,000 building our own custom dream home.
I am thoroughly enjoying all the emails and great stories from farmer’s wife.
Thanks heaps gal, keep up the great work.
Glad I could provide some help, or at least a little entertainment!
I have always used 25 cubic feet to a yard when pouring against dirt, those 2 cubic feet always seem to get used.
Thanks Dccoins 🙂
Interesting reading, thanks for all the posts and information. I can’t seem to register my email. Also, I really hope you poured concrete and not just cement without the sand/aggregate 🙂
Yes, we poured concrete thank you. Thank goodness for you readers who can correct me on some of the wrong words that I use, oops! Did you get your email to register?