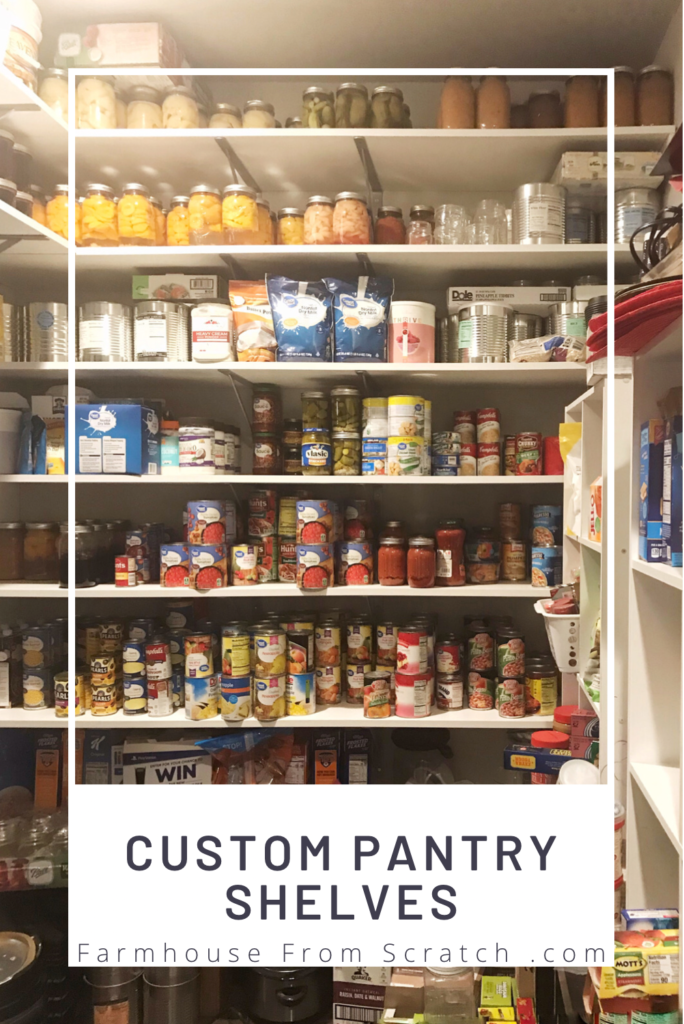
I absolutely love my pantry shelves. Farmer built me the most beautiful and simple custom pantry shelves and I could not be more in love with them.
How did we build our easy, super sturdy, and incredibly simple pantry shelves? They are made out of 16″ melamine board and 16″ shelving brackets, plus some left over trim. This project was finished in one evening and cost around $300. We built these custom shelves in the perfect sizes to hold heavy bottled fruit. I didn’t ever want to worry about overloading our pantry shelves and these ones don’t sag at all, totally filled with bottled food.
We built what we needed and it’s perfect!
How we came up with our measurements
In all honesty, we kind of just guessed where we wanted our shelves. I knew I wanted space at the floor to put bigger kitchen items like my crock pot and other pans so we made sure we had space for that. Then for the shelves themself, I have different sized items (I think we all do). Some larger items like cereal boxes and then smaller items like apple sauces and a bunch of in between items. So we created the first board, put some food in where I wanted it and then built the second shelf on top of that and kept going until we got what we wanted. And it turned out perfect!
Some might see “wasted space” because some cans have a little extra room on the top but I love that I can fit my hand in to reach the cans and I can lift them out of the shelf with ease. I can stack cans of the same food on top of each other instead of having to put everything side by side. We really feel that we maximized our space and efforts with our custom shelving.
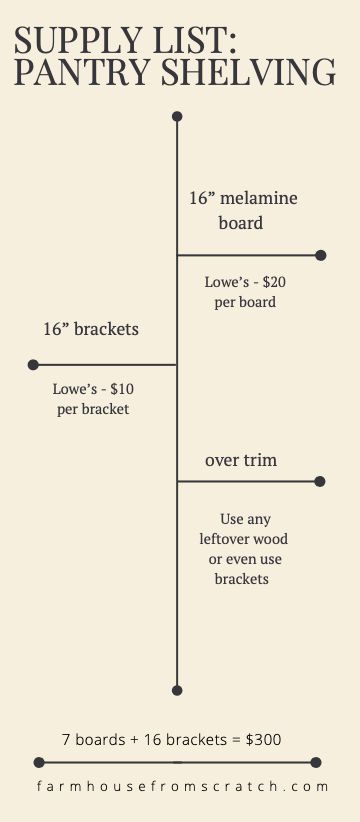
Supply list
16″ melamine board – from Lowes ($20 per board when we purchased)
16″ shelving brackets – from Lowes ($10 per bracket when we purchased)
over trim – extra wood we had laying around (free)
7 shelves + 16 brackets
TOTAL = $300
Click the link below for a detailed video tour of our pantry shelves.
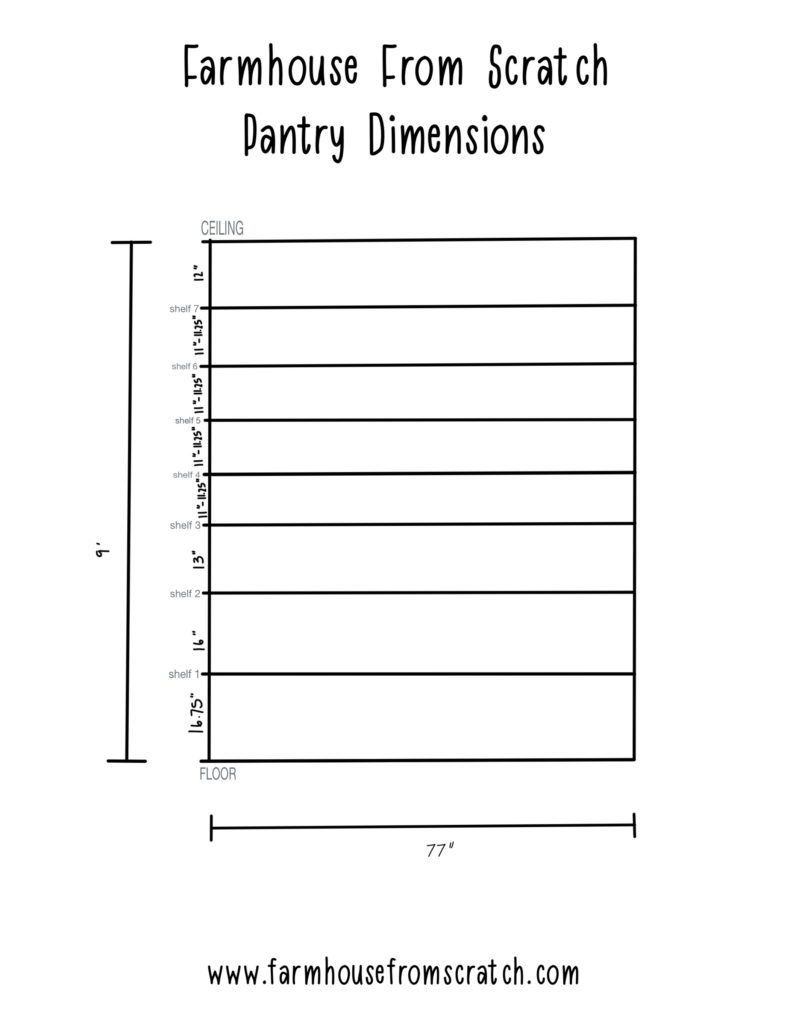
Detailed Shelving Measurments
From the floor to the first/bottom shelf is 16.75 inches. This is one of the largest (or tallest) shelves because I knew I wanted to put appliances or taller items like our crock pot or larger canned goods that we don’t get into every day down there. It was a great size to be able to stack two #10 cans and still have a bit of wiggle room. I am not super organized so in the video it doesn’t look like the best use of space but it is still what I wanted.
The next shelf is 16 inches and this is also for larger items like our cold cereal boxes and a few other large items. There is plenty of space for big things that some might not think about.
The third shelf is 13 inches tall, perfect to fit two large cans on top of each other with wiggle room. We could have gone shorter for the shelf but it makes it hard to stack the cans and get them out. I like the little bit of extra comfortable wiggle room.
The rest of the shelves juggle between 11 and 11.25 inches. We didn’t really care about having all the shelves the same size. We were just measuring and putting them where we thought we wanted. (perfection is overrated!)
The space between the top shelf and the ceiling is 12 inches so there is a bit of extra space for different sized items. With all shelves, they are 16 inches deep and can fit about 4 canning jars deep and 5 large store bought cans.
The width of the shelves are 77 inches – that is from wall to wall. If you’re a visual learner – I have created a super quick diagram to show the dimensions of the pantry. Obviously not perfect but it helps get the point across.
These are great sized shelves to stack cans. Because of the way we built the shelves – there is no sagging. We used 2 brackets per shelf (plus the over trim on the ends) and that was plenty. These are super sturdy pantry shelves. I knew that I was going to have a lot of heavy canning items so I knew I had to have sturdy shelves.
We have a family of 7 so we like to have a lot of food storage. I also enjoy canning so I needed a place for that. You might not need that deep of shelves or that long of shelving. You might not need as many brackets as we did so make sure you measure and check your math. It is so easy to customize your pantry to fit just want you want/need. Like I always say – plan plan plan because it can save you tons of money.
We aren’t done with our pantry. We loved the sizing and everything so much that we are going to add more to our other wall (more details in the videos).
So tell me, what makes the perfect pantry for you? What did you keep in mind when designing your kitchen/pantry?
FREE checklists and schedules
Access to the resources I created that helped Farmer and I save over $75,000 building our own custom dream home.
Leave a Reply