Hey there, how are you feeling so far? Completely overwhelmed? It’s okay, so was I at this point. But we made it through, despite plenty of people telling us we wouldn’t. And we saved SO MUCH MONEY building and general contracting our own house. Plus our house is wonderful and exactly the way we wanted it. It’s worth it! Don’t give up!
In the last step we talked about going around the outside of the house and putting green plate on top of your foundation walls. Now it’s time to build the supports for everything inside of your house.
Depending on the size and shape of your new home, you will most likely need supports all over underneath your floor. That is, unless you want your floor to sway up and down when you walk from one side to the other. Nope, not good!
Your blueprints will show you exactly where you need these supports, just like your foundation walls. They will also tell you how strong they need to be, a.k.a. what material to use and what size.
Under our home we needed large 4″ x 10″ beams all the way across the house in several different places. These are spendy little buggers because they are so big. They have to be strong enough to hold your floor up and everything on it. I felt like we were buying full on trees because these hunks of wood were so solid and huge.
This is the part where we finally use those spot footings we poured so long ago. Was that just last week? Maybe it just feels like so long ago. We already placed the 4″ x 4″ post holders into the concrete when it was poured, so it was all ready to set our posts in now. If you need a little refresher on spot footings you can CLICK HERE.
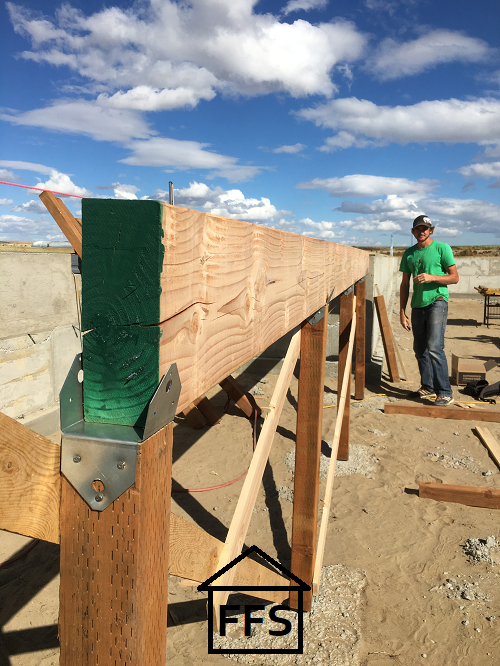
So to complete the foundation below our house, and be ready to install the floor, we now needed to put our 4″ x 4″ posts into all of our post holders and top them off with 4″ x 10″ green douglas fir beams.
Just like with every other step on this house, all of these words were gibberish to me. If this sounds like you, the best way to find out what materials you need to be using and get more information on all of these “other” things, is to talk to the guy who calculated your materials take-off. Part of his job is to help you figure out what you are supposed to be using on your home. Don’t feel bad asking him to walk you through what everything is and what you will be using it for. These guys know their stuff. They are a great resource to utilize.
I knew what 4″ x 4″ posts were, but I had no idea what GDF stood for or any of their other material codes. GDF stands for green douglas fir in case you were wondering. But I only learned that because I sheepishly asked the guy at the building supply store. Usually they just chuckle and then explain things to me like I am 5. I don’t mind … at least that way I understand what they are saying to me!
So after we had the correct materials delivered to the construction site we were ready to get started. This is about the time that Josh had to go back home to Utah for a bit so it actually just ended up being Matt working on this for two days. Farmer and I were in and out a little, but we were putting up hay that weekend which left very little extra time to go help. Ahhh poor Matt. He got it done way faster than I thought he would with only one person … those beams are huge guys!
First thing was to set the 4″ x 4″ posts on the post holders. They each needed to be measured and cut so that when the 10″ beam sat on top everything would be flush and level for the floor. The easiest way to do that was to run a string line again. If you pull it really tight and use the level, you have a perfect line to measure straight down from.
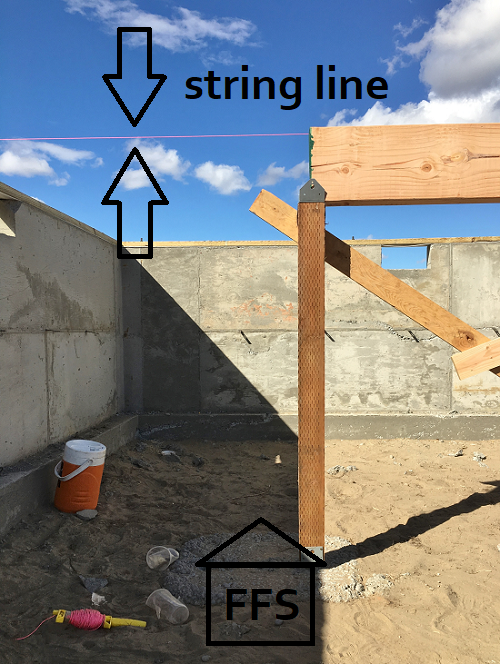 Just be sure to consult your blueprints again to make sure you are measuring all of the different components that will need to go underneath your floor.
For example, we also had to factor in a tiny space for the post caps. It’s not much, but it’s enough to make things not level if you don’t account for it. You want all of this stuff to be as close to perfectly level as you can get.
Also remember that lumber is not true to it’s name. Most of it is smaller than it says because it shrinks when they dry it. Our 10″ beams were more like 9 1/2″ beams. Measure the actual lumber you are using and you will be just fine.
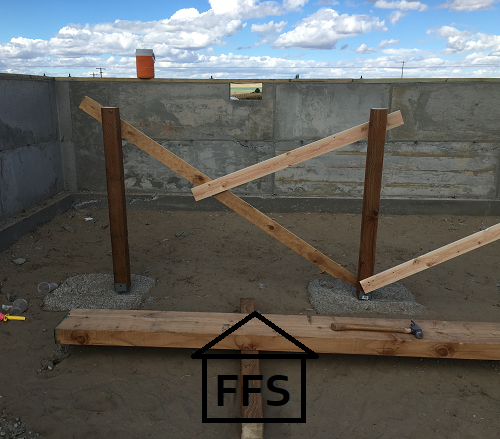
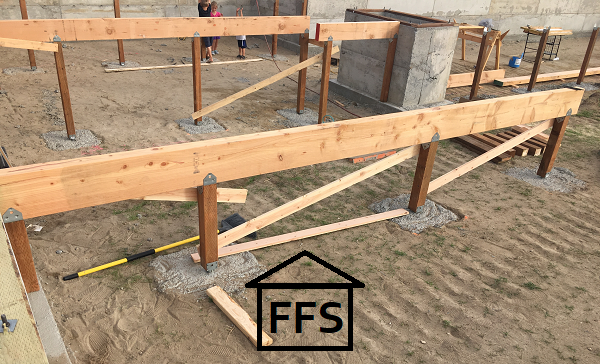
Cut your posts to the correct size and then secure them in their places. You may need to put up a few temporary braces to hold them level until you can set the beam on top.
Once you have your posts set, top them all with post caps. These help to keep the beam that will sit on top from shifting. Of course we all want our house to be strong and sturdy right?
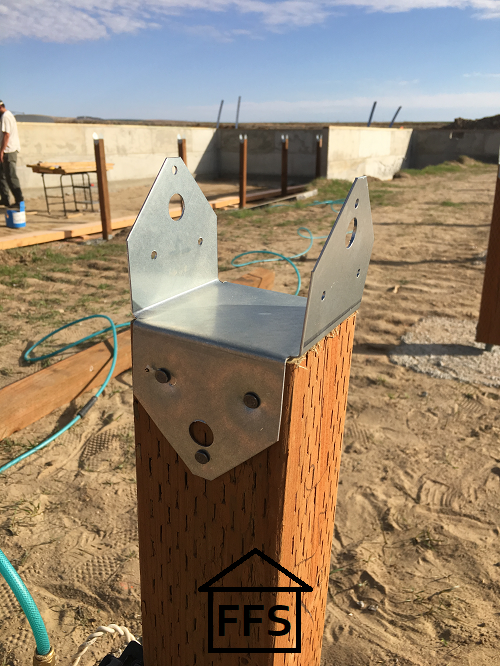
Post caps, check. Now you are ready for the beasts. I suggest having two people on hand to set these trees … ahem I mean beams … in place.
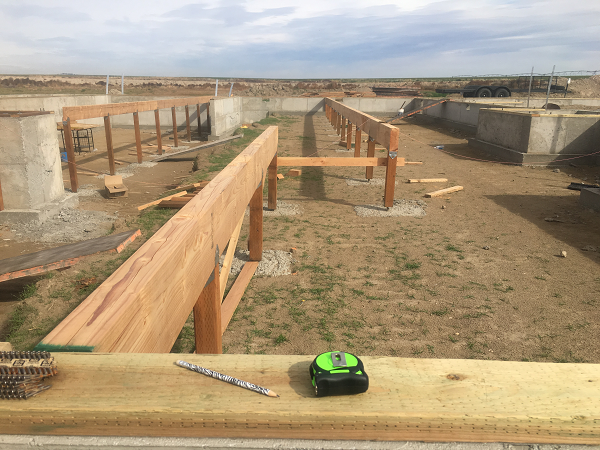
You will need to measure and cut these also before you set them. You need to make sure the spot where one beam ends and the next one begins sits right in the middle of a post.
 You don’t want your seams floating in between posts or they will sag with no support. Your blue prints may even show you exactly where to put the breaks. Check that too.
Matt had the good idea of laying ALL of the beams out before cutting any of them. It cut way down on waste because he was able to move them around to better spots so he didn’t have to make as many cuts. We only ended up with like 12 inches of extra beam because he figured it out perfect.

One thing our blueprints didn’t tell us was that we needed a moisture barrier to separate the beams from our concrete foundation walls. The foundation walls will soak up a little moisture sometimes and could transfer it to your beams. Rotting beams is a very bad thing underneath a house. Very very bad ….
It’s a simple problem to solve though, if you do it BEFORE the beams are set. We MAY have forgotten until after the beams were set … and it MAY have been incredibly annoying to get the moisture barrier wedged in there …. I am just saying.
Just put a piece of tar paper in between the green douglas fir beams and the foundation walls. Make sure they stick out around the edges an inch or two so the moisture can’t sneak around your barrier. See what I mean? Not a big deal, as long as you don’t forget about it until after the beams are tight up against the wall. If I can ever find the picture I took of it, I will put it here.
The post caps will make it pretty easy to secure the beams. It’s goes real fast once everything is measured and cut to size.
Double check that everything is level both on the top and also standing straight up. A leaning post isn’t very strong.
Now your foundation is ready for your floor joists. Booyah!
The materials for this step were pretty expensive mostly because of the 4″ x 10″ green douglas fir beams. Beams are always expensive so take care not to waste them. Measure twice, cut once.
Like I said in the last post, rather than having it scattered all over throughout ten posts, I am putting together a cost breakdown for the entire framing portion of the house. It will be much easier to follow if it is all in the same place.
So if you haven’t already signed up for the completely FREE page where all of these checklists, schedules, and printables are that helped farmer and I save over $75,000 on our house so far, you can do so right here:
On that page you can also find a cost breakdown for the first half of our house, a timeline with everything you need to do before you start building, and a whole bunch of other completely free pages to print off and use to help you save thousands like we did. You know it’s worth it, so do it now before you forget!
If you have already signed up for it, then you can CLICK HERE to visit the checklists, schedules, and printables page for subscribers.
Real quick breakdown before I wrap things up today:
- This step took 1 person about 2 days to complete
- Yes, I believe it could be done by someone with no experience as long as they follow their blueprints closely
- If we did it all over again, I would be totally comfortable doing this step ourselves
Do you need to revisit step 18? CLICK HERE
Or … moving on to Step 20, CLICK HERE
Forgot to sign up for the free checklists, schedules, and printables page that has helped us save over $75,000 on our house so far? You can do that right below here.
Happy house building!
~Farmer’s Wife
FREE checklists and schedules
Access to the resources I created that helped Farmer and I save over $75,000 building our own custom dream home.
Where is step 20 or is this the most recent post? I have learned a lot reading your blog so far. Thank you
Step 20 will be out in a couple of days. So sorry, I wish I could write faster! Let me know if there is anything else I can help with.
Don’t be sorry! I was just making sure I didn’t miss anything! I am excited to read more! Where are you guys at right now? We are still in the planning stage. Getting our engineered set of plans by the weekend hopefully.
We just finished covering all the outlets and putting in our can lights, now we are starting on tiling the bathrooms.
So excited for you! It’s fun to get your plans back and all finished up.
My partner and I want to eventually build a home and I’ve been following along with your posts religiously since I discovered your blog a few months ago! I know that this will end up being a huge resource for us when we are eventually ready to build for ourselves. Thank you so so much for putting everything out here in such an easy to understand and relatable way, your writing style is so engaging to read!
Thanks Kelcie! So nice of you to send me that sweet comment, I wish you the best of luck!