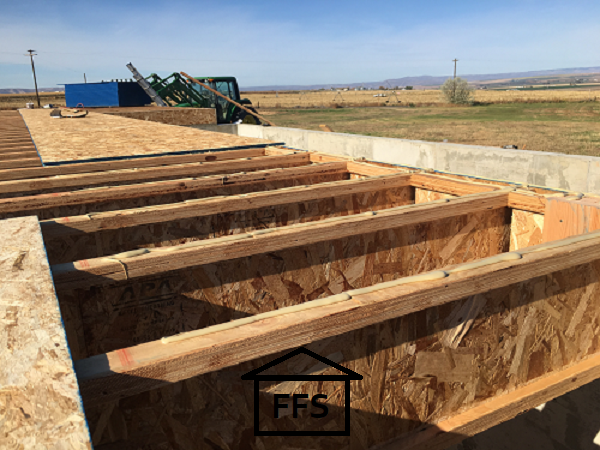
Once your floor joists are on, next up is the rim board.
The rim board is just a board that goes all the way around the rim of your foundation. It closes off the floor joists around the edges, and provides a little extra support for holding them all together.
This board would not be used like this if your floor joists are hanging inside your foundation instead of sitting on top like ours.
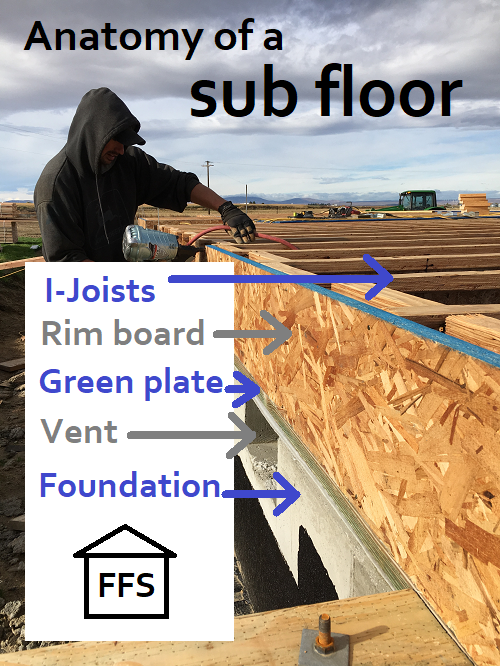
Your rim board should be the same size as your floor joists (11 7/8 inches in our case). It sits on top of your green plate, and is flush with the top of your floor joists. This way when you put on your sub floor boards next, they can go all the way to the edge and sit level.
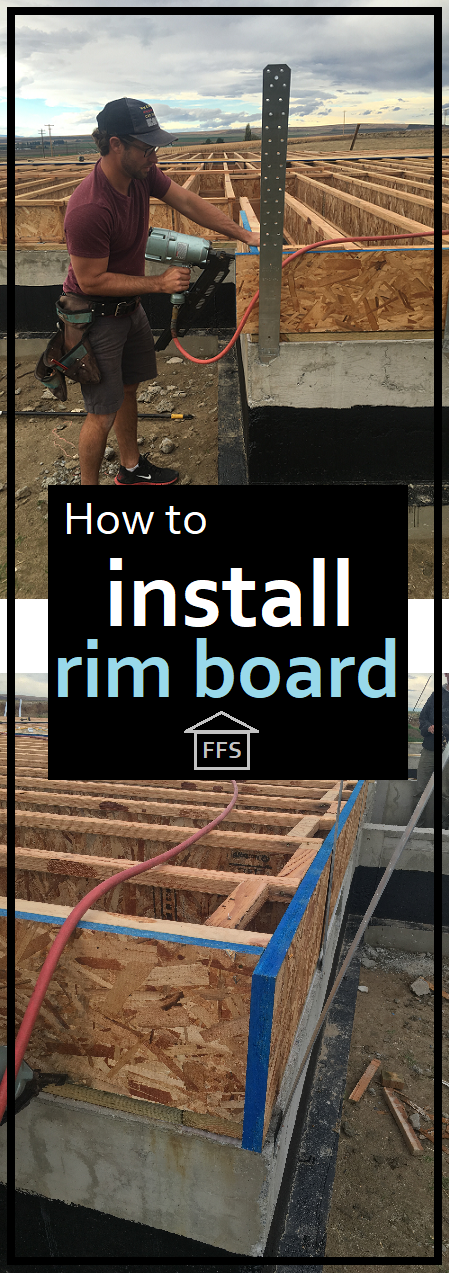
Installing the rim board
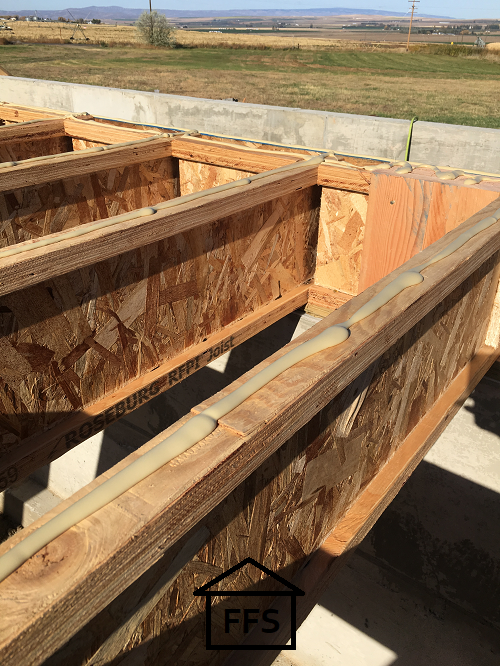
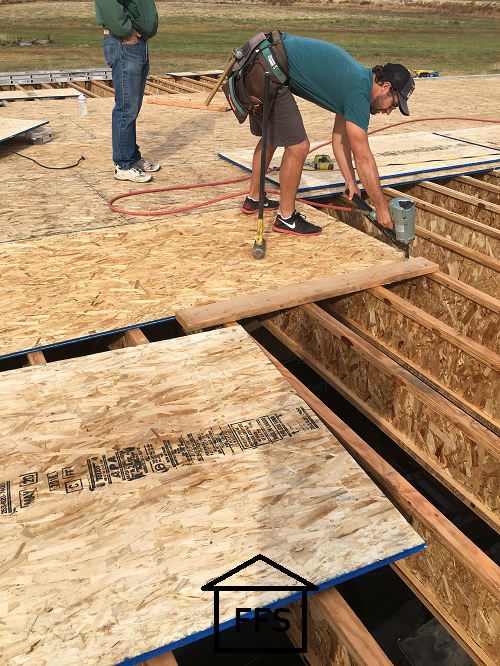
All you do to install your rim board is run it around the outside of your floor joists. Start at one corner and work your way around, making sure it is properly secured. Your blueprints will specify if any certain kind of nail, screw, or pattern needs to be used for this step.
Pay special attention to making sure your rim board is level and flush with the top of your floor joists. You don’t want to be working with uneven edges when you put down your sub floor.
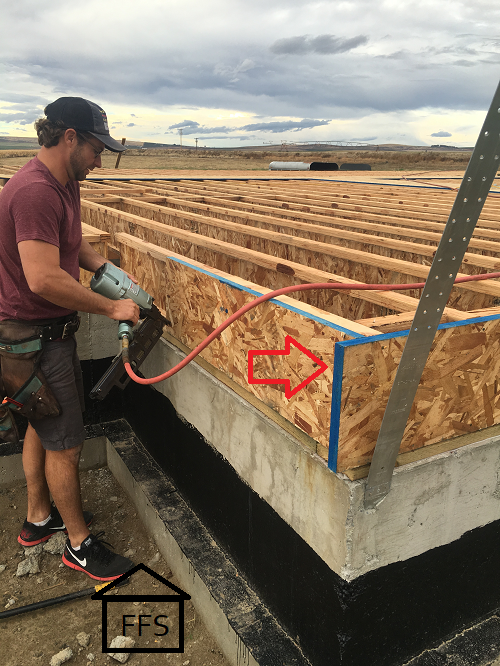
You will notice that in the picture above, the rim board sticks out a tiny bit past the edge. That is only because sometimes Josh prefers to cut off the edge after it’s already installed. It can eliminate the need to measure meticulously, and it will get a very close to perfect cut. So in this picture he just hasn’t cut off the excess yet.
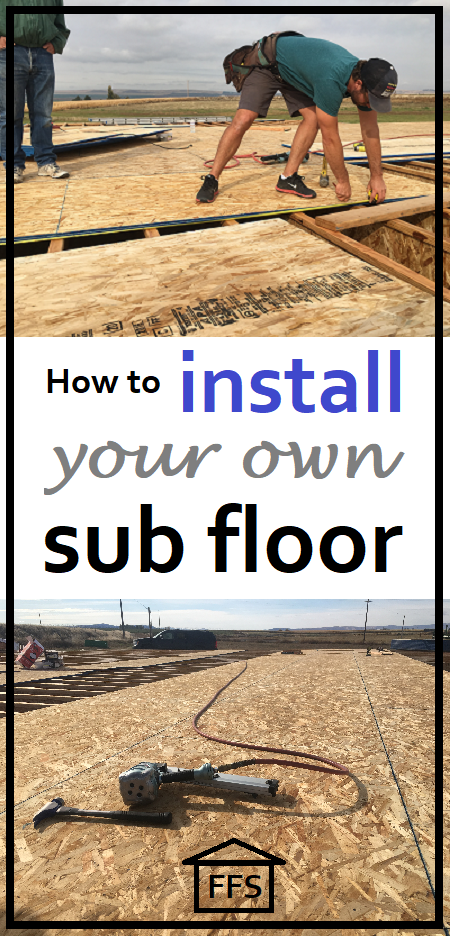
Installing the sub floor
And now you are ready to begin installing your subfloor. Here is where you will really find out how accurate you have been with your measurements. If your floor ended up perfectly square and flat, and each of your floor joists are placed the correct distance apart, your sub floor will go on easy as pie. If you were careless with your measuring and leveling, you will end up with some tough spots that are difficult to fix.
One good suggestion before you start is to lay down some temporary boards to walk on. There is nothing wrong with screwing down a nice pathway across the top of your floor joists. We just used the sheets of plywood that would be our sub floor anyways and put a few screws in each one to keep it from sliding. Individual floor joists are not easy to walk on. They wobble very easily. It may take a few extra minutes, but you will be happy you built a temporary pathway to walk on while you work.
Once you get started, you can stand on the boards you have already placed so this won’t be a problem for very long.
For your sub floor you will need:
Plywood or OSB sheets (we used 4′ x 8′ tongue and groove) to cover the entire floor
Liquid nails (to better secure the floor, keep it from squeaking, and help seal out bugs, air, moisture, etc, from below the house) and a gun to apply it with
Something to secure the boards with (we used a nail gun and nails but I know some people prefer screws)
Measuring tape, saw, level, hammer, pencil/marker
Before we began placing boards, we measured from one end of the house to the other. We wanted to see how the boards would fit, and if we would end up with a tiny 1 foot strip at the end. If you are going to end up with a weird sized space at the end, just adjust your first row and split the difference. It’s better to have a medium sized board on both ends of your house than a tiny board at the end.
- We began in the corner of the house. Bring the board, liquid nails, loaded nail gun, measuring tape, hammer, and pencil or marker.
2. Apply the liquid nails to the tops of the floor joists wherever the sub floor board will be sitting. Make sure to get plenty around the edge of the house and on top of the rim board also. The liquid nails are meant to be in a solid stream especially around the edges of the boards. This way it will seal out any way for bugs, air, and moisture to seep in.
3. Set the plywood or OSB board down in it’s position. Make sure all edges are flush and even.
4. Next measure where each floor joist should be positioned by placing the measuring tape all the way along the edge of the board you just placed, and using the pencil/marker to mark exactly where the floor joists should hit. Our floor joists were supposed to be 16″ on center. So from the center of one joist to the center of the next should be exactly 16″. They will likely not be very far off from that, but if you don’t adjust each one, then 1/8″ can quickly turn into 1/2″ and maybe even worse. You need your floor joists to stay as straight and perfect as possible to keep your floor as strong and accurate as it needs to be.
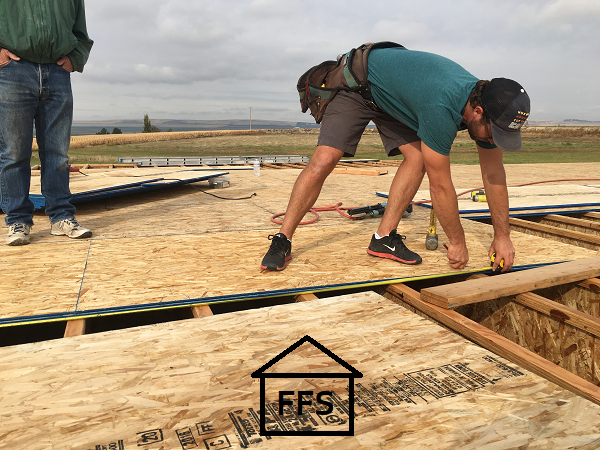
If a floor joist needs to be moved a little just tap lightly with a hammer into place. If it’s not moving, DO NOT slam the life out of it with the hammer. Grab another board to place in between the hammer and the floor joist before hitting harder. Those joists are not very strong by themselves, this is a strength in numbers situation. They are very easy to blast through with a hammer if you aren’t careful.
Finally, be sure that the edge of your board lands right in the middle of a floor joist so that the next board will have an edge to sit on as well. If the boards do not meet up on top of a floor joist then they won’t have any support under them and you will literally be falling through your floor when you are finished.
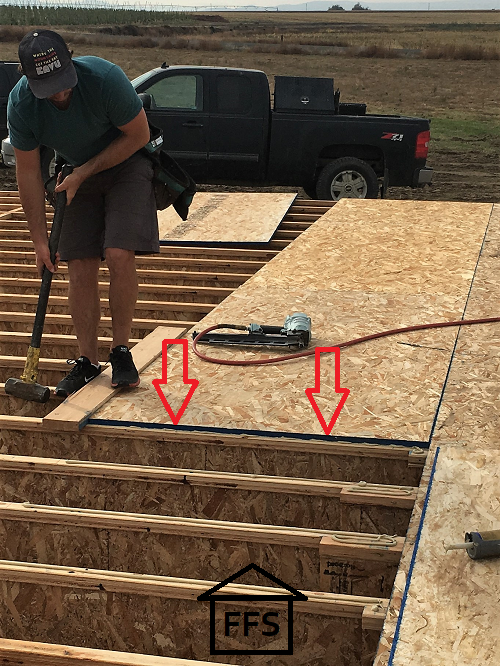
5. Once you have all the joists lined up, then you may begin securing your board with your choice of nails or screws.
Nails vs Screws
We debated the nails vs screws argument for a few minutes. Here is what our collective heads came up with …
- Nails are way faster
- Our foreman preferred nails and has used them for years
- Nails have the potential to wiggle out over time which leads to squeaky floors
- If you use liquid nails in addition to regular ones, the potential for squeaky floors goes down
- We already had nails on hand
Now, your situation will not be exactly like ours, but I decided that since we already had the nails, they are so much faster than screws, and the guy in charge uses them for all of his projects, the nails were the winner for this particular situation. And because we were using liquid nails underneath the subfloor, I honestly wasn’t very worried about our floors becoming squeaky. Ask me in 20 years and I will let you know how they are holding up.
Check your blue prints to see if there is a specification for how far apart your nails or screws need to be.
6. Continue on like this across your floor, always checking and double checking the floor joist measurements and that everything stays flush and even with each other.
With each new row you should stagger the boards so the seams don’t line up with each other.
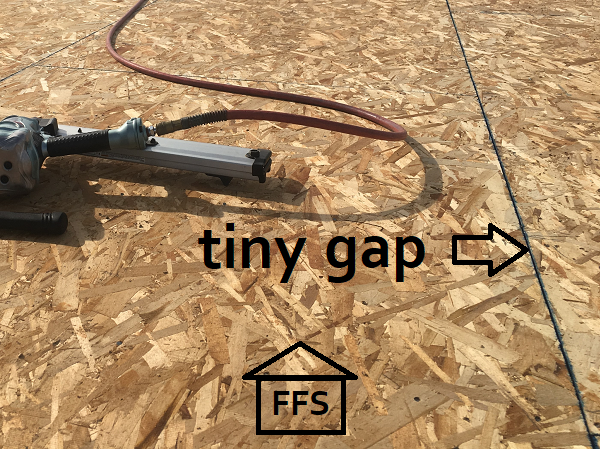
When using tongue and groove boards, you need to be sure that the “tongue” gets pushed into the groove properly. You may need to use a sledgehammer with a board in between to get the extra difficult ones to slide in. Leave a penny sized gap in between each seam to allow for expansion. Otherwise you may end up with ridges on your sub floor where the boards have pushed into each other.
We found it worked nicely to have one person in charge of the liquid nails and the other in charge of laying the boards. Of course if you have extra helpers it will go even faster. The liquid nails happened to be a great job for Little Man (7) and grandpa. That left the big guys for the heavy lifting and nailing. It went pretty quickly except that we had rain that week, so each morning we had to wait for everything to dry out before we could start.
Final Thoughts
I have to say that finishing the floor was one of my favorite days because it felt like such a huge change. Things were changing every day for the weeks before, but we were always working on the “underneath” part of our house. Now we finally had something to stand on. Ahhh great moment!
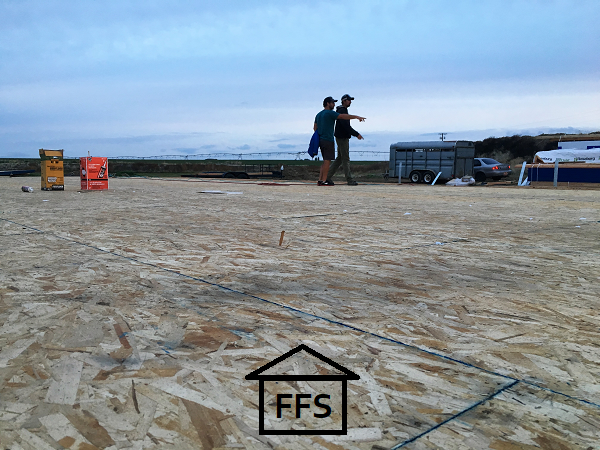
If this is the first time you have ever been around a house being built, you will notice that at this point your house feels really small. Don’t freak out. The walls change everything. My mom even made Josh draw the exact size of a king size bed in one of the bedroom corners because it felt like it wasn’t going to fit. Of course it did, and we all breathed a sign of relief. It’s just the way it looks right now, but I promise your house is big enough. Give it another couple of weeks and you will feel much better.
This step was not a difficult one. Laying the sub floor on our house didn’t require any crazy math or weird angles, so it was very straight forward. As with everything else though, I was so glad to have a professional there as our foreman. Yes, we could have done it ourselves, but it would have taken longer. We were still able to help out a bunch. Little Man got to run the liquid nails gun for awhile, Farmer hopped in and out to help lay floor boards, and the rest of us got to run around cleaning up, getting more supplies, and bringing lunch out each day.
We saved a little money on this step by helping Josh out, and all in all it took about a day and a half to put up the rim board, and four days to lay all 4,000 square feet of sub floor.
If you need to return to Step 21: Floor Joists click here.
or CLICK HERE to move on to Step 23: Concrete slab
~Farmer’s Wife
P.S. You are going to need this information later. If you haven’t saved it already, take a moment to Pin one of the article pictures below… or both of them, yep that would be good.
FREE checklists and schedules
Access to the resources I created that helped Farmer and I save over $75,000 building our own custom dream home.
That’s so funny that you mention the debate between screws and nails. It goes on and on.
I prefer to use screws 100% of the time. I’ve been in enough houses that have squeaky floors to know how annoying it is to hear that every day. I also use PL 400, which is comparable to Liquid Nails. It’s just much easier to find here in Canada than Liquid Nails.
If you do use nails on the subfloor, I hope your contractor used spiral shank nails. They will resist being pulled up/out more than smooth shank nails.
It really is funny how heated the debates get with different people about screws vs nails haha. Thanks for your comment Thomas, it made me smile.
Yes we used the shank nails. So I will cross my fingers that they do the trick and we don’t have squeaky floors in a few years!