Oh man! (that’s an excited “oh man” FYI) You are about to have something to stand on! Installing the floor joists and the sheeting for the floor was one of those things that just made me giddy! The really big ones were ground breaking day, putting on the floor, sheeting the exterior walls, and putting up drywall …. those were all HUGE changes that made my house feel like it was really coming together.
I am so excited for you, honestly I am. In fact, you all should send me some pictures of your houses so I can see the progress! I love this process because of how big the project is. I mean seriously what have you ever created that was bigger than a house? If you have an answer to that, I would LOVE to hear about it.
In my area, we were required to have our “floor package” drawn up by an engineer. We didn’t have to have that done for our blue prints, just for our floor package and our truss package which comes later. In fact, the engineered floor package had to be turned in with our blue prints before they would give us building permits. It tells you in your packet from the building department which things need to be drawn up by an engineer so double check that.
All I did was find a few companies that provided that service and then emailed them a pdf of my blueprints. It took a few weeks for them to get it back to me, but then I had it all drawn out on paper and I had an estimate of the materials I would need with a price.
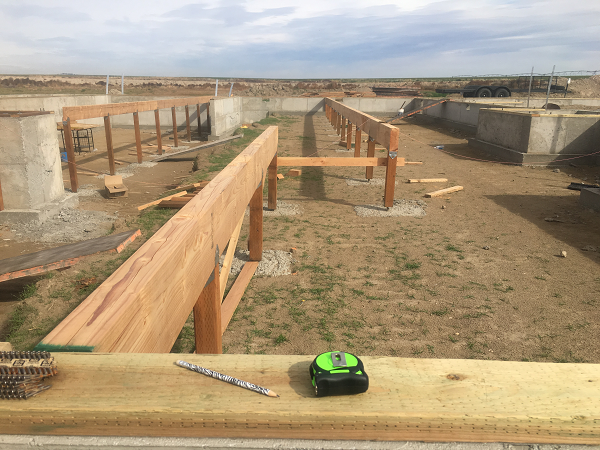
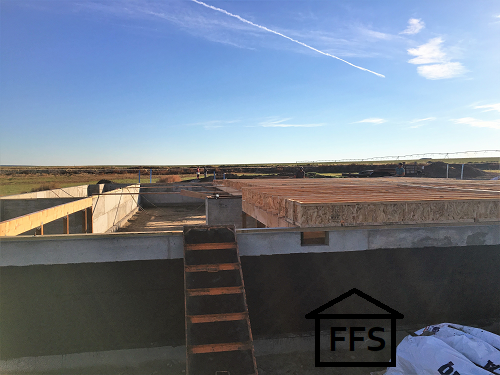
Let me remind you real quick that our home was built with a crawl space underneath. We do not have a concrete slab under our home. We have a concrete foundation wall all the way around, with support beams going across the middle.
If you are building on top of a slab of concrete, none of these instructions will apply to you unless you are installing floor joists for a second level. If your home is going to have a crawl space then keep on reading! You are in the right place.
Okay so first, let me tell you all the cool things I learned about “floor packages”.
When you have your floor package drawn up, you will receive a computer drawing of your floor plan with the I joists sizes, how far apart they should be, where the breaks should be, and any double joists or special things you will need in order to support the floor of your new home.
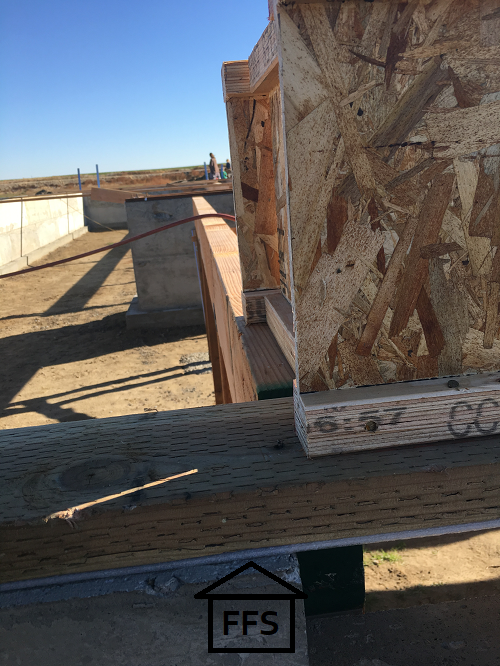
No idea what an I joist is? That’s okay, neither did I. It’s another one of those cool construction words that makes TOTAL sense when you see what they are talking about.
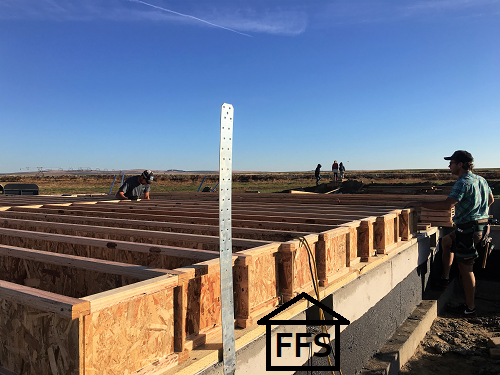
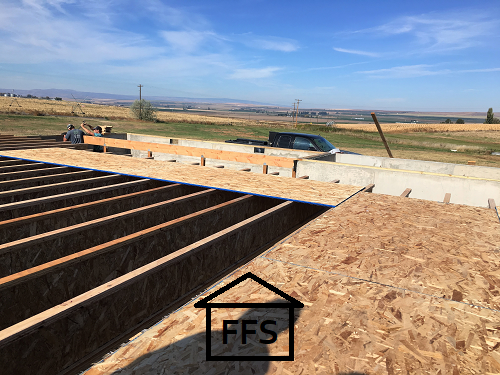
I joists are just the boards that go underneath your floor. They stand on end because they are much stronger that way. And guess what they look like ….. Yep, an uppercase “I”.
When you have just one I joist, it actually feels really flimsy and wobbly. I was nervous when I walked on one for the first time because it was all over the place. But then Josh explained to me that the strength comes when you tie them all together with blocking and with the floor boards on top. He was right.
Another thing I learned was that there are different sizes of I joists. The standard size around here is 9 1/2 inches from the top to the bottom. However, there are new energy requirements going into play every year.
Right before we turned in for our building permits (2016) they had just introduced huge changes in every area of energy efficiency. The new requirements are changing the way things are being built. Please check the energy requirements in your area because for us, it forced a lot of changes we wouldn’t have made. Everywhere from thickness of insulation, to R value in the windows, to the type of water heater.
In this instance, the added thickness of necessary insulation would not have fit well into the cavity of a 9 1/2″ I joist. It was strongly recommended to us by a few professionals that we up our I joist size to 11 7/8″ so we could fit the extra insulation.
The new energy code required that we go from R-30 to an R-38 insulation which added several inches. The R value for insulation is just how strong of an insulator it is. Generally, the higher the number the thicker the insulation is.
The insulation will be shoved up in between the I joists after the floor is put on. If it hangs down below the I joist, then you have to find some way to hold it up so it doesn’t fall out. Because of this, we chose to use 11 7/8″ I joists for our floor package.
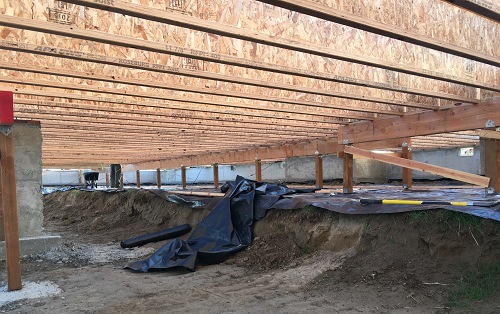
Another thing that matters is whether or not your I joists are hanging from your foundation, or sitting on top of it. This may have already been decided in your blueprints, but it’s still something you need to know about because it determines where your homes floor will be.
If the I joists are hanging from your foundation, then the floor will be level with it. You will attach hangers to the green plate that is sitting on top of the foundation, and then the I joists will sit just inside the foundation walls on the hangers.
If your I joists sit on top of your foundation, then the floor of your home will be that much taller than the foundation. In our case, that was 11 7/8″ above the foundation wall. This effects how many stairs you will need up to your house, how high off the ground you will be sitting, how much sheeting you will need on the outside of your house, etc.
 It also effects how large your crawl space is. If your joists are hanging, then you have cut into your crawl space that far. You don’t want to be squeezing into a 12″ crawl space, no way! I don’t even think that passes code anyway.
These are just things I want to make you aware of because I had no idea. Sometimes you don’t even know what questions to ask because you don’t understand what the job actually is. Welcome to my life the past two years! I can relate, trust me.
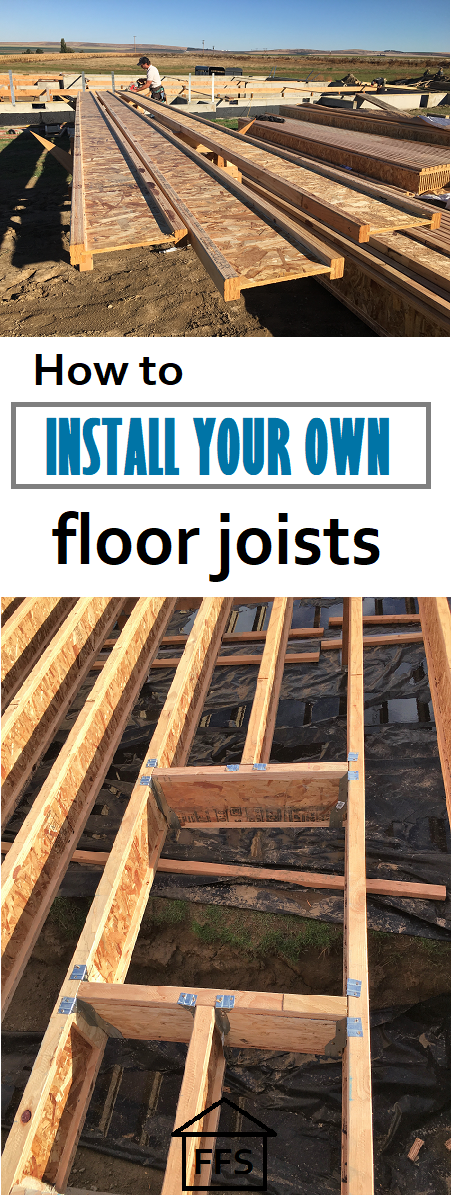
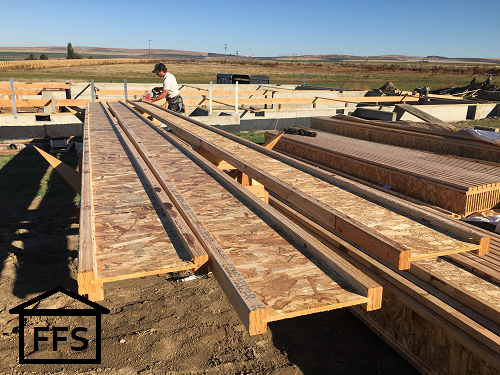
How about a little terminology lesson? They call this part “rolling” the floor. The reasoning behind this one is that the best way to install your floor joists is to measure and cut them first, and then lay them all out where they go. Then after you have them layed out, you just go down the line one by one and roll them up into standing position and nail them into place. You have to roll them because of their shape. They are tall and skinny so you can’t set them down the right way and expect them to stand up.
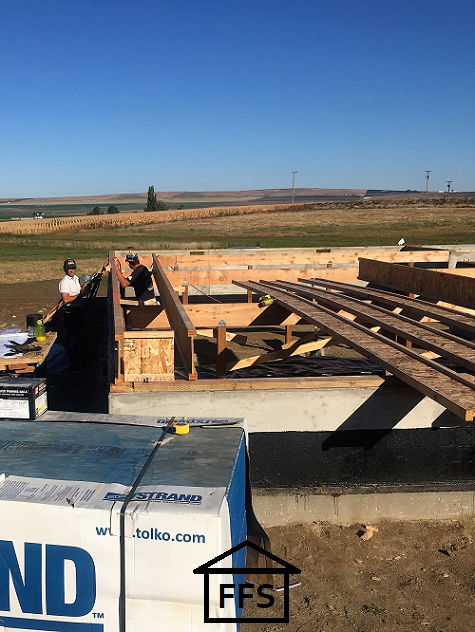
Next vocabulary word is “blocking”. This is what they call the short pieces they put in perpendicular to your standing I joists. It hooks the joists together and provides much needed support and strength in between them. Your floor package design will show you where these pieces go too.
Alright enough with the vocabulary. Now you know how to get your floor package, you also know everything I know about I joists, and you have had a mini vocab lesson. You are even more prepared than I was to move forward with your floor and mine turned out alright.
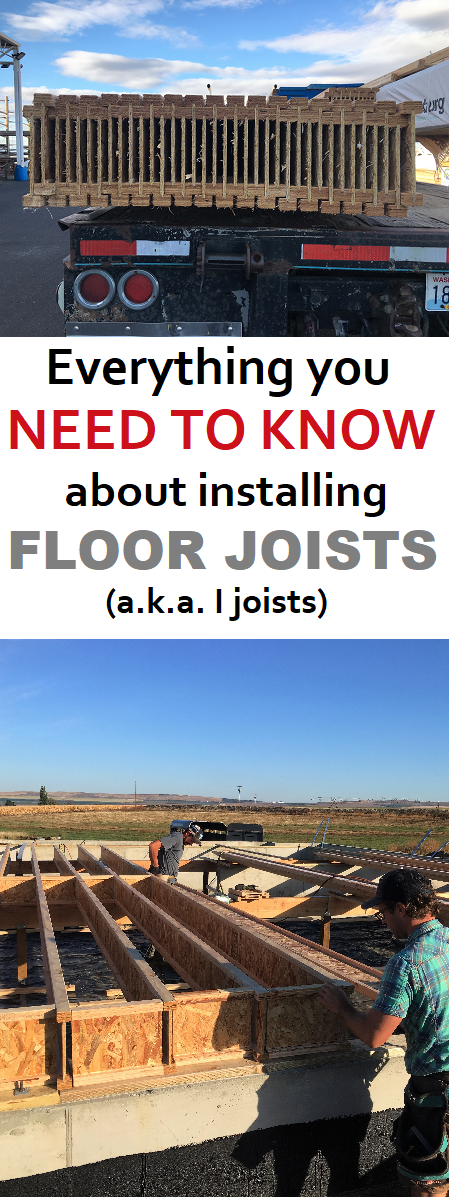
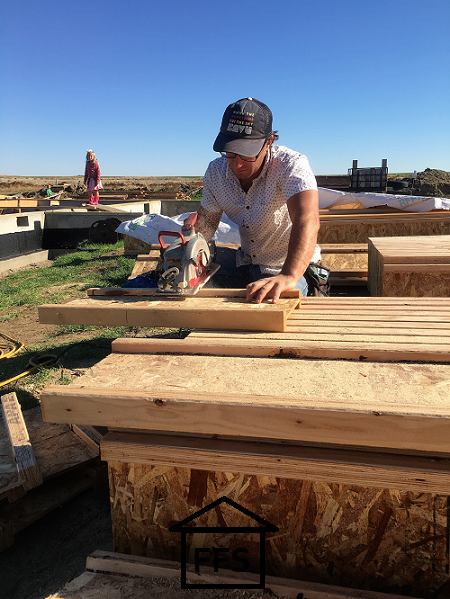
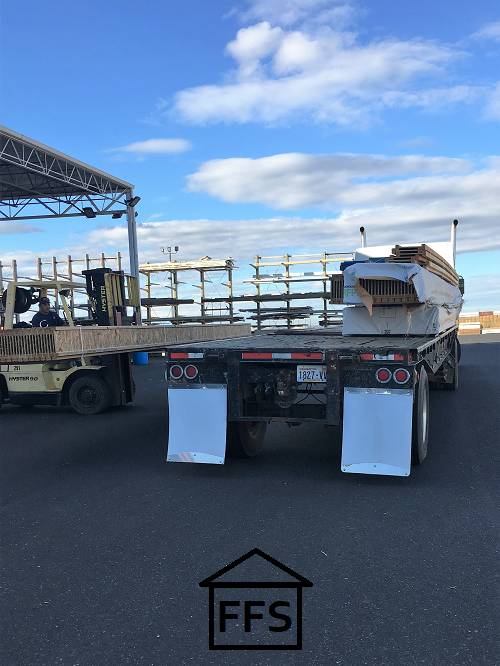
First thing you will need to do is order your I joists. These things are big because they have to span as much of your house as possible. You will most likely need them delivered. Our longest ones were 24 feet long.
Ours were all set up to be delivered, and that morning we got a call informing us that their delivery guy hadn’t shown up to work that day and it would set them back 3 days. (I am not sure how that math works- 1 day gone = 3 days pushed back ….grumble grumble …. oh well) Normally that wouldn’t be a huge deal because we were really trying not to rush things. However, Josh (the guy in charge with all the know how) was heading back home for a family thing in three days. If we didn’t get those I joists installed before he left, it would have set us back more than a week. That’s no bueno when you are racing the weather.
This would be one of many instances when I am forever grateful that I live on a farm. They couldn’t bring the lumber to us, so we hooked up Farmer’s flat bed trailers to the semi truck and headed to town to pick it up ourselves. Strike 1 for our lumber supplier.

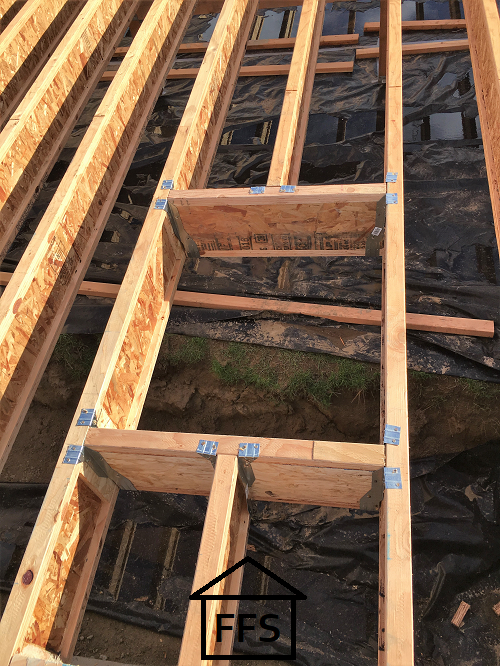
Once we had all the I joists, the guys got right to work measuring and cutting all of them. The floor package design was pretty easy to follow. They also went through and marked where each one would sit ahead of time. 16″ centers means that the center of one I joist to the center of the next one is 16″. That distance is pretty common, though some houses are on 24″ centers.
By marking them first, you save a ton of time when you start rolling.
They measured, cut, and laid down all of the I joists on the first row. Our house was kind of divided into three strips of I joists sitting on top of 2 support beams. The south side, the middle, and then the north was just a short strip because it’s only 1 bedroom and bathroom that jut out.
Once they had the first row all laid out, they started “rolling” them. It goes really fast! Just one guy on each end. Roll the truss up on end, match it up to it’s mark, then use a nail gun to secure it diagonally from both sides several times. There is actually a specific number of nails you are supposed to use in your I joists. If you use too many it can split the wood and weaken it. Too few and you won’t have it secured well enough. If it doesn’t tell you on your floor package or blueprints, check with your local building department about their requirements and also the size of your I joists. This is something they will be looking for on your next inspection.
Make sure your I joists are “breaking” directly on top of your support beam. If you have a break in an I joist (where one starts and the next one begins) in mid air, there is nothing holding it up. It can’t support your floor and therefore is not built correctly.
 Now I don’t want to imply that this kind of thing happens a lot, but as the general contractor you need to be the one making sure things like this don’t happen. (You would be surprised what some people do when no one is looking) Whether you are doing the work yourself, or you have hired a framer to do it, you are still the “checker” and the one in charge. You need to do enough research that you know whether a job is being done correctly or not.
Follow the floor package plan exactly when installing your I joists. There is a reason they require it to be drawn up by an engineer. It’s very important that your house be built on a solid foundation with a sturdy floor that can support the weight of the structure.
Don’t forget that you need a crawl space access somewhere. That may be drawn into your blueprints also, but if it’s not don’t let it get forgotten! We actually changed the location of our crawl space access at the last minute because the depth of our crawl space is different on half of our house. Just call the building department to clear it first and then you are good to go.
When you put in a crawl space access you will need to cut out a chunk of one of the I joists the size of your access. Then use hangers to install 2 small I joist pieces perpendicular to the one you just cut out. You can then secure the cut off I joists to the perpendicular pieces with more hangers.
Make sure the hangers that you purchase are for the right size I joists. If you are unsure what to get, just talk to the guys at the building supply store. Tell them the size of your I joists and what you are trying to do and they will be able to help you find what you need. If they can’t, try a different building supply store that employs people who know what they are talking about.
Any time after you have some of your I joists put up, you can throw a couple sheets of plywood on top to make them easier to walk on. Like I said earlier, they are super wobbly. It makes a big difference to throw a large sheet on top to sure things up. Plus it’s super fun to stand on your new floor and imagine where all the rooms will be in a few months.
I am putting together the complete cost breakdown for all the framing on our house. It will be much easier to see it all in one place then for me to break it up into each post. If you haven’t already signed up for the FREE checklists, schedules, and printables page full of the resources Farmer and I have used to save over $75,000 on our house so far, CLICK HERE to sign up. It’s free forever, and I am filling it with invaluable things that you can print off and use to save money and time when you build your own dream home. So much money is saved from planning ahead and making good decisions, it’s not only about finding great deals and doing work yourself. Take advantage of this completely free resource and save yourself thousands seriously.
Time breakdown:
It took us three days to roll all of the trusses. A good part of the first day was spent measure, cutting, and marking. Once we started “rolling” it went so fast. For the most part, we only had 2 guys working on it. I was very little help during this part, but Farmer was right there with Josh the majority of the time.
I know I say this a lot, but I am so grateful we found Josh to work on our house with us. He knew what he was doing, and he was incredible easy to work with. He explained everything to me, worked completely around our schedule, and did whatever Farmer and I asked him to do. We brought two other guys on a little after Josh because we were really worried about the winter weather approaching. Matt and Mikey were awesome too, and it made it so easy on me to have three knowledgeable guys to answer my million questions. They gave me their opinions, they helped me solve problems, and they told me what the best options were. They even drove tractor for us through the night when we needed to get the hay up. Above and beyond I tell ya!
If you are looking for someone to hire by the hour, maybe because you want the house to go a little faster, or maybe because you know absolutely nothing like me and you want someone there to hold your hand through the hard parts, send me an email and I will get you their contact info. They traveled three states to work for me, and it still came out cheaper than hiring a local crew.
So would I do it the same if I had it to do over again?
Many of the jobs so far I have told you guys that I would do myself if we did it over again. Mostly that’s because once I saw how it was done, I knew I could do it myself. Framing however, is different. We are just barely getting into the framing portion of the house on this blog (Step 18 the green plate was the first one) and it is a HUGE undertaking. Framing itself is not a super difficult thing to do. However, there are so many different little factors that go into each house. “Framing” is not ONE thing, it’s a million small things lumped into one trade.
Our 4,000 square foot home took three months to frame. We had Josh and Matt working on it full time, and Mikey was full time but only for the last month of it. We also had Farmer part time, and then there is myself who counts as about 1/4 of a person because I have no construction knowledge and usually have 4 kids tagging along behind.
If I had it to do over again, I still WOULD NOT do it ourselves. I honestly think it would have taken Farmer and I like a year to accomplish what we did in three months with our makeshift “crew”. Not to mention we would have destroyed our relationship, neglected the kids way too much, and had to redo plenty of things because we didn’t really know what we were doing.
I LOVE that we got to be a part of the framing process. I understand everything they did in my house, and I did get to help with as much as I could. Farmer got to help, but he wasn’t obligated to put in the time when he had farm work to attend to. Our relationship didn’t suffer, it grew. We got to enjoy things instead of stress over them. And all the while, stuff was getting done on the house every single day whether or not we showed up to help work on it.
I would do it the exact same way if I had it to do over again.
No matter what you choose to do on your house, there is one big suggestion I have for you right now. Be there. Be there as much as possible. You don’t have to be an expert, but if you aren’t present, you have no control whatsoever over how your house is being built. If you build the whole thing yourself, great! If you hire someone to build it, that’s great too! Just be there so the house that you want is the house that is being built.
Now that I blabbed on and on about all this other stuff, let’s wrap things up shall we?
Do you need to head back to the beginning of the framing steps? CLICK HERE to visit Step 18: Green Plate
New to this website and want to know where to start? CLICK HERE
Then be sure to sign up for the FREE checklists, schedules, and printables page HERE so you have all my great money and time saving lists for your house.
Ready to move on to Step 22: Rim board and sub floor? CLICK HERE
Let me know how your build is going!
~Farmer’s Wife
FREE checklists and schedules
Access to the resources I created that helped Farmer and I save over $75,000 building our own custom dream home.
Leave a Reply