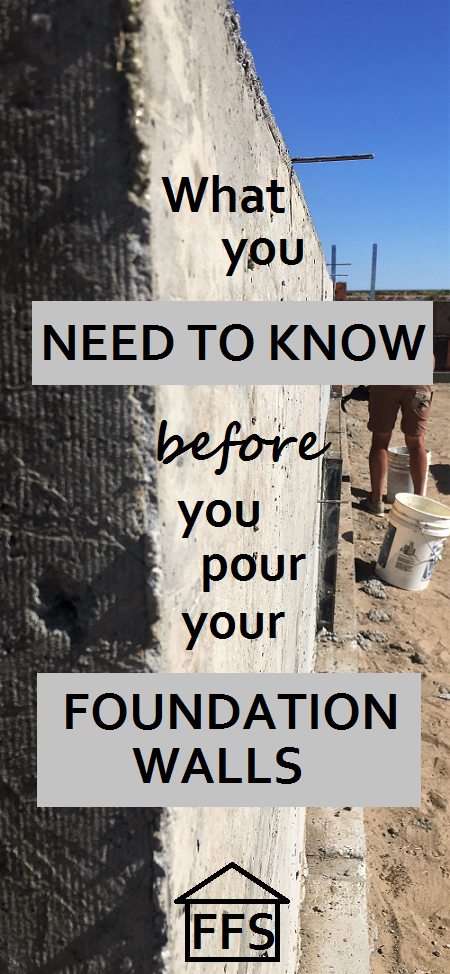
Ahhh now we get to do it all over again.
I hope you enjoyed pouring your concrete footings, because now we get to prep and pour the stem walls on top of the footings. Don’t worry though, you are a pro by now and this should go quickly and smoothly.
After you pour your footings, the cement only needs to cure for 1 day. You will notice how quickly it hardens up even while you are working with it. The exception to this would be if it’s really cold or it rains or snows soon after. The water will just slow the curing process down and you need to wait until it is completely dry.
To pull off the forms, all you need is a little elbow grease. Okay, make that A LOT of elbow grease.
Use a pry bar, hammer, wedge, whatever you have to get the forms off. Just be careful not to pry on the cement so hard that chunks break off. Our forms were supported with wood pieces across the top, so we had to go around and back out all of the screws before ripping anything off.
The hardest parts to remove were the forms on the inside of a corner. You know, where the corner turns towards itself instead of away. For example, the forms on the inside of our fireplace rectangle were dang near impossible to yank free because the harder you pulled, the more wedged into each other they became. It’s a good thing we used wood for that one instead of manufactured forms because we just had to break the form apart to remove it. Here is what they looked like before:
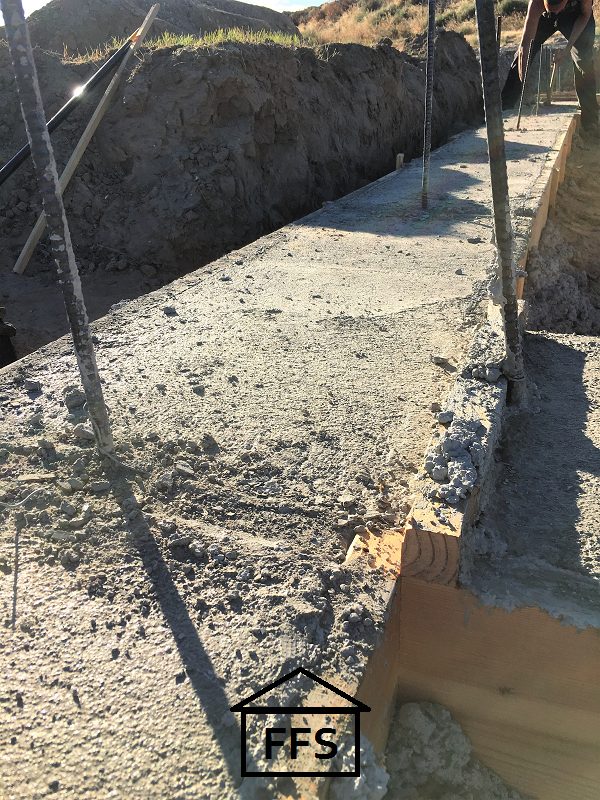
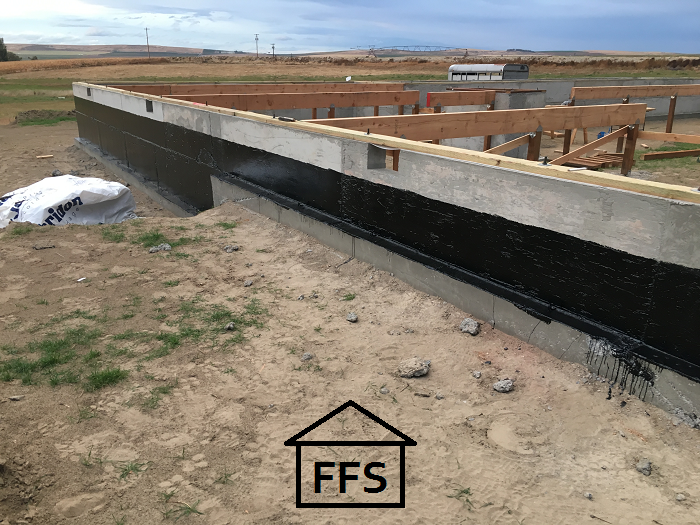
After you get all the forms off, take a quick sweep over the top of the footings to clear the debris. There will probably be plenty of small pieces of cement all over. You need to sweep it off so you can pour more cement on top. You can see here how much junk there was to brush off.
The skinnier wall of cement you are going to pour on top of your footings is called the stem wall. Most crawl space stem walls are around 2 feet tall. By law, it has to be large enough for a human being to get down there to put in plumbing, electrical, and HVAC later. Look at your plans to see how tall your stem wall is supposed to be. This will tell you how tall your forms need to be built.
This is what it looks like on our blueprints.
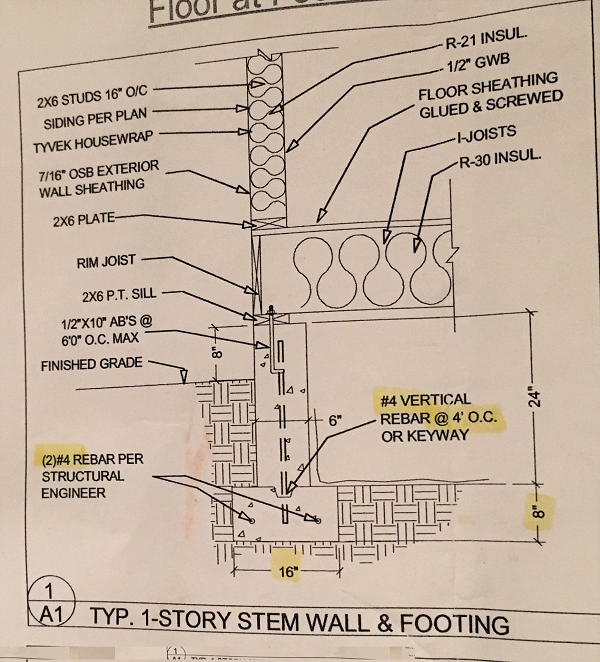
Can you see it sitting there on top of the footing? It has a stick of rebar through it, and a bolt that looks like an L coming out the top.
Our stem wall is supposed to be 24 inches tall as you can see on the right side of the picture.
However, a few weeks back, when our excavator showed up, he made a suggestion to change our stem wall because of the slope of the land. If we left our stem wall at 24″, then we would have either needed to dig way down to make it all level, or we would have had to build up the dirt to make it all level. We didn’t want to dig down and lose any more of our view than we had to. We also knew that bringing in dirt to put under your house is a bad idea unless you have no other option. You do not want that dirt settling or moving and causing your foundation to crack or crumble. It’s always better to build directly on to native soil.
So, we called the inspector to clear it first, and then gave the excavator the go ahead. We now needed to pour 4 foot stem walls on one half of the house, and 2 foot stem walls on the other. Here is what it looks like after we got the foundation done so you can understand what I mean… 2 feet of concrete on the top half and 4 feet on the bottom.
Follow what your plans say. If you are concerned about it, have any questions, or need something changed, then call the building department and ask an excavator or foundation contractor. If you catch the right one, they will be more than happy to answer a few quick questions for you.
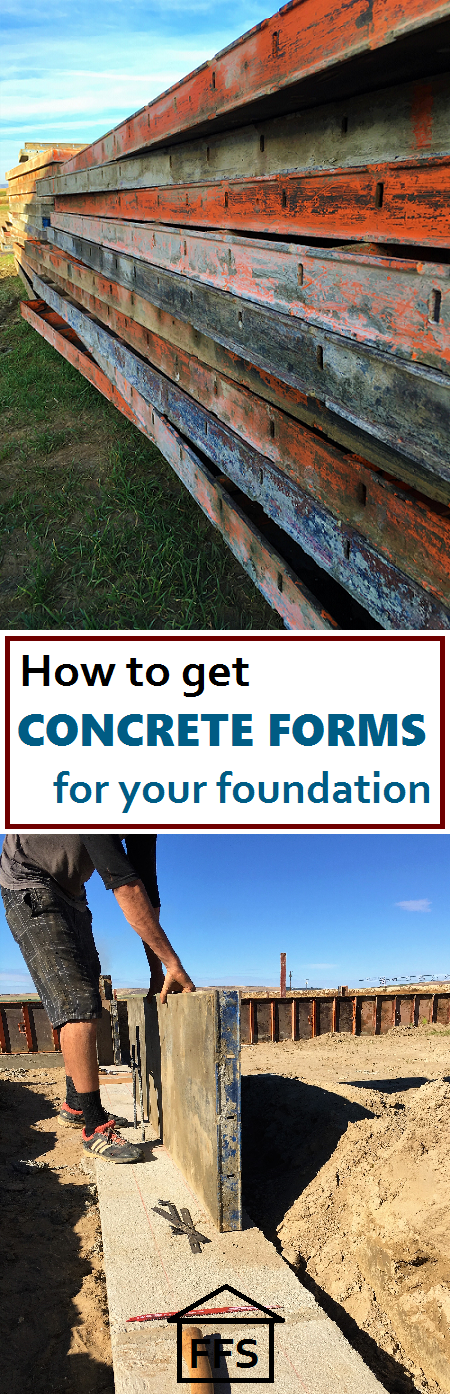
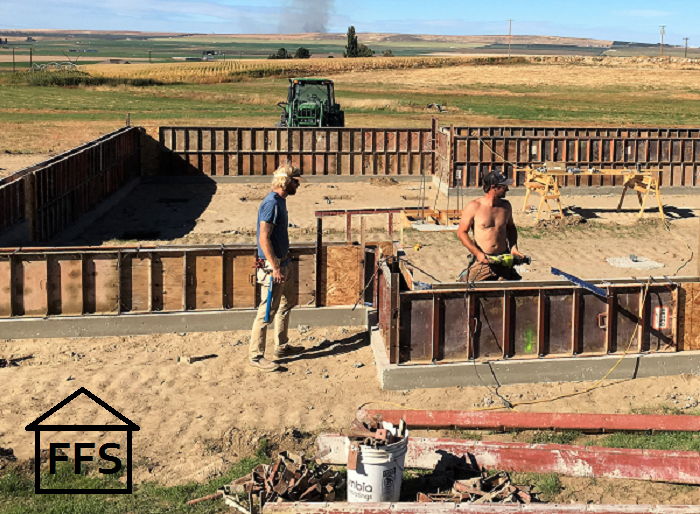
So we determined that for our stem wall we would use manufactured concrete forms instead of lumber. The stem walls were much taller than our footings, so the lumber would have been way more expensive and also not reusable like the 2×8’s we used for the footing forms. It also would have been an even bigger job to build them all from scratch.
Farmer knew a guy who he thought might have some forms we could rent. So, I called him up and he agreed to rent them to us for half of what I was quoted from the form rental store.
It came out to $500 to rent all the forms for just over a week.
We did have to go get them, which was quite a chore. These things are super heavy guys! I could barely lift the big ones by myself. I can’t complain though because the guys did all the work. I helped some, but mostly I just kept the kiddos corralled and out of the way of the big heavy stuff.
Here is a picture of what one of the forms looks like:
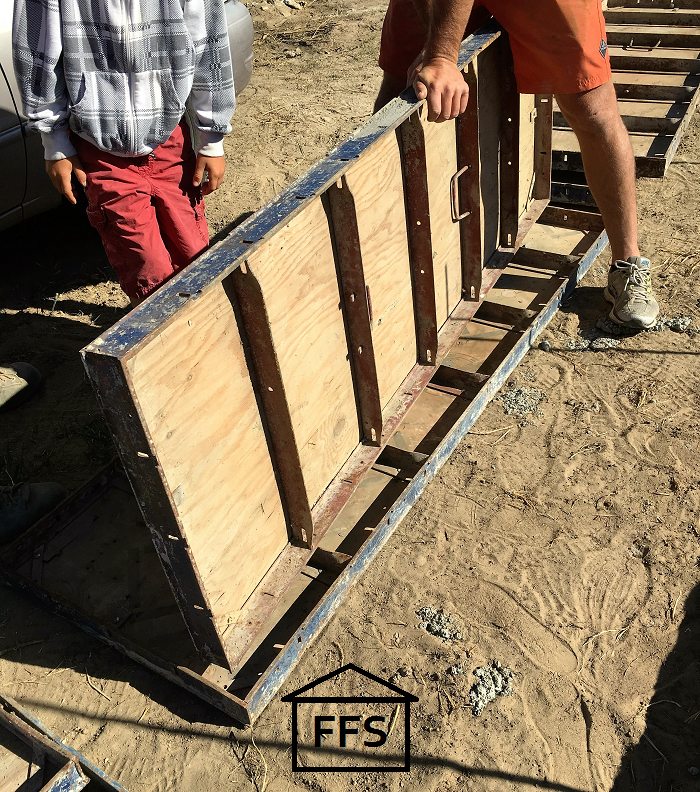
These particular ones are made out of a piece of wood on a metal frame. The metal supports have to be very close together because of how heavy the cement gets. That’s why these things are so dang heavy.
Before you call to rent your forms, you need to know how many you will be renting. You should have already figured out how many linear feet of footings you have when you ordered your rebar and your concrete the first time. If you don’t have that number still, just look at your blueprints, and add up how many feet of wall you will be pouring. You can CLICK HERE for a little refresher on that math if you are still confused.
Also take into consideration how tall your stem walls will be. You don’t want forms that are taller than you are pouring your walls, because it will be almost impossible to get the top of the wall flat. You need the top of your stem wall flat because it is what the floor in your new home will sit on, or hang from.
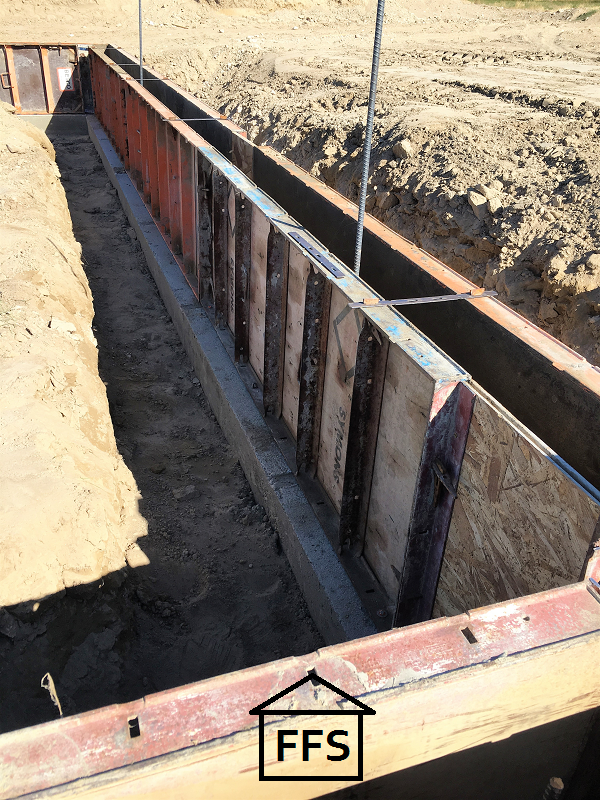
You can stack forms on top of each other for taller stem walls if you need to. Be warned though, that stacking forms can make it more flimsy. The chances of your wall breaking out while filling them with wet cement goes up.
We used 1 form for our shorter walls, and 2 forms on top of each other for our taller walls.
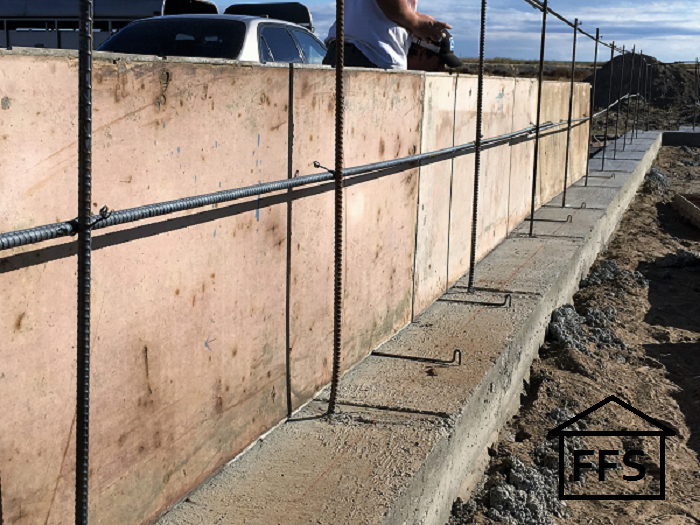
 The rebar you see sticking up out of the top are our electrical grounding rods. Call your electrician before you pour to make sure you put those in the right place.
Along with your concrete forms, you will need connecters or “ties”. For your forms to hold together, you have to purchase metal connecters that hook on to the tops and bottoms so the forms stay the right width apart from each other. This way your walls won’t end up 6 inches in some places and 10 inches in others. These connecters go every foot or so apart, and some of them will stay inside the concrete after it’s poured. You have to purchase these as they are not reusable. We needed 2 different types of ties, one for the top and one for the bottom.

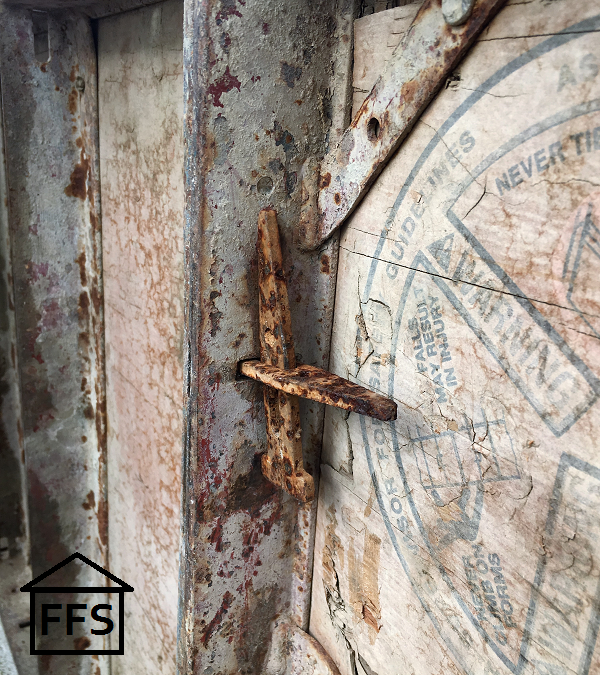
You also need “pins” that will wedge into the connecter ties on the outside of the forms. These will help hold the connecters in place and keep the forms from moving. The also hook into the spot where two forms touch to hold them together. The pins we used ARE reusable as long as you can get them out without breaking them. The weight of the concrete sometimes makes it impossible to get them out without bending or damaging them.
The last thing you will need to get with your concrete forms are called “boots”. These connect to the outside of the forms and allow you to reinforce the walls with lumber. You have to reinforce the walls with 2×4’s to support the weight of the concrete. If you don’t, the forms will break out as your are pouring, and you will have an expensive muddy mess on your hands.

When you call the company to rent your forms, you need to know how many linear feet of forms you will need. Ask them to help you figure out how many ties, wedge pins, and boots you will need. The type of form you rent will likely have a certain number of ties, pins, and boots suggested for each one. Just tell them all about your house, how tall your stem walls are and all that, and they will gladly help you figure some of the numbers out. If they don’t, then I want you to hang up the phone and call a different company.
Manufactured forms come in all different kinds and sizes. You NEED to talk to owner or renter of the forms to make sure you have everything you will need for that particular brand.
We literally grabbed buckets and buckets full of wedge pins and boots. You need more than you think.
Get your forms ordered a few weeks before you need them, to make sure you have them on time.
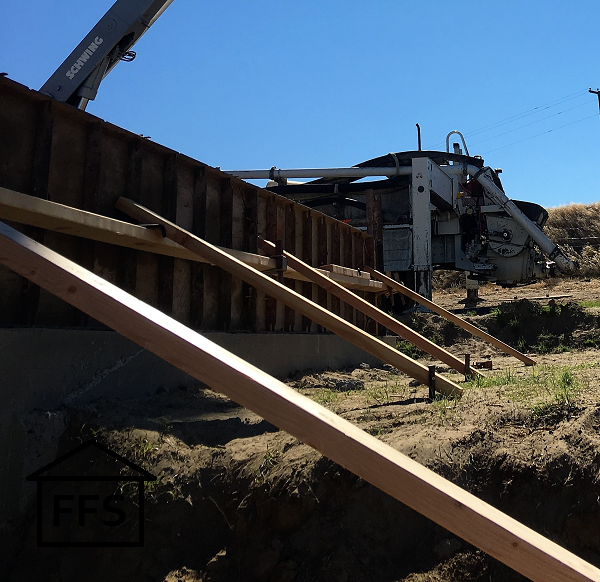
You are also going to need long pieces of 2×4 lumber to support your forms, and metal stakes to drive into the ground. You need enough lumber to go around your house once for each level of concrete forms you are using.
So in the half of the house where we were only pouring 2 foot tall stem walls, we only needed 1 2×4 all the way around. And the half that we were pouring 4 foot tall stem walls (with two forms stacked on top of each other) we needed two 2×4’s all the way around. These will go through your “boots” to secure to the forms.
You also need plenty of long pieces to prop up against the wall and then down into the dirt to support them standing up straight. Pound the stake in at the bottom and attach the 2×4 to the stake with a huge screw. The more of these you have in place the better. I thought we had PLENTY, but we actually had a couple spots bow out a little while we were pouring, and I was super worried we were going to have a blow out on our tall walls.
Again, it’s a good idea to talk to the concrete form rental company in detail, about what amount of extra support you will need. It’s better to be safe than sorry!
Don’t skimp on the 2×4 supports to save money. Most of the lumber will be reusable because it’s just serving as a support. Even if it ends up with some concrete on it, there are places in your house you will be able to use it no problem.
Alright once you have your forms ordered and plenty of lumber on it’s way, it’s time to prep everything else.
First thing is to go back and re-measure and re-draw your lines. Get used to this step. You will be doing it in between just about everything. You want your house to be straight right? You want your floor to be level right? You want your walls to match up right? Then you need to check your measurements EVERY SINGLE TIME.
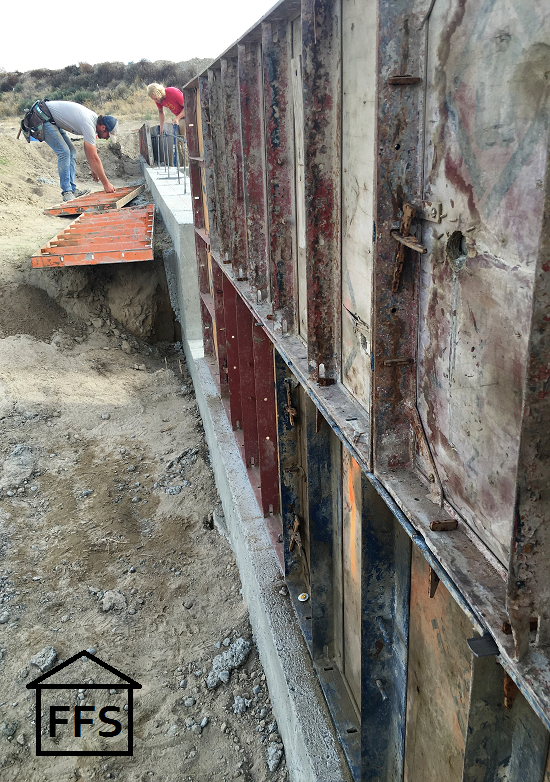
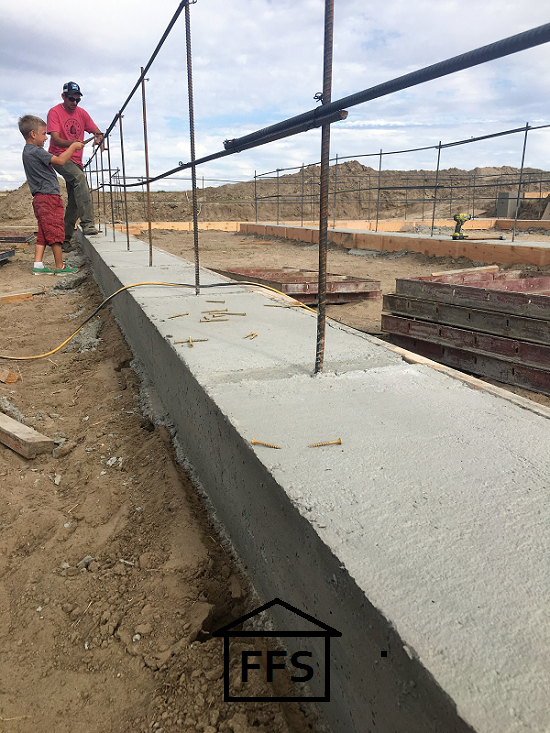
Mark out your corners again. Measure out exactly where each stem wall is supposed to be, and use your handy little string line to snap your guiding line on top of the footings. You do not want to be measuring every time you set a stem wall form. If you mark all the lines before hand, you just get to follow a nice red line all the way around. You can see our nice straight red line here:
Next thing you need to do is set more rebar if needed. Our plan actually didn’t call for anything more than the pieces that were already sticking straight up. However, Josh was a little nervous about the strength especially since we made our stem walls taller in places. So he called the inspector to check with him.
**Side note: You can ALWAYS call the inspector with questions. Their job is to help you make sure you are building a house that is safe, sturdy, and well built. We called our inspector a few times every week to ask questions, or just to double check that we were doing things the way the rule book says we needed to.
Our inspector told us that we didn’t HAVE to add rebar because it wasn’t specified in our blueprints, but that he recommends it. It is after all, the foundation that your house will sit on for years and years and years.
Well, that was an easy decision to make because Farmer and I are building this house to last. We do not want to be redoing things in a few years. The worst possible thing to have problems with would be the foundation anyways. You can’t very well fix your foundation without having some serious house problems.
So we chose to add two horizontal lines of rebar all the way around the stem wall for extra foundational support. The more rebar you add, the more strength your concrete walls will have. I am happy we did this because I will never worry that we built our house on a weak foundation.
Running the rebar is as simple as using rebar ties to hook it onto the existing vertical rebar. Just like in your footings, you want to over lap each piece a bit so that the whole thing is continuous.
Also make sure the rebar is sticking straight up because you need it in the middle of your stem wall. Just push it into place if it’s sticking at a weird angle.
If you need more instructions on setting your rebar, bending your rebar, or anything else rebar, CLICK HERE to read my rebar post.
Once you have string lined everything and set the necessary rebar, you can start putting together your forms.
I will be writing a separate post on how to put together manufactured concrete forms, which you will be able to see HERE once it’s finished. Until then, call the form company and have them walk you through it. It’s not super difficult, but it is very physical. The forms are crazy heavy and you need to get them in the correct place, secure them, and brace them correctly. If they are not put together and braced the right way, you will have a concrete disaster on pour day.
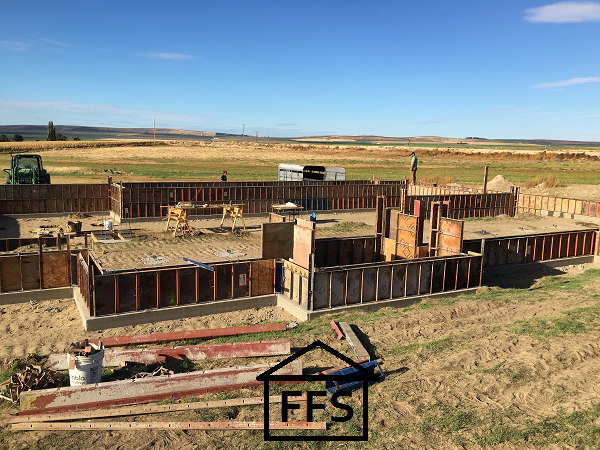
Build the forms all the way around your footings. Support them even more than you think you should with your 2×4 lumber. Cement is very heavy!
Check to make sure the rebar is all in the center of the forms. You can’t have it touching the sides or poking out the top.
Now check to make sure that everywhere you will be pouring cement is ready to go.
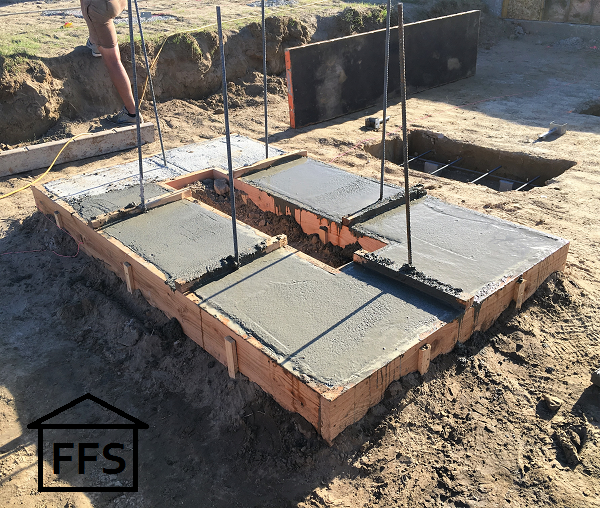
We had spot footings that we left empty on our first pour. We wanted to be able to pour these with the pump truck so we didn’t have to wheelbarrow them in. These were already prepped with adobe bricks and rebar, so all we had to do was clear out some dirt that had been knocked in by the dang gophers. Oh man do I hate gophers! Don’t even get me started on that one!

We also had the fireplace in the middle of the house which needed stem walls. We used some concrete forms combined with lumber to build the forms for them.
Check your plans to make sure you have accounted for everything that needs to be poured for your foundation.
Down the road, we would be pouring slabs for our garage and our front entry, but those didn’t need to be prepped right now. Just double check everything so you don’t forget something that would have only needed a yard or two of cement.
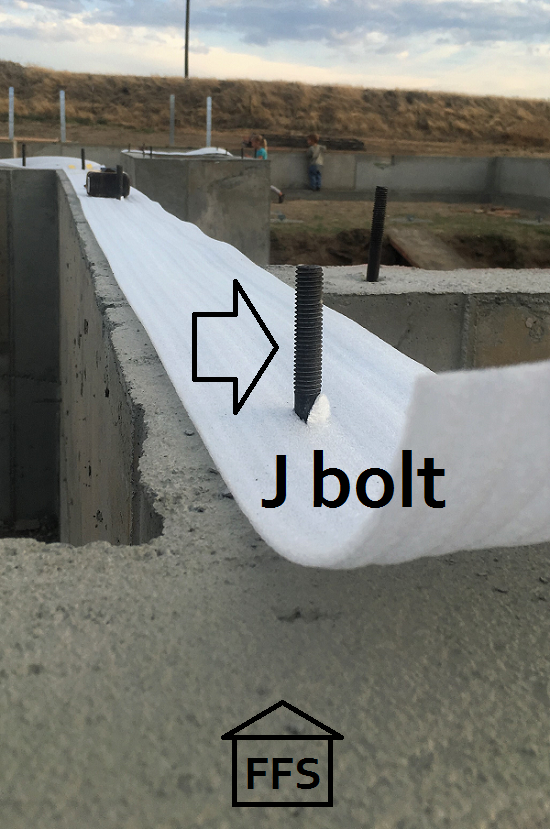
The last thing you need to check is what needs to go in the top of your stem wall. Our plans called for “J bolts” and “Simpson Strong Ties”. It’s okay, I didn’t know what those were either.
J bolts are just bolts that look like a J. Actually they look more like an L if you ask me, but I am not the construction genius so I won’t complain.
A Simpson Strong Tie is a huge metal piece that attaches the stem wall to the house wall once it’s all framed up. They keep your house from being ripped off the foundation in a terrible storm. They also help keep it from tilting or shifting.
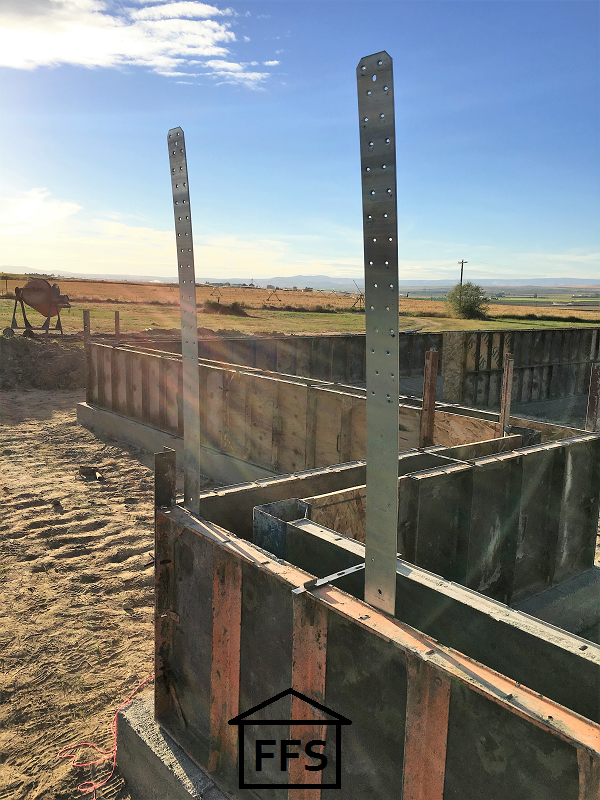
This is my favorite product code so far in my adventures as an owner builder. That sounds funny even saying that “favorite product code”, but seriously it cracks me up every time I see it. The first time I saw that number I honestly thought “I can’t do this! I can’t be my own general contractor!” What if everything I have to buy has a number like that which I have to remember! When I called our material supplier and told him that I needed 10 “sp124# sthd14rj”, he didn’t even hesitate. He knew exactly what they were! Well that freaked me out even more. Who are these people?!
But I can assure you, you can do this! There aren’t very many numbers like that, most things have funny names that make total sense once you see what they are used for.
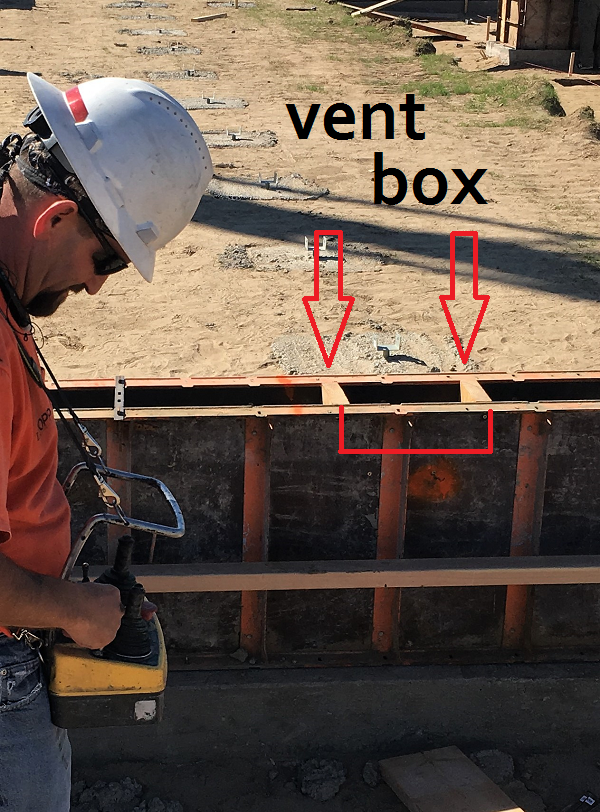
We also needed vents (pretty sure everyone will need vents in their foundation). So we built little 3 sided boxes out of scrap lumber just to set in place where the vents go. That way if a little cement gets dropped in, it won’t be hard just to pop the whole thing out. Check your blueprints for the size of vents you will be needing.
 Here is a picture of what the vents will look like after:
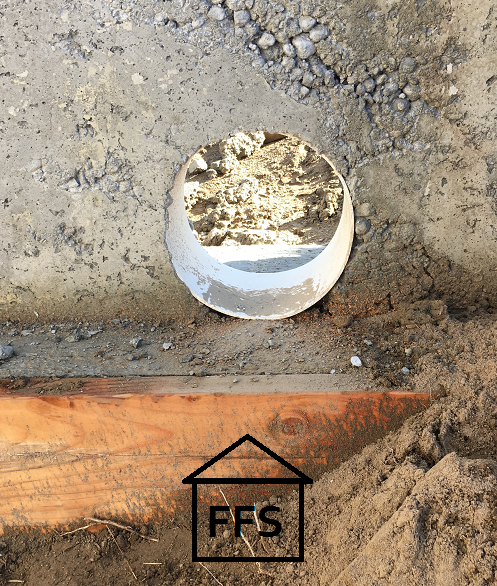
Call an electrician, plumber, and HVAC contractor (all separate companies most likely) to ask what you will need coming out of your foundation walls. It should not be real difficult for them to tell you what you will need with a little bit of information from you. All we needed was a 6 inch PVC pipe opening for the water outlet, and a 2 foot box opening for the HVAC to go in. It’s always easier to double check these things before you pour. Otherwise you end up having to drill or cut holes through the cement later on, which is no fun for anyone trust me!
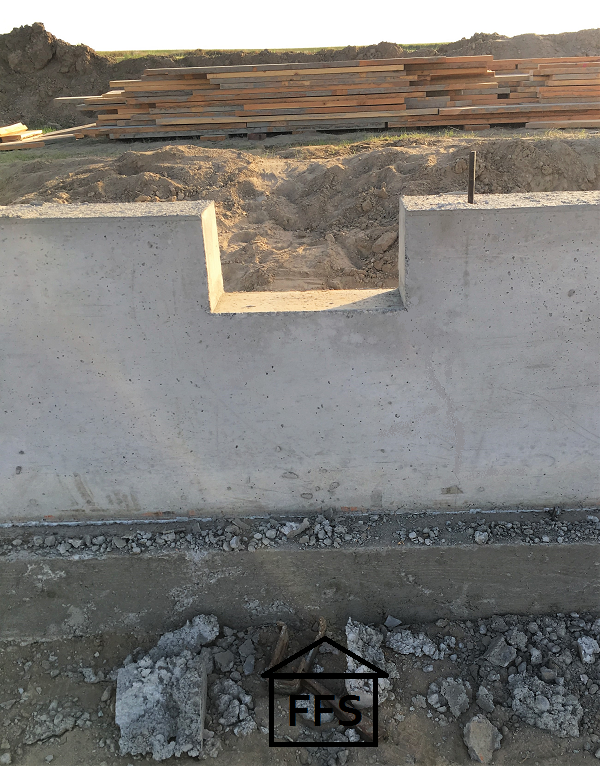
Here is what the plumbing opening looks like. This is what will exit out into our septic.
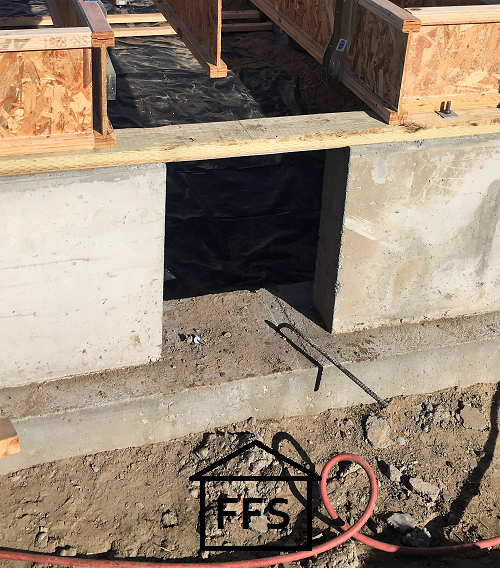
And here is what our HVAC hole looked like. This is where the duct work will enter from our garage into our crawl space.
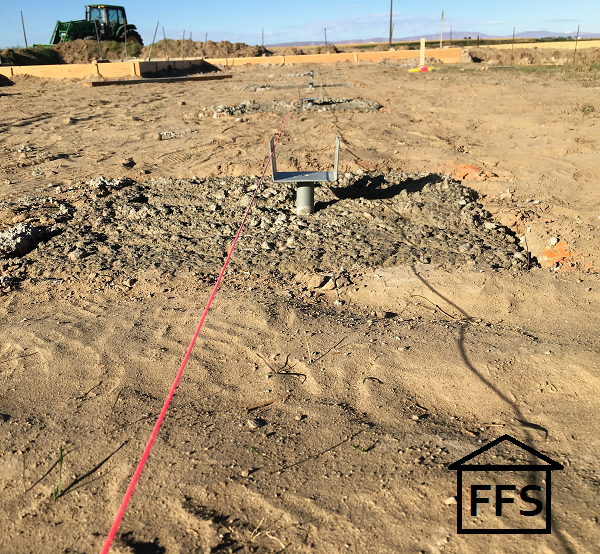
One other thing we needed was post holders for the spot footings. They are just little metal square pieces to sit a post on top of. They have a long skinny bottom that sticks down into the cement. It was nice to have something that was easy to count for once! Same number of post holders as spot footings. I can handle that kind of math!
You will need to run a string line across the top so you can line up all of the post holders exactly. They need to be perfectly in line, and the same height as each other. Hopefully you can see the pink string line in these before and after pictures.

Anyways, back to your stem wall. Thoroughly check your blueprints for anything that needs to go in your cement before or right after pouring. You need to get these things ordered, and have them there in time for pour day.
Make sure you have enough because you can’t very well run to the store to grab more while your cement is drying.
We had that problem with our J bolts. We were shorted, by a very large amount, by our materials supplier. I am not sure how you miss count 100 J bolts, but oh well. We had to rent a high powered drill a few weeks later to drill holes into our stem wall and insert a different type of bolt.
I learned my lesson though, and now I double check the amount of everything we are ordering. You might not know EXACTLY how much of something you will need unless there are only a few, but you can double check the supply companies numbers and have a pretty close idea.
Taking back extra is sometimes a lot easier than to be short on something and having to fix it later.
You should already have the supplies you need. If you don’t know what those are CLICK HERE to read all about the tools and things you will need on pour day.
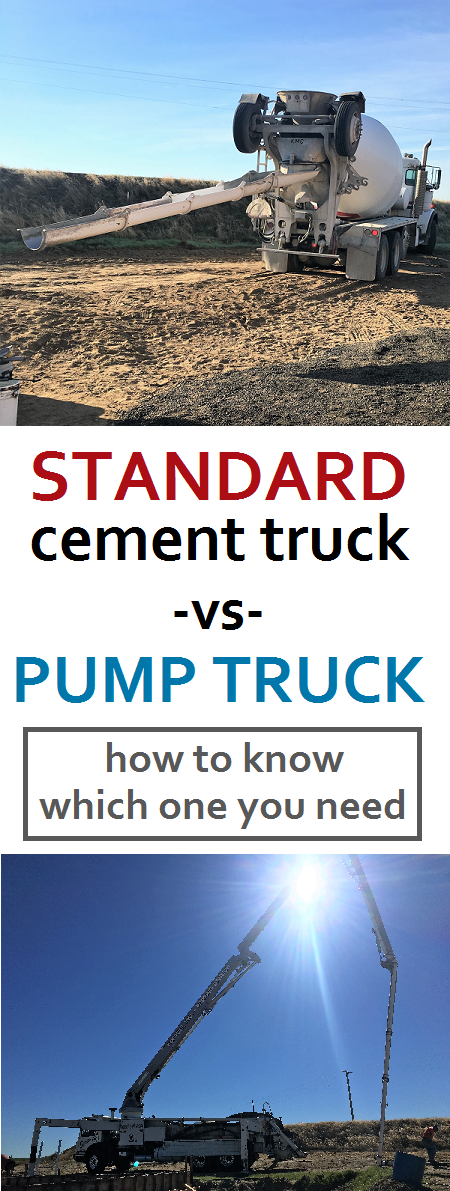
Finally, you need to determine if you can pour your stem walls with a standard cement truck, or if you will need to rent a pump truck in addition.
With a standard cement truck you can not pour upwards. The truck must be parked on higher ground, and the boom must be angled down. It’s just a shoot that allows the cement to slide down it. For it to work at all, you have to be able to use gravity to pour your cement.
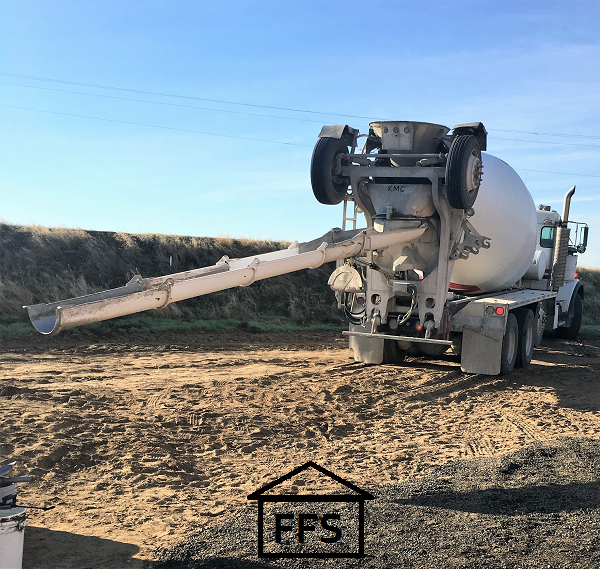
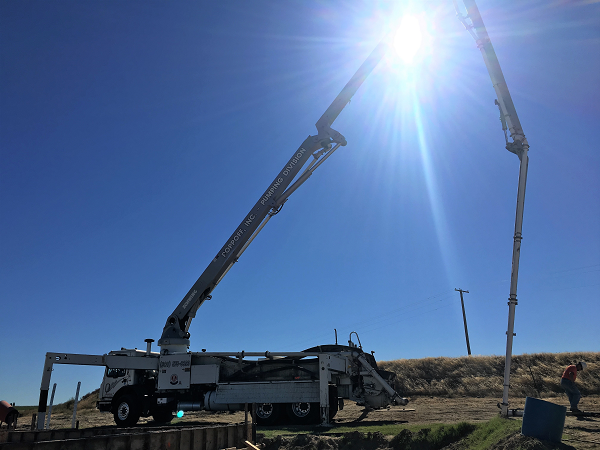
A pump truck, on the other hand, pumps the cement straight up a tube some 50-100 feet in the air, and then drops it down a more flexible tube allowing you to drop the cement in hard to reach places.
If you can not easily get a cement truck within 10 feet of where you need to pour, you need a pump truck.
If you are trying to pour into a place that is higher then about 18 inches off the ground, and you can’t drive the truck onto higher ground, you need a pump truck.
To learn more about standard cement trucks, go back to Step 15 HERE. We used a standard cement truck for our footings, and you can read all about that process.
For our stem walls, we needed a pump truck. There was no way a standard truck could get the cement up into our 4 foot tall stem wall forms. We also wanted to use a pump truck for the spot footings in the center of the house so we didn’t have to use a wheelbarrow to fill them. (no fun!)
I called around for a pump truck for a few days. Surprising to me was the fact that the cement companies did not also have pump trucks to rent. I had to call one company for my cement, and a separate company for a pump truck. Then we had to coordinate because they both have to be there at the same time. Throw on top of that the fact that they both charge extra if they have to sit and wait, and I was a pretty concerned duck!
But it all turned out okay because I told the pump truck company which cement company I was using so that they could coordinate with each other, and I didn’t have to be a responsible middle man. Yay for less responsibility!
When the pump truck company ended up waiting an hour for the cement company, it was their fault, not mine. I didn’t have to pay the extra fee because I was not the responsible middle man. Yay again!
So now you know whether or not a standard cement truck will do. You also know that if you need a pump truck, then you must coordinate the two companies. (Or let them coordinate themselves)
You have all your cement supplies ready. You have people lined up to help on pour day. You set all your rebar into place, and put together your cement forms. Everything is THOROUGHLY braced so there is no way the cement will bust through your forms.
Now you need to call for one more inspection before you can pour your cement. The inspector will be checking to make sure the rebar isn’t touching the sides of the forms. He will also make sure you are pouring the stem walls in the correct place.
Not a big deal, this is a pretty quick one as far as inspections go. If you need more information about inspections, CLICK HERE.
After your inspection is passed, you are good to go! Get that cement truck heading your way!
One last tip: Before you pour the concrete, Use a yard sprayer to coat the inside of the forms with diesel fuel. It acts just like cooking oil and allows the forms to separate from the dried concrete much easier.
To be totally honest, this job was a BIG one. If Farmer and I had tried to do it ourselves, it would have taken weeks. With our small crew of myself, Farmer, and 3 experienced construction friends which were working full time, building the forms still took over a week.
This is also a very physically demanding job. The forms are heavy, and the cement is heavy.
If you want to try this job yourself and not hire anyone, then go for it! Just know that it’s going to take awhile, and it’s going to be very physically demanding.
If Farmer and I ever built again, we would still hire some people to help on this part because of the time factor. I think we would probably go crazy doing that kind of work for weeks on end.
If you are not doing your own foundation, this step would fall under the umbrella of the foundation sub-contractor.
It’s still important for you to know what is going on and what his job entails. Be sure to discuss these things with him. Have him walk you through everything he will be doing. Make sure you understand which parts YOU are responsible for. For example, he may expect you to supply the J bolts, the simpson strong ties, and the post holders. Or maybe you need to have the water there for them on pour day.
I honestly don’t think you can be TOO thorough, so go ahead and talk about EVERYTHING.
CLICK HERE if you need to go back to Step 15: Pouring cement footings
Ready to move on to Step 17 … CLICK HERE
~Farmer’s Wife
FREE checklists and schedules
Access to the resources I created that helped Farmer and I save over $75,000 building our own custom dream home.
Leave a Reply