Phew! You are finally finally done with the foundation. You now have something permanent on your property, which means there is no turning back!
If this is your first experience building a home then you are probably feelings a bit like I was… always looking for the next “milestone” to hit. It was so exciting to finish anything and move on to the next step. Something to check off the list was both exhilarating and stress relieving.
Another emotion I was feeling right around this time was amazement in how it felt to write checks out for that much money. For someone who has saved and saved for so long, and tried not to spend more than was necessary, handing over thousands of dollars at a time felt completely unreal. And not in a good way I might add. The money leaves so fast that it’s like watching years and years of work deleted in an instant. Sometimes I felt a little sick to my stomach when the bill reached several thousands of dollars.
Not that I think these people don’t deserve it! It’s just a very new feeling for me and it made me uncomfortable some times. I want you guys to know that I am still very happy with just about every single person we were able to hire and the costs of the services they provided. If you shop long enough and hard enough, you will end up with great sub-contractors.
If you are new here and looking for a good place to start, CLICK HERE. You will find a detailed guide on how to build/contract your own home and save thousands from someone going through the same thing as you are. Yes, for real! Good luck!
Alright enough about that! It’s time to move on to Step 18: Green plate
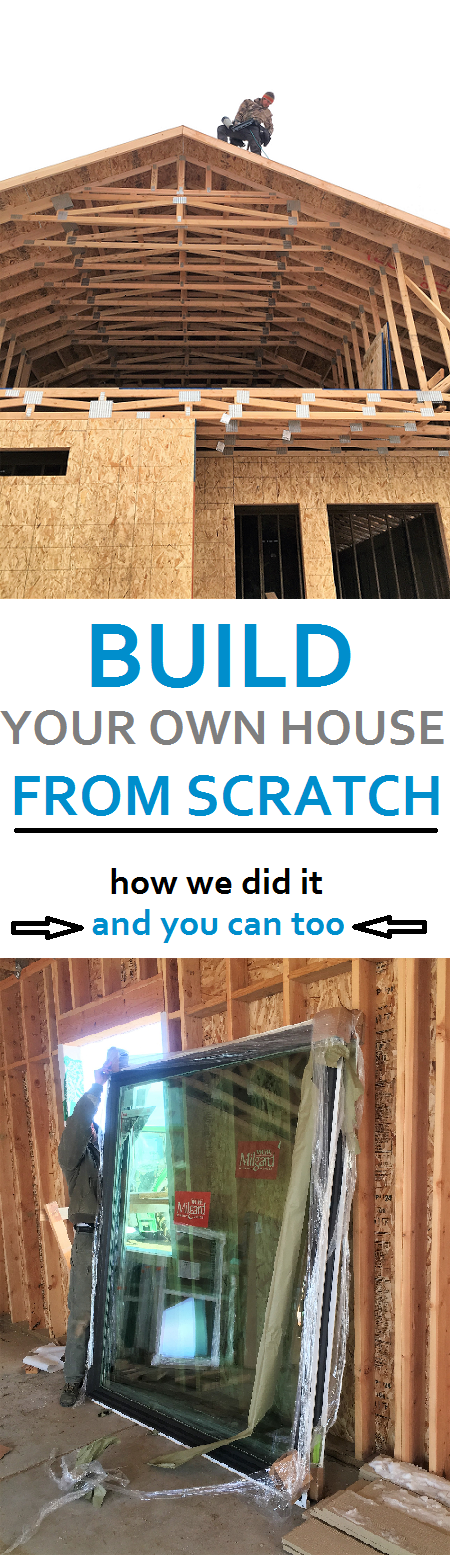
This is the first step in framing your new home.
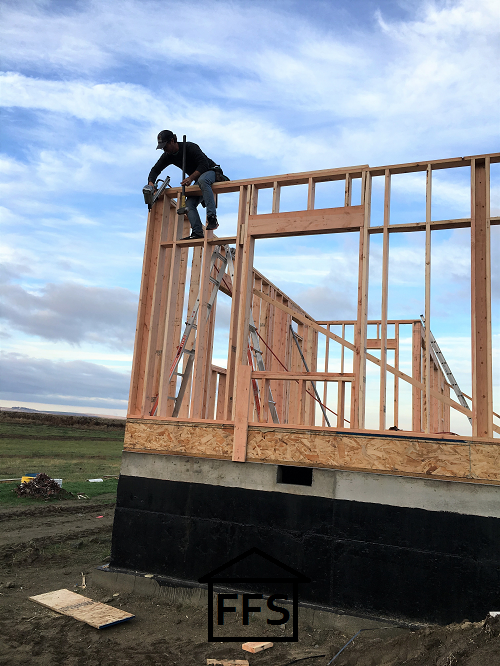
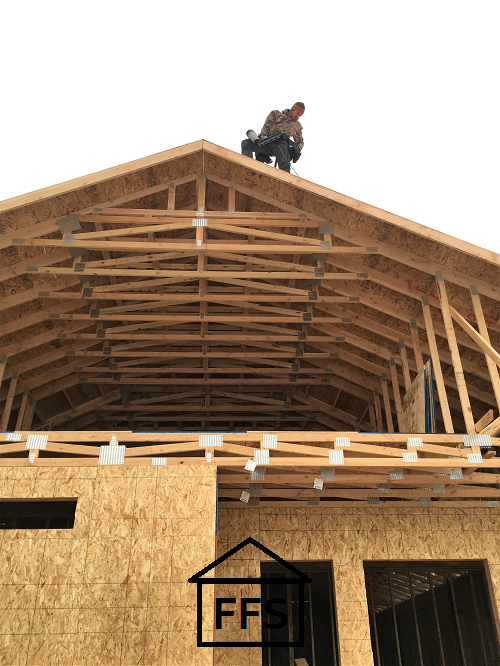
Framing the house is another very exciting time. Things happen fast with framing. Almost every day there is a noticeable difference in the new house, and before you even know it, you have the general shape of your house unfolding around you.
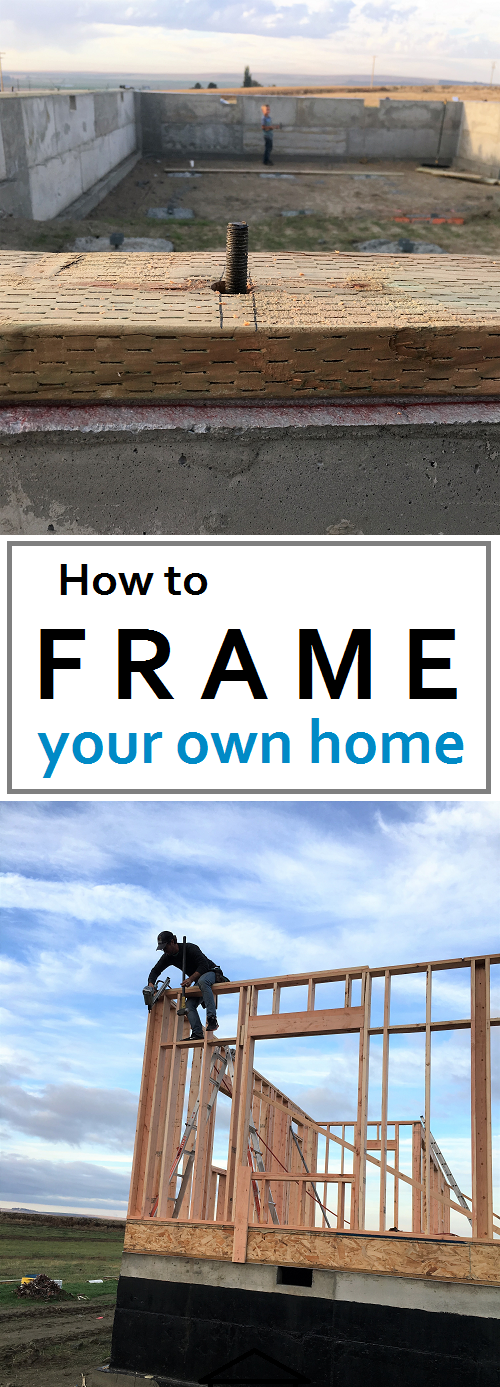
There are 3 main parts to framing a house:
- The floor
- The walls
- The trusses
Every house is soooo different. The farther you get in the process, the more options I feel like there are.
When it comes to framing, you have all kinds of things to think about.
- Exact sizes of windows and doors
- Style and size of gable vents
- Exactly where your toilets will sit
- How large your water heater is
- Where your extra heavy appliances will be
- What built in’s you will have
- Shelves or benches in your shower area
If you don’t have everything planned out, you will get yourself into trouble in this step. Even simple things that you don’t think would matter right now, do.
Take for example the placement of outlets. We had areas in our home where we had a hard time fitting the outlets that needed to go there because the door was too close to something.
Because I wanted larger trim than normal, we had squished the areas a little too small to fit them easily. Simply moving the door an inch or two would have made all the difference.
How about where you want your crawl space access? Seems like an after thought doesn’t it? Well it’s pretty important when you are placing your floor joists in.
Did you want your ceiling vents or can lights centered? If you don’t know that ahead of time, your trusses may make that impossible.
I am not saying this to scare you, but to help you. You MUST plan out every detail you can think of or you will run into problems later on. You will either have to settle with something you didn’t necessarily want, or you will end up with costly change orders.
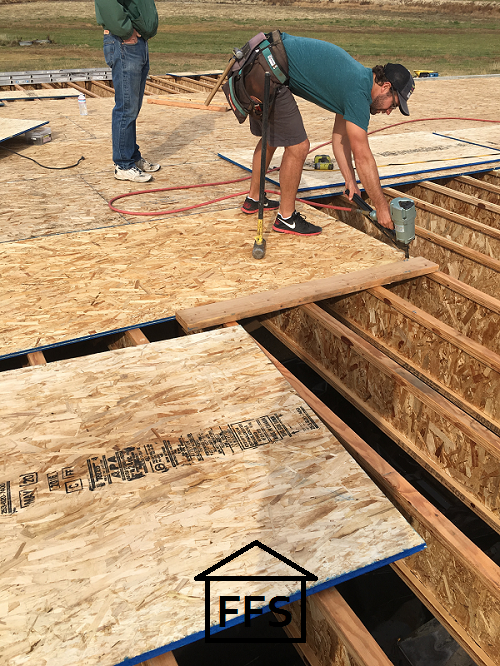
The sub floor (underneath your carpet, hardwood, tile, etc.) of your home will either be made up of a concrete slab or wood floor joists and sheets of plywood.
If you are building on top of a slab of concrete, your finish flooring will most likely go right on top of your slab (with a barrier and pad in between). You have no need for floor joists unless you have a second level. If that is the case, the floor joists will go on after you have your lower level walls built. They can’t just hang in mid air dang it!
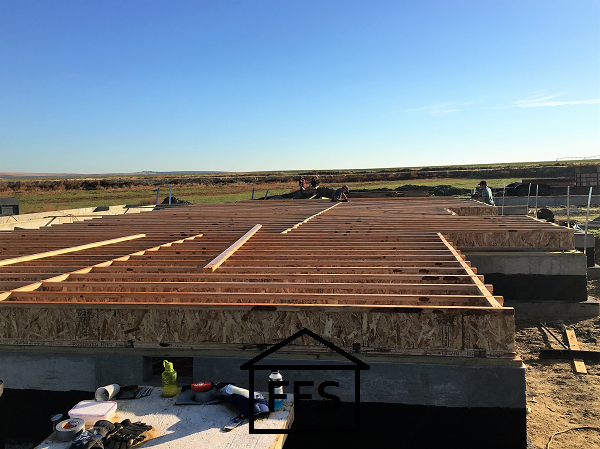
If you are building a home with a crawl space, your floor will be made out of joists that sit or hang on the concrete foundation walls, followed by sheets of plywood laid on top. This is what the floor joists (also known as I joists) look like.
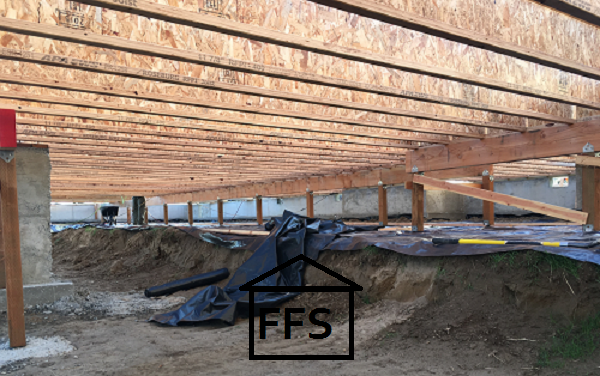
Our house has a crawl space so that is what I have experience with. If you are building on top of a slab, your process will be a little different.
I really enjoyed the part of installing the floor, especially because our foundation was rather tall (4 feet). Once we had a floor it was like standing on top of the world.
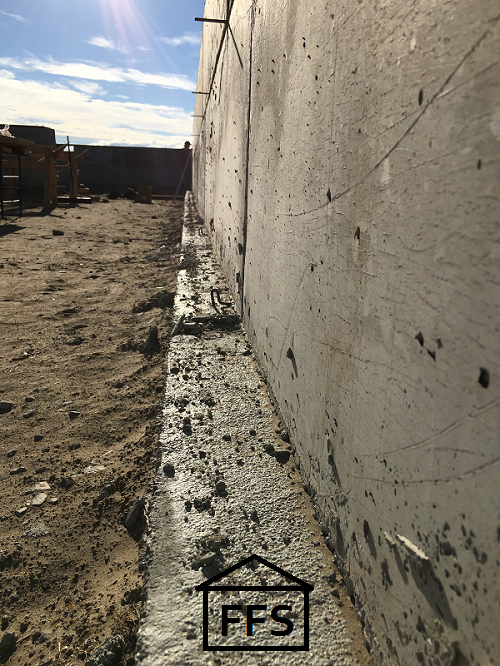
The last step we talked about was pouring your stem walls. Before you can start this next step, you will need to pull off all of the concrete forms and knock out the vent boxes and anything else you had in your concrete.
This job is a huge pain and it takes at least a day or two depending on how many people you have to help, but it’s not something you need skill for. I would suggest recruiting a few (responsible) teenage boys to go at it for a few days if you don’t want to tackle it yourself. Just know that’s it’s not a job that requires the skill of someone who charges $30 an hour or more. A few minimum wage teenagers will do the trick.
You also might need to go through with a quick sweep and clean up of the whole thing. There will be tons of little bits of dried concrete everywhere and they aren’t very pleasant to walk on. You also don’t want them under your house because you will need to lay down a layer of plastic and they could puncture holes in it. You will need the walls swept off for when you go through and paint tar on them as a moisture barrier a little later.
Again, this is not a job that requires skill. I swept everything off while my very young kiddos ran around picking up pieces of dried concrete and putting them into buckets. Offer to pay them a shiny quarter and you have yourself some great workers for about an hour. After that, the gopher mounds start looking way too tempting and you lose them to a more enticing game.
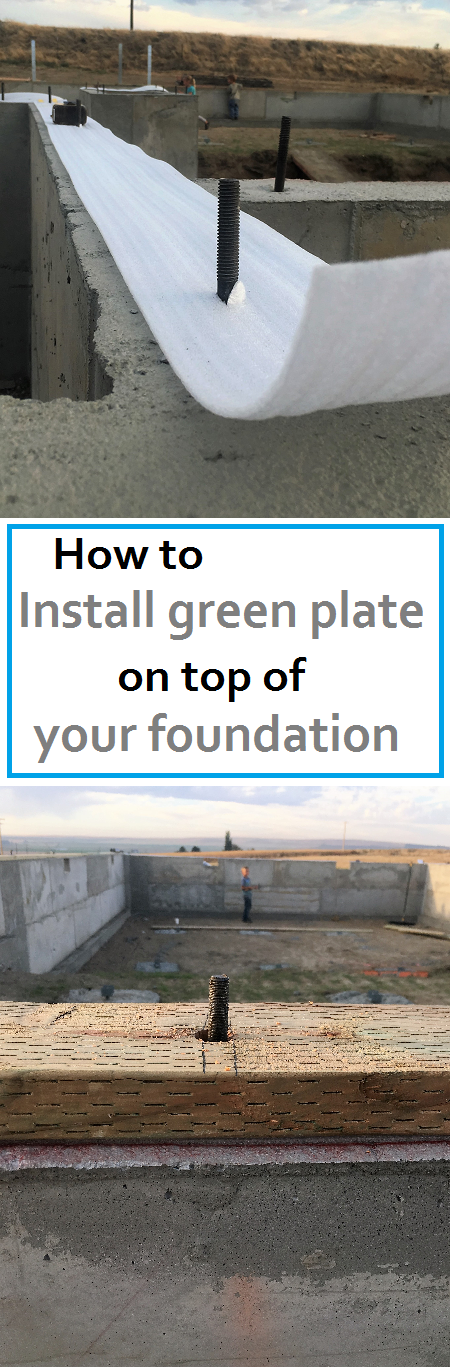
So the very first thing you must do to prepare for your floor joists and sub floor is to line your foundation with green plate.
Green plate is just a fancy name for treated lumber. It’s just a regular piece of 1 inch x 6 inch lumber that has been injected with chemicals to prevent it from rotting. It will be the barrier in between your concrete foundation and your walls built out of regular 2 x 6 lumber.
Remember those little J bolts you stuck in your foundation walls while the concrete was still wet?
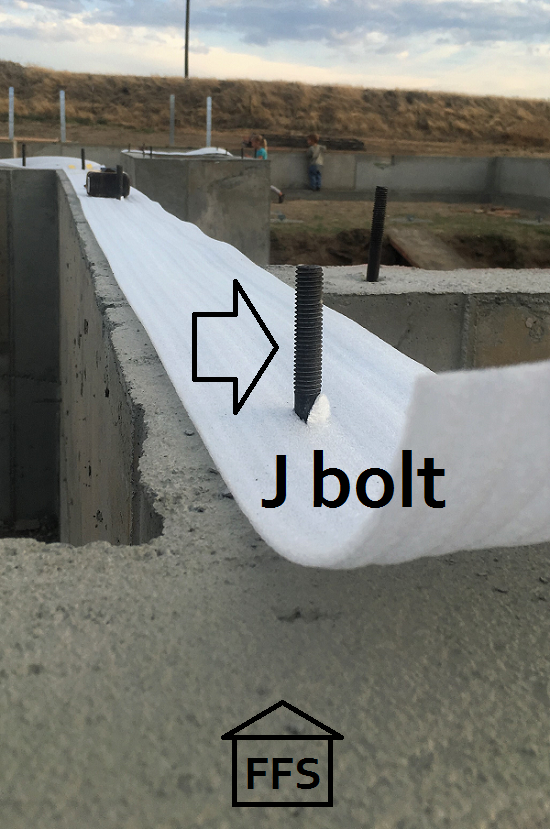 Well that is how you are going to attach your green plate.
Here is what you will need:
- chalk line
- measuring tape
- washer plates for each J bolt
- nuts for each J bolt
- plastic barrier to line the top of your stem walls
- 2 x 6 green plate to line the top of your stem walls
- a drill
The plastic barrier is just an extra barrier to help make up for the gaps and unevenness between the top of the stem wall and your green plate. Of course there will be imperfections, so this stuff just helps to fill the holes and hopefully keep the bugs and moisture out while still letting everything breath a little.
That really seems to be the name of the game when building a house- “How can we seal everything off from bugs, water, heat, and cold, but still allow the house to breath so it doesn’t get moldy?” We deal with that predicament in the foundation, the floors, the walls, the ceiling, the roofing … everywhere literally.
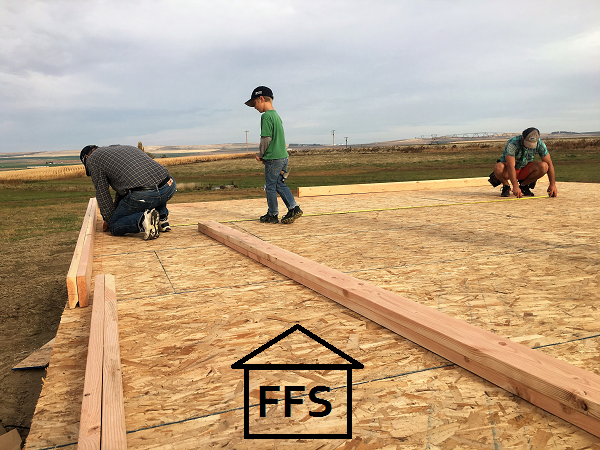
First you need to go back through and measure and mark everything. Through every step of building a house you should do this. If you are off by 1/4 inch, and you fix it before moving on, then it’s no big deal. If you don’t bother to correct that 1/4 inch, then later on it will turn into a bigger problem that will cause you headache trying to cover it up. Measure, measure, measure!
Follow your blueprints measurements as closely as possible. Measure everything to make sure it’s square and straight. Then use a string line to snap straight lines all the way around the foundation walls where your house walls will sit. This will make it really easy to lay your green plate and just follow the line around.
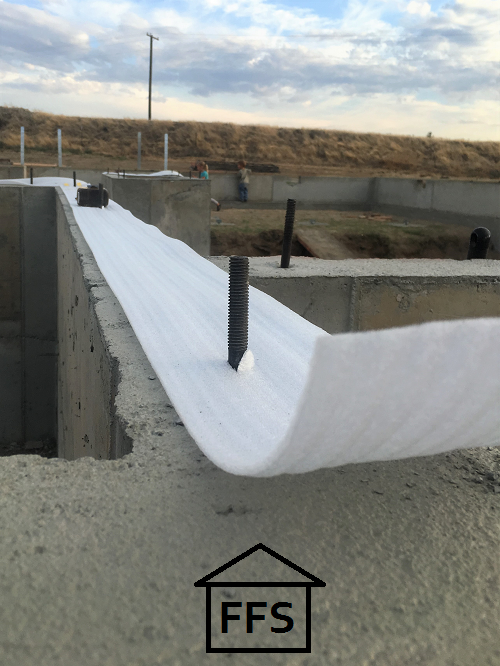
Next, you run the plastic barrier all the way around the top of your foundation wall. Just poke the J bolts through it and try not to rip them a ton. You may need to weigh it down every once in awhile if it’s windy, this stuff is really light weight. Don’t stress too much, this part is really easy. Yay, a job I can handle!
Then you can start in on your green plate. Begin at a corner and measure where the J bolt will be coming through the board. Mark that spot and then use a drill to make a hole so your J bolt will fit through.
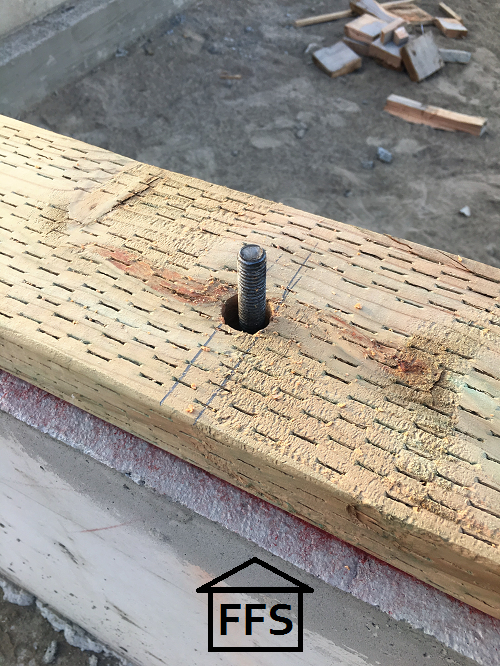
Set your green plate into place and move to the next one. You don’t want to leave gaps between the boards because that will just create one more spot for bugs and moisture to find it’s way inside your foundation. You don’t need to cut any weird angles when moving around the corners. Just cut it off at the end and then start a new board next to it.
One thing you need to check is that you have J bolts in all necessary places. If you set a green plate board down and it only has one J bolt holding it down, you are going to need another one to keep it from shifting. The building code in our area had a specific distance that the J bolts needed to be from the edge of each green plate and all the corners of the foundation. If you have questions about where the J bolts go, study your blueprints and then call your building department if you still have questions.
We actually ran out of J bolts while we were pouring concrete because the company we ordered from didn’t give us enough, so we have plenty of experience with drilling holes AFTER the concrete has dried. Find a rental store, you know one of those that rents everything under the sun? Ya, we have three of them in the neighboring city. You are going to need to rent a hammer drill. Make sure you know what size bit you need, and let them know that it’s to drill into concrete so you get one strong enough.
You will also need a different kind of bolt since you can’t exactly put a curved one into dried concrete. There were a few different options of things that would work. You can call the building department to find out which ones pass code in your area. It may also tell you on your blueprints depending on how specific they are.
Wherever you need an extra bolt, just use the hammer drill to drill a hole straight through the green plate and into the concrete. Then you can place your bolt in and secure it.
Finally, go around and put washers and nuts onto each J bolt. Tighten them down, and then you are all set!
You should now have a layer of plastic barrier and a layer of green plate all the way around the top of your foundation walls. Everything should be tightened down by the bolts and nuts poking up through the green plate.

All of this will act as a moisture barrier between the concrete and your floors and walls. It will also serve as a kind of anchor for your floor and walls to attach to so they aren’t just sitting on top of your foundation.
Exciting isn’t it? Now your house won’t blow away because it will be attached to your foundation … pretty important I would say!
Soooo what’s the damage?
This step isn’t too expensive because it’s just a tiny portion of your framing. Rather than breakdown what each individual thing costs on separate posts, I am going to create a framing cost breakdown of all the framing materials and labor together in one place. That cost breakdown will be on the checklists, schedules, and printables page which is free to all subscribers. If you have not subscribed for FREE and unlimited access to the checklists and schedules that saved Farmer and I over $75,000 so far, you can do that right here:
Putting on the green plate only took about 2 days and we only had 1 guy working full time on it. Farmer stopped in to help, but only for a few minutes here and there. Pretty quick and pretty easy overall.
If you are hiring this part out, it would fall under the framing sub-contractors job.
Framing is one of the largest jobs you will hire out (or do yourself). It is expensive because of all the materials you will be buying and because it will take a few weeks to a few months to complete, so labor really adds up. It was also the time where I felt like I had to run to town to grab extra things constantly. There are so many different things you need and jobs to complete within the framing portion that you are constantly reevaluating.
It doesn’t help that our building material take-off was short on almost everything they quoted us. I was running to the store almost every day during the three months of framing, to grab extra nails, staples, 2×4’s, saw blades, and on and on …. Just prepare yourself for this ahead of time.
It also depends on the framing contractor that you hire and the agreement you make with him. YOU are the general contractor, so YOU will probably be the one in charge of getting things when you run out. However, if you hire a framer to handle EVERYTHING, it will cost more but you will not be the one running to the store. Instead of YOUR time, you will be paying your framer for the time he has to go to the store and stand in line. This was something that I was happy to do, in order to save money. And as a bonus, the guys at the hardware store started offering suckers to the kids to keep them happy. Win, win!
As far as hiring a contractor, we opted for half and half … We hired three guys to frame our house full time. But Farmer and I also helped often, and I was the runner. I purchased everything for us (under the direction of our head framer) and either had it delivered or I went to pick it up. We figured our labor and time saved us around $10,000 on the framing portion. I don’t have a job, so it wasn’t taking me away from work. However, Farmer did take some time off work.
If I did it all over again, I think I would choose to do it the same way. I loved that we got to be a part of building our own house and also that it saved us some money. I had a blast learning how to do things and understanding how my house was being built.
And at the same time, a positive was that Farmer and I didn’t feel obligated to be there the whole time. If we couldn’t help on the house that day, we knew the work was still getting done. It worked out perfect for our situation, and the house progressed at a steady pace.
It can be difficult to find people willing to make that kind of a deal with you, but we were blessed to find some awesome guys that agreed to work with us that way. Plus they traveled all the way from Utah for our job and they were cheaper than anyone we could find around here. If you are interested in hiring these guys, send me an email at farmerswife@farmhousefromscratch and I can get you their information. I would recommend them any day!
To help out with this post and with the rest of framing, I am creating a framing cost breakdown and also a framing timeline. These are free for all subscribers and will be posted on the checklists, schedules, and printables page. You can subscribe below for unlimited access to this page.
~Farmer’s Wife
CLICK HERE to go back to Step 17
FREE checklists and schedules
Access to the resources I created that helped Farmer and I save over $75,000 building our own custom dream home.
What kind of window is that. Im have some trouble with finding the right window with black interior and exterior.
It’s a white vinyl window that they painted black on one side. It’s becoming a lot more popular so I hear. If you live anywhere in the area, call Perfection Glass in Tri-Cities Washington. They painted them for me and did an excellent job. I can’t recommend them enough! Honest company that did everything I needed, no questions asked.
Hello Mrs Farmer,
I am wondering about your placement on the green plate on top of your foundation wall. Did you purposely place the green plate to sit away from the exterior foundation wall’s edge?
Thank you.
Oh great question Duck Mama,
I will have to update my post to include why we did that.
After EVERY single step in building you should always re-measure and re-mark so that you don’t end up with a totally crooked house in the end. When we poured our foundation, a few of the concrete forms buckled a little bit and shifted ever so slightly. It happens, concrete is super heavy.
So after we took our concrete forms off we re-measured and re-marked everything so the green plate and walls were sitting exactly where they needed to go. They were still on top of the foundation. They were still just as strong. They just didn’t meet up exactly with the outside edge everywhere around.