Putting up your roof trusses is an exciting couple of days. There is a lot of change that happens and it is incredible to see your house coming together.
Once your trusses are rolled there is still quite a bit more to do before your roof is ready to be put on and your “lid” is complete. One really awesome thing though is that you are getting dangerously close to being “dried in”. I know in other places they call this different things … I have heard closed in and blacked in … but it all means the same thing which is that the exterior walls are closed in, the windows and exterior doors are in, the house wrap is on, and the roof is complete. We call it dried in because all the moisture, weather, and elements are being kept out. This is an important step because your house is now basically protected from the weather and you can work on it knowing that things aren’t getting damaged when it rains or snows.
If you are like us, and I know that many of you are, you will be working on this step in the fall and trying to beat the winter weather. Try not to lose too much sleep stalking that weather report. If something gets rained on or snowed on once or twice you will be just fine. Most builds will experience some kind of moisture before they are all dried in.
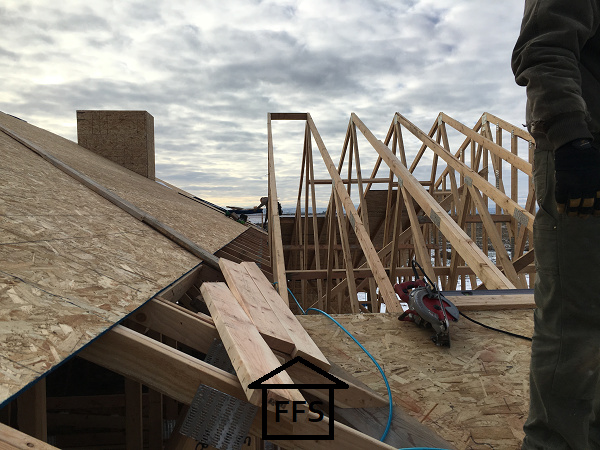
So your trusses are up and secured. What’s next? You need to finish framing up your roof. Your trusses provide most of the structure, but there will most likely still be places you need to connect or add, in order to complete your roof.
_____________________________________________________________________
I don’t bring up sheeting until later on in this article, but the reality is that is happens throughout. Sometimes it makes things easier if part of it is sheeted already. There is more to stand on and sometimes it can be beneficial to have something solid to nail to. If you are doing the framing yourself, please take the time to do as much research as possible so you can know how to proceed with each step on your own home.
_____________________________________________________________________
Overbuilds
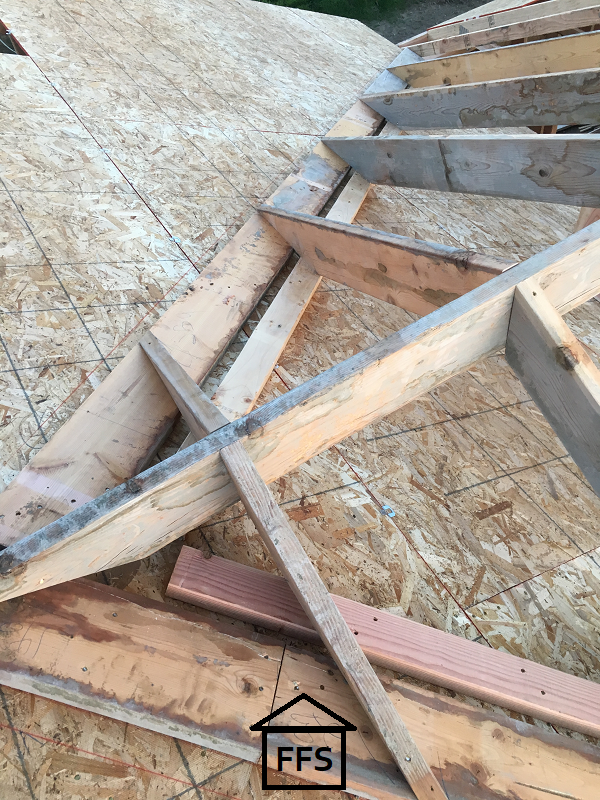
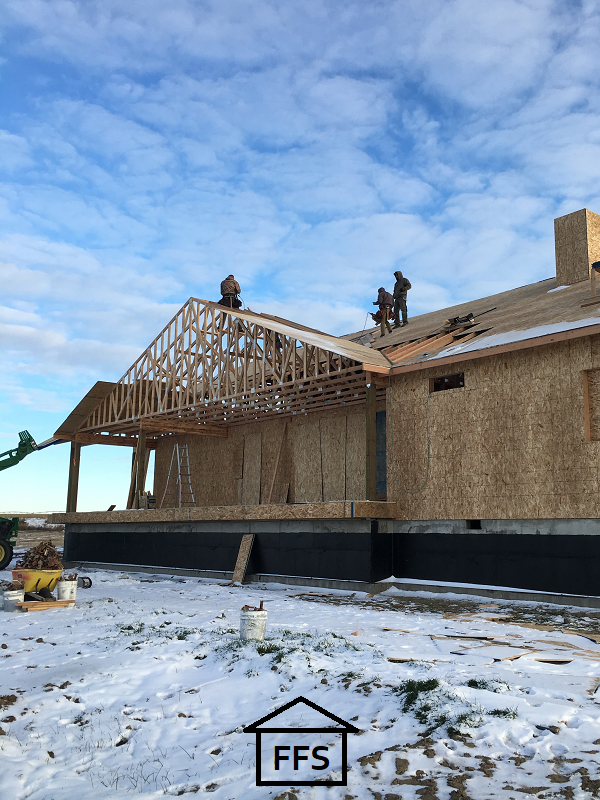
Unless your home is a perfect rectangle and everything is under one roof line, with no change of direction or height, you will have overbuilds. This is just where you build from one roof line over to another. Just like with everything else on your home, making sure the overbuilds are level and at the correct angles is very important.
During this part of our build, Farmer was swamped with fall harvest so our framing crew did most of the work. This particular area is where our house roof connects to our garage roof.
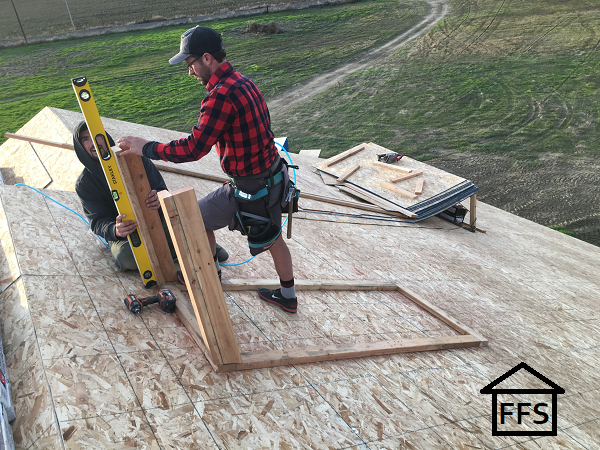
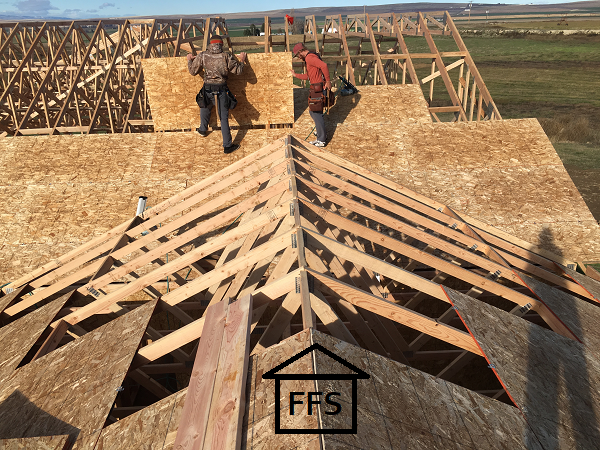 First they put the guide boards down on top of the sheeting.
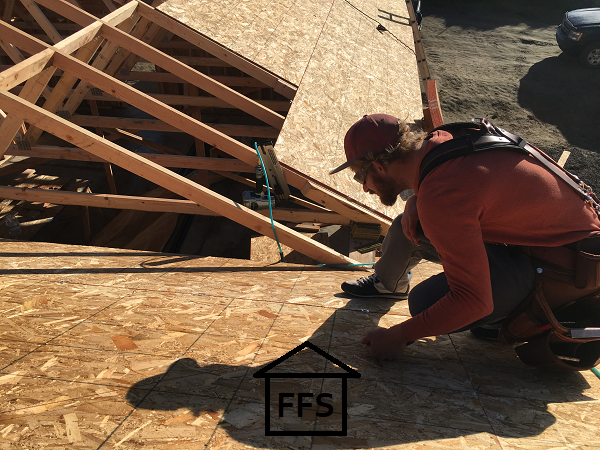
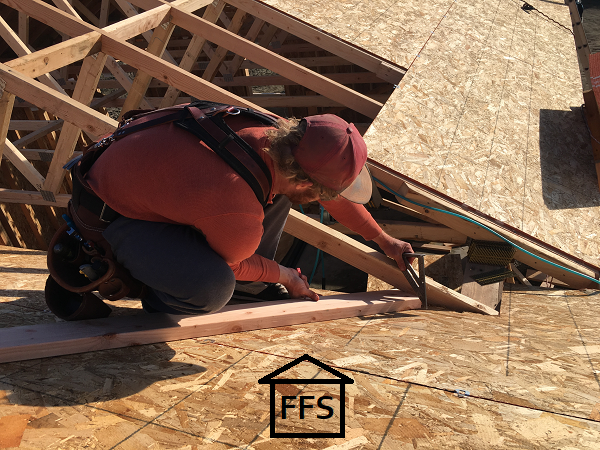 Then they added the top board and made sure it was perfectly level with the top of our trusses.
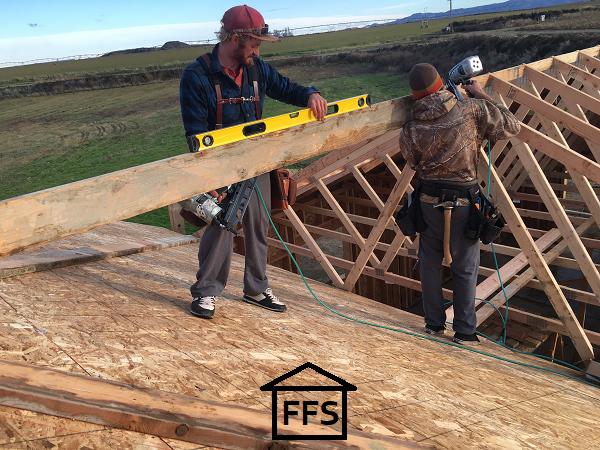
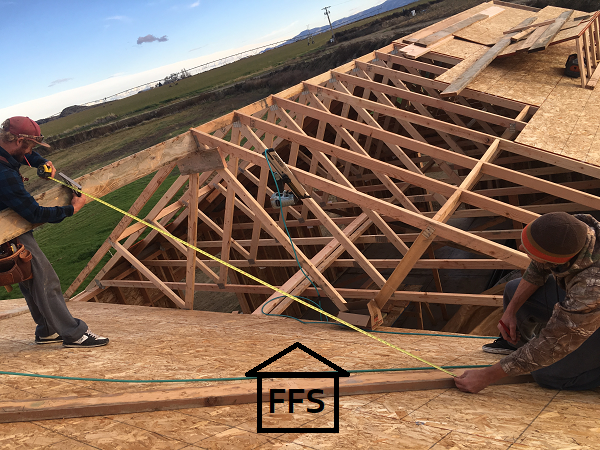
They were then able to add the cross boards the length of that board.
 There was a surprisingly large amount of math involved in this and I won’t pretend to tell you that I understood everything the guys told me they were doing. This was one of those times that I was very glad to have someone who knew what they were doing. Don’t let that scare you away from doing it yourself though! Just make sure to research well and then double check your math if you are DIY-ing.
Barges
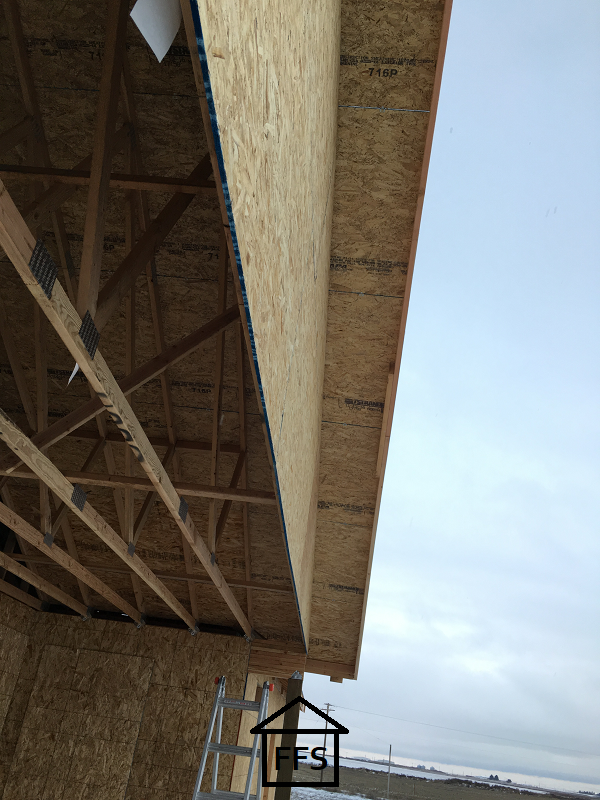
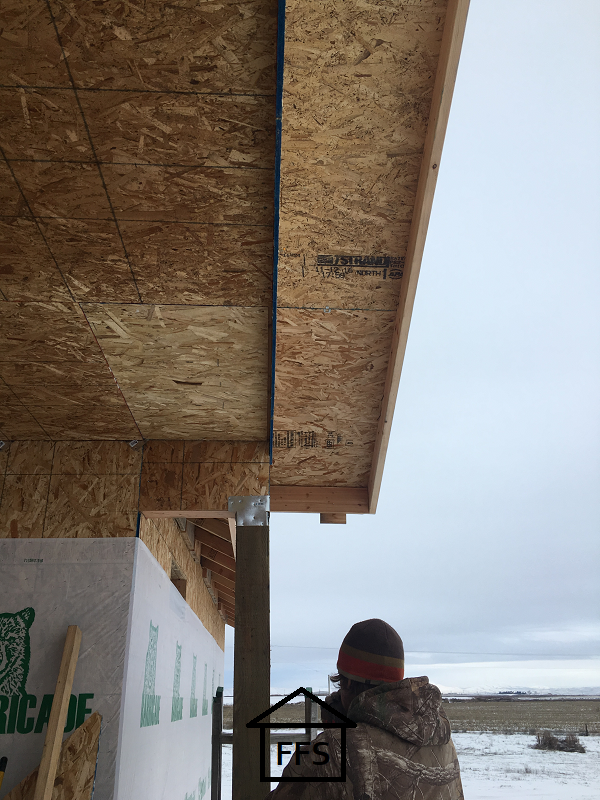
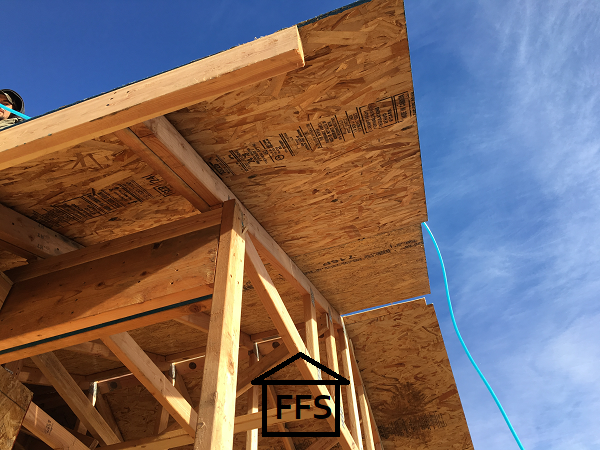
Barges are basically the area that hangs over the edge of your house. Your roof has to end somewhere. Where does yours end? Some barges are just a barge board and are only an inch or two beyond the exterior walls of the house. Other barges can hang out up to a few feet.
I’m not sure if there is a limit to how far out a barge can hang before it becomes a deck roof or some other term. Our barges hung out 18″. Here is a picture to give you a better idea.
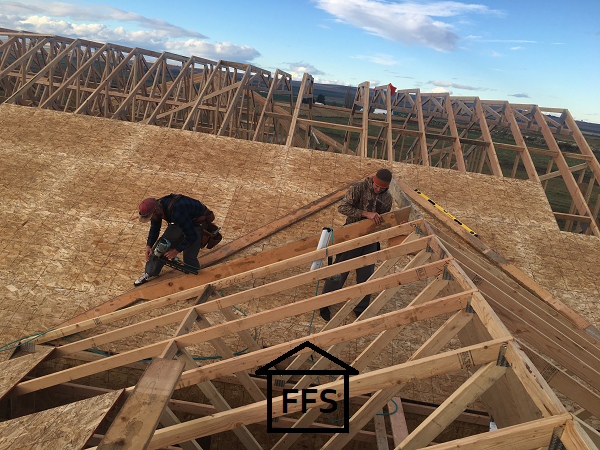
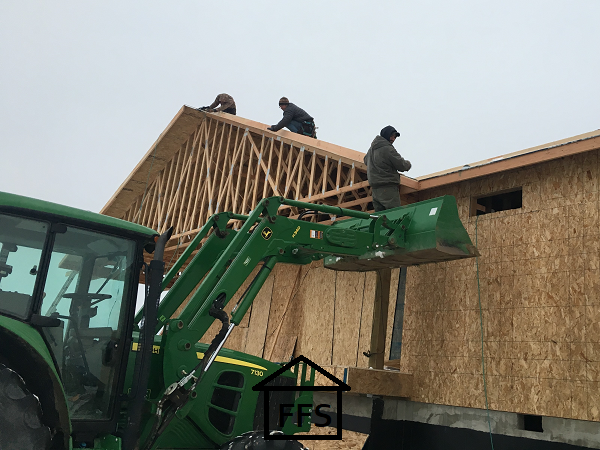
These must be built out from the tops of your trusses. The worst part by far is trying to attach these while laying up on the roof. The peak of our house is over 20 feet tall. I tried to be brave and help out, but I was such a baby about being up that high that no one wanted to ask me to help after the first time. Yes, you should absolutely where proper safety gear and tie yourself off so you don’t have any horrible accidents, but that doesn’t help me be any less afraid of heights. I tried guys, I really did! Thankfully all of our framers actually liked to be up high. No one else seemed to have any issue with it except me.
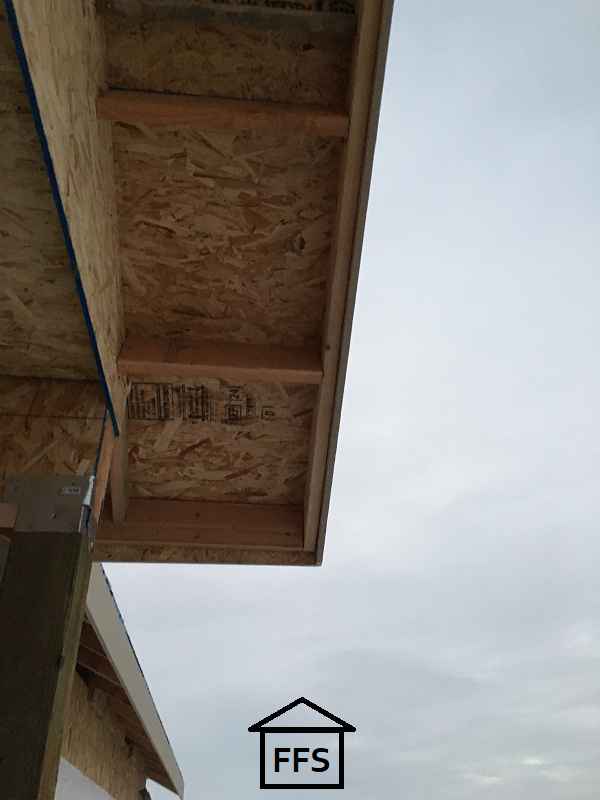
Barges are really simple though. Our guys just overhung the sheeting 18″ and attached the barge board to the edge of it.
I think that makes it a lot easier because there is something to attach it to.
 Then they went through and added little cross boards every 24″. They will all be the same size so that’s easy and quick to cut.
You will only have to build your overhangs like this on the peaks of your roof. On the edges that are parallel to the ground the trusses will hang out over the edge creating the overhang for you. All you will need to do is attach a face board and it’s ready for sheeting.
One thing you will need to decide is how you want the corners of your roof to look. There are a few different ways to make the corners look nice. Just decide which one you want ahead of time so you know how to cut the boards at the bottom. Here is a picture of one of the most common options:
Dormers and Gables
I know you already know the difference between a dormer and a gable, wink wink. So I am just posting this for myself since I had no idea.
“The difference between dormer and gable is that dormer is a room-like, roofed projection from a sloping roof while gable is the triangular area of external wall adjacent to two meeting sloped roofs.” At least that is what wiki tells me!
Dormers and Gables come in all different sizes. Some will be made out of trusses, others will be small enough that you can just build them out yourself.
Here is a picture of our large gable that we added to the back of our house.
 This was completely for looks and didn’t serve any real purpose other than to give variety to our roof line.
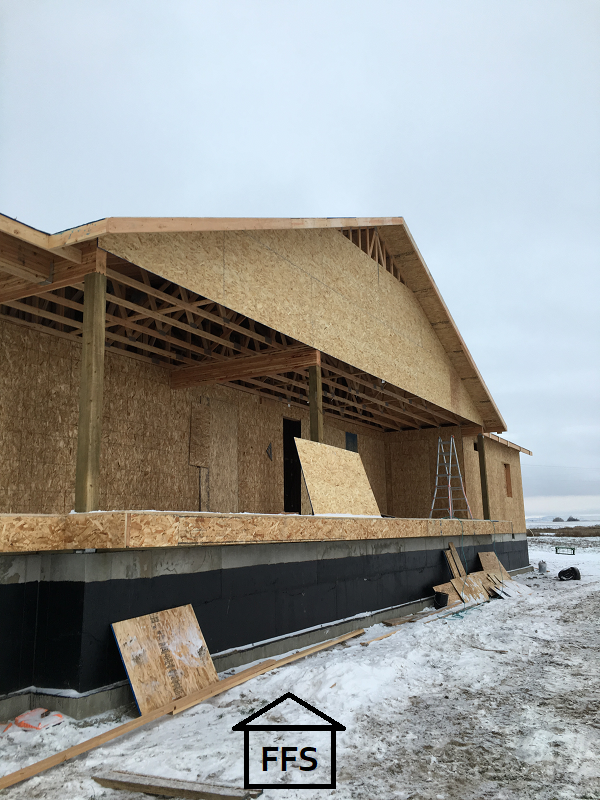
It was built out of several trusses, but then needed an overbuild to connect it back to the rest of our roof.
 It also has a barge hanging out 18 inches.
Side note: I wish we would have gone larger with our barges. If they hang out far enough, they provide a lot more shade and rain protection for your windows. I think it would have helped keep our house cooler in the summer and also kept my windows cleaner from the rain. It’s a minor detail though, not a big deal, just a thought I have had.
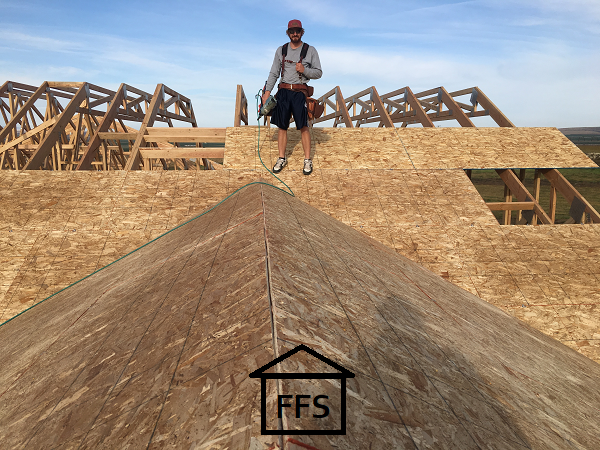
Sheeting
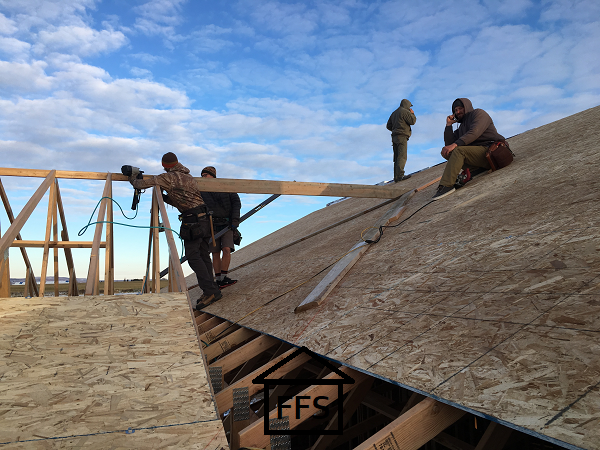
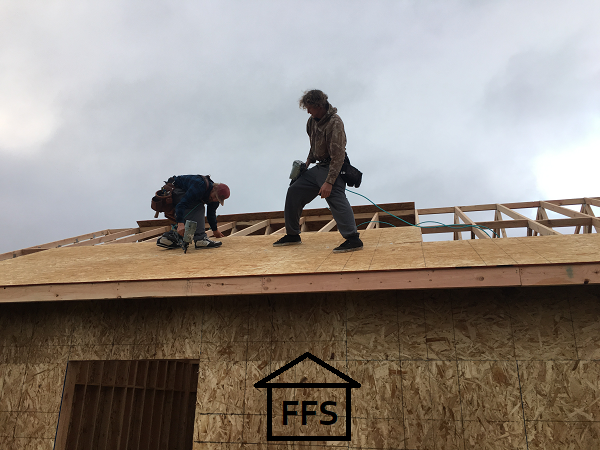
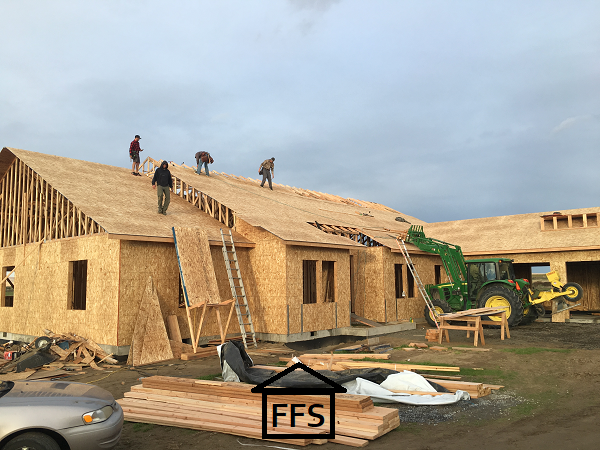
Now we are to the really fun part! Seriously I LOVED this step. To close in our roof with sheeting made it so our house actually felt like a house. It goes pretty fast too since you are working with 4’x8′ sheets of plywood, so a lot gets done in one day.
Since the sheeting part kind of happens throughout all of the finish roof framing, you really just need to finish it up now and fill all the missing spots.
You have already sheeted the walls so you know what you are doing. Make sure to stagger the joints so you don’t have weak spots. Check your blueprints and paperwork from the building department to see what the exact nailing requirements are. Some places will have inspections to make sure there are the proper amount of nails and nail spacing.
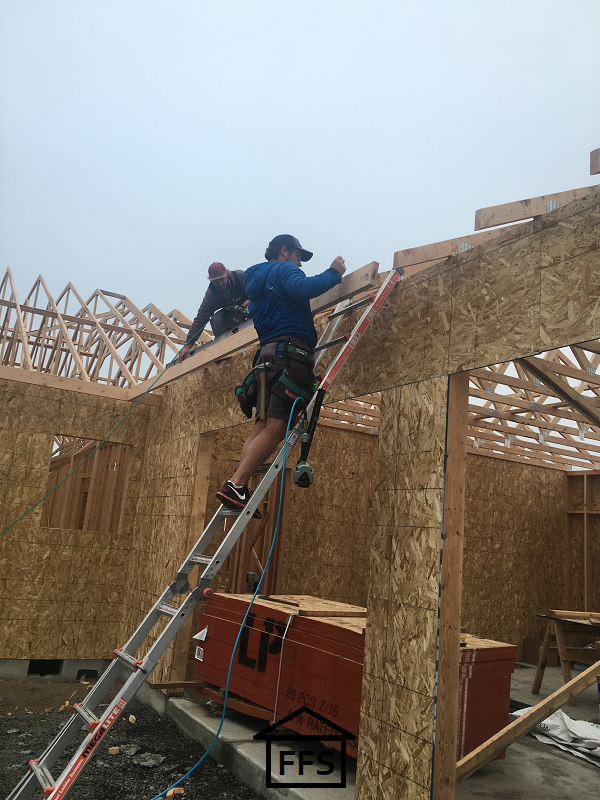
Our guys built a quick little stand out of 2×4’s to set the sheets of plywood on. It’s a serious workout to get every sheet up on top of your roof. They grabbed several sheets of plywood off the stack and leaned them up against the house in their stand.
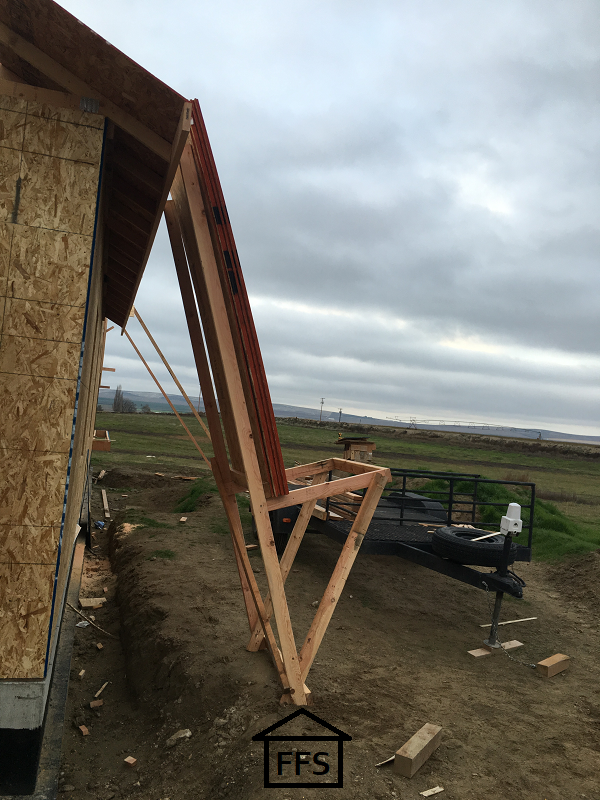
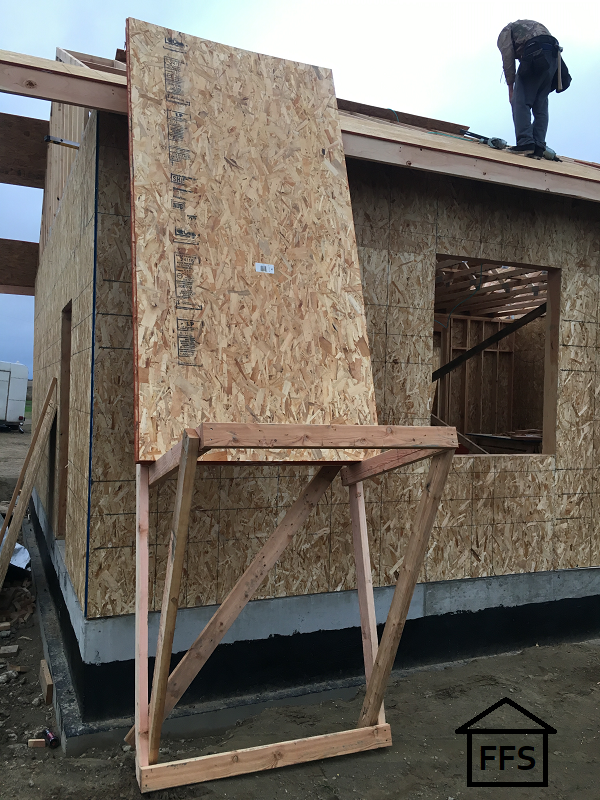

Then they were able to go up on the roof and reach the sheets of plywood to pull them up instead of having to climb up and down every time they needed another sheet. It went way faster this way. Still a pretty dang good workout though!
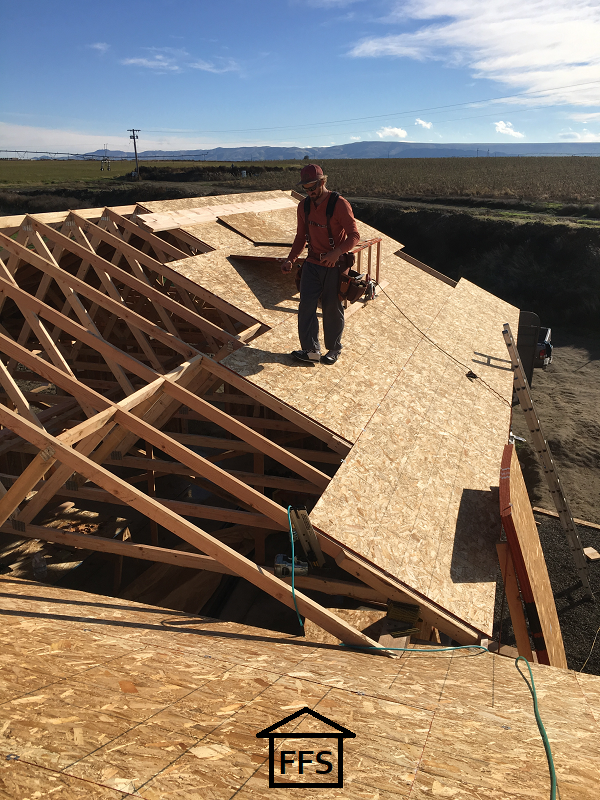
Along the edges the crew would nail entire sheets and let the ends hang off.
Then once they finished that whole edge they would just cut all the way up it. Doing this saved time on all the measuring and cutting, and it also made the cut line really nice, straight, and even. Please please check to make sure no one is standing down on the ground underneath them when they do this. Back WAY up. Crazy things happen at construction sites.
One difference you may have in sheeting the roof versus sheeting the walls are “H clips”, also called panel edge clips. These little guys are placed in between boards to hold the seams together and keep them from sagging. Since your roof has more weight on it then your walls, these are commonly used to help that.
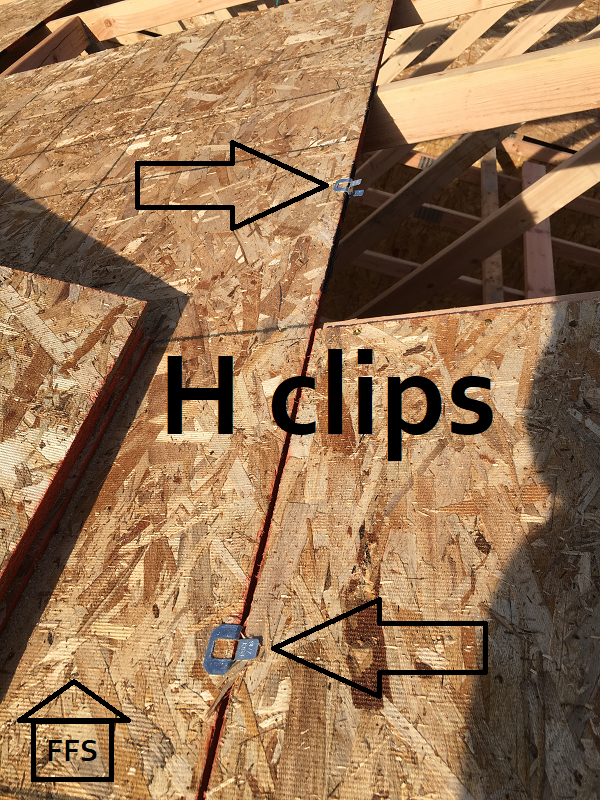
My framers told me that there is plenty of controversy over whether or not they actually help enough to make it worth it. The clips were a little annoying to work with but we did it anyway. They weren’t very expensive. Unless they are required in your area, then it’s totally up to you if you want to use them or not. I will let you know in ten or twenty years if our roof is sagging anywhere haha.
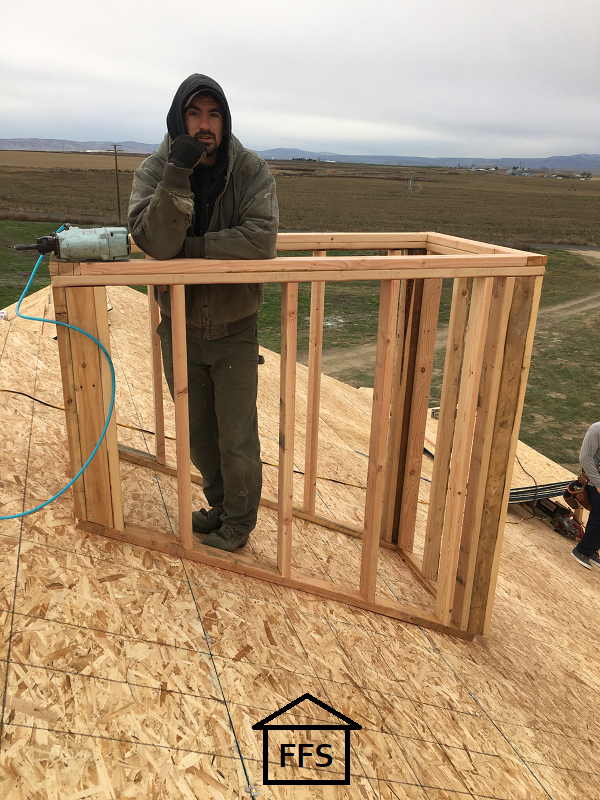
Chimney
Obviously not everyone will have a chimney. Maybe you have nothing else on your roof, or maybe you plan to build a secret tower for UFO watching. I’m not judging. You are building your own house so whatever your little heart desires, your heart gets!
Once our roof was sheeted, it was then time to build our chimney up on top. I wanted a big, pretty, rock covered chimney sticking up out of our roof. I love chimneys. What I didn’t know before hand is that the part of the chimney I wanted was completely unnecessary to our fireplace and therefore a total “extra”. If you have a fireplace in your house, all you really need is an exit point for the smoke. You will have a vent going straight up and out your roof, but all it really needs in order to function properly is a vent cap that lets the air and smoke out and doesn’t let rain and snow in.
The large rock covered statement piece I wanted on my roof served no purpose except to look pretty, unfortunately. Did we still do it? You betcha! I just wanted you all to know that this step is completely unnecessary unless you want something pretty to look at.
At this point, all we needed to do was build a large box the size that I wanted, directly over where our fireplace was going to be inside the house.
They nailed 2 x 4’s straight onto the roof and then built the rest of the box off of them.
 Then they wrapped it in plywood sheeting to finish it off.
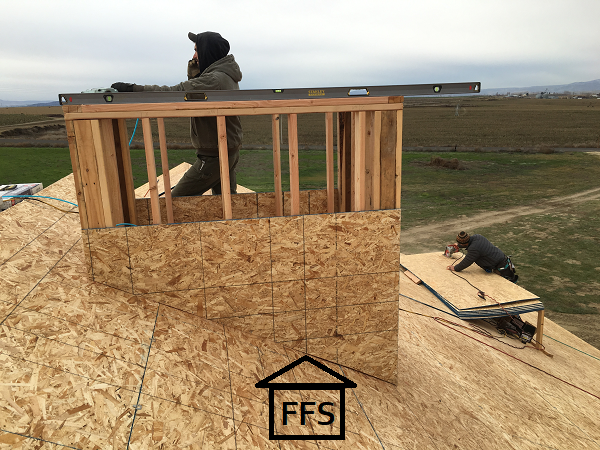 We put a piece of plywood over the top of it temporarily to keep any rain or snow from puddling inside our new box.
This was the beginning of my pretty chimney. Eventually it will be waterproofed and covered in rock. When we put our real fireplace in the house, we will put the vent up through the center and cap up on top.
I will write a complete post on our chimney from start to finish and detail exactly how much extra it cost us to add this “want” to our house. When it is finished I will link to it right here and send out an email notification. If you aren’t on my email list yet you can sign up here and never miss a helpful post or a free checklist!
Facia
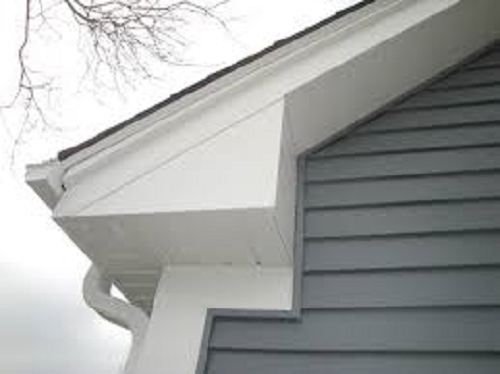
Facia is a weird thing to me. Maybe I just still don’t understand it and that’s why I think it’s dumb but oh well. When you build your barges and overhangs, you will put a barge board or outer rafter all the way around the edge of your roof. Then you still have to put another board right onto that one. Some call it facia board, some call it bargeboard.
I have found that most everyone I talked to used those terms interchangeably, but when I looked it up there may be a slight difference in the location of the board. Facia boards are the ones that run parallel to the ground and barge boards are the ones that run up the barges to the tall peaks of your roof. Here is a picture to show you what I mean.
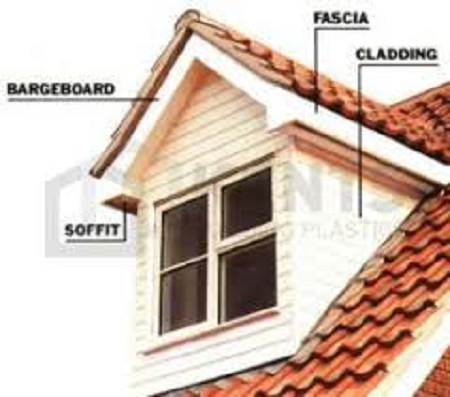
Do you trust google? Cuz this is what Google says. I just call them all facia board and probably look like an idiot.
Back to why I think it’s weird though. Why do you have to put 2 boards there? Does the facia board actually help the structure be stronger? Personally, I just wanted to paint the rafter board/barge board that was all the way around the roof instead of adding another layer that was more expensive. Here is what it looks like on our house:

Since I am cheap, this facia board thing really ticked me off. Add that to the fact that we were in a hurry because winter weather was threatening to hit, and I made a bad decision. And I am going to tell you about that decision so you don’t make the same mistake I did.
________________________________________________________
Because I didn’t want to pay for the facia board and I thought it was stupid, I went ahead and scheduled the roofing contractor and decided we would just wait and put up the facia board whenever we got around to it. Fast forward a few weeks and the roofer gets started. Because there was no facia board, he had to guess how far to overhang the roof flashing.
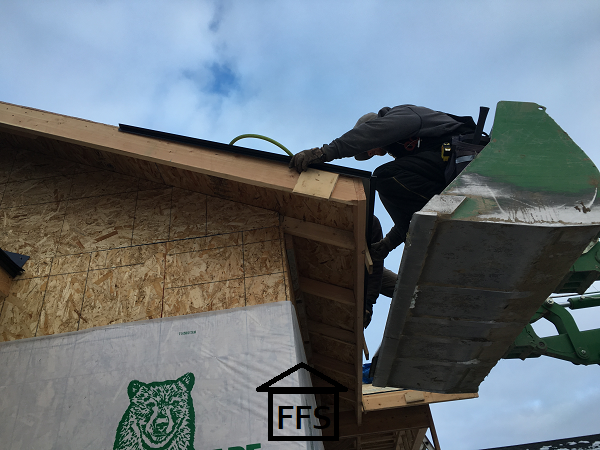 This made his job a lot harder and the flashing around the edge of our roof wasn’t perfectly straight. Plus, I created a WAY bigger job for Farmer and I in putting up the facia. We now have to hold open the metal flashing in order to slide the facia board up into place. Only it doesn’t slide. You have to pry open every few inches and shimy it in there. This is not a small inconvenience guys. This is a huge pain to do and really physically demanding on your arms! What would have been a quick and easy nail-a-board-up job, turned into pulling, prying, banging, yelling, and finger smashing.
_______________________________________________________
Learn from our mistake and just put your facia board up when you are supposed to, even if it seems like a pointless piece of trim. Oh yeah, and if you have another suggestion for how to fix this problem of ours that I created, please feel free to leave it in the comments below. We STILL aren’t done putting up our facia because we hate it so bad that we do like 2 boards a month. Maybe I should have waited awhile to write about this so I was a little less peeved at myself … hmmm
Hire it out or DIY?
All of these finish roof framing jobs falls under “framing contractor”, so if you hired a framer instead of doing it yourself then they will still be there working away on all of this. Farmer and I did a bit of a mix on this one. We did hire a framing crew because we knew we wouldn’t be able to finish it in a timely manner with Farmer’s work schedule and me homeschooling our 5 young kiddos. Spending 3 years framing up our house sounded like a bad plan, but you tell me.
We hand picked each guy that worked in the crew. They all came up from Utah and stayed for a few months to work on our house. We had a unique arrangement where we paid them by the hour, and Farmer and I put in as much time as we could alongside them. They taught us how to do things and let us choose what we wanted to do and what we wanted them to do. This worked perfect for our situation. We got to be a huge part of the framing process, but when Farmer and I couldn’t be there, work was still getting done by someone who knew what they were doing. It saved us a ton of money and made this time a lot more enjoyable.
If you are hiring a framing sub contractor, make sure you still educate yourself about framing. If you read all of my framing posts, you should have enough knowledge to discuss things with your framer and feel confident that everything is going how it should go.
Here is a list of the steps on framing you should read:
Step 19: Support beams for floor joists
Step 22: Rim board and Sub floor
Step 24: Framing the walls-part 1
Step 24: Framing the walls-part 2
Make sure to discuss with your framer any “extra” things you want in your home that may not be standard. This will ensure that you are both on the same page about what YOU want and how you want it to look. If you just hand the blueprints to your framer and assume he will do everything perfectly, then you aren’t doing your job as an owner builder. I am not saying that every framer will make a mistake and you should hold their hand. I am saying that if you don’t talk through everything with him, then you are running the risk of things getting overlooked.
In our case, I didn’t discuss our skylight with the framers or the truss company. I just ASSUMED they would see it on the blueprints. Skylights are actually really easy to overlook or forget about so I honestly don’t blame any of our guys. I blame myself for not bringing it up to anyone. Long story short, we don’t have a skylight in our house. It’s sitting in the garage in a box and I can’t use it. Anyone wanna buy it??
On this finish roof framing section, consider any areas that you think may be unique. Are you putting in a chimney? Do you have gables or dormers? Are there pitch changes and how will the transition go? Do you have barges that hang out particularly far? If you think about it at all, don’t be afraid to ask about it.
And if you feel completely lost, like you wouldn’t even know what to discuss with your framer, then reverse the conversation. Instead of you going through everything, ask him to “walk you through it all”. You will understand the job better AND you will think of questions while he is explaining things. After that conversation you will know what things to pay attention to and I guarantee you will feel a million times more comfortable and confident with what is about to happen.
I am not going to go over the money for this step right here. You can download our cost breakdown right here for free and look through what everything cost us up until we moved in.
But here are the ways we saved money on this step.
- We hired our crew by the hour and put in as much time as we could.
- We discussed with our framing crew that we really wanted to have as little waste as possible. They completely supported us on this and agreed that many crews don’t worry about the amount of waste. Once it’s cut, it’s tossed in the trash. I genuinely feel that they did a good job of trying to use what we had which saved us a little on materials.
- I compared prices and shipping costs for materials. Then I negotiated. We found a company that was willing to price match everything and give us free shipping in order to earn our business. The free shipping thing was especially awesome because of our location. We are 45 minutes from any building supply store. This saved me a LOT of time and money for fuel.
And here is the materials list we needed for this step (I only linked to the exact ones we used):
- Lumber- We used basic 2×4’s, 2×6’s, 3/4″ plywood, and facia board
- Nails- Mostly we used long, galvanized (more rust proof-to be used outside), ring shank (to keep them from pulling out) nails in the nail gun. But there was the occasional screw used as well.
- H clips- These are the little clips you put in-between your sheets of plywood to help them not to sag.
- Chimney cap if you are putting in a chimney
- Level
- Tape measurer
- String line and chalk line
- Loads of carpenter pencils
- Tools: We used a miter saw, circular saw, framing nail gun, and air compressor
By far the best way to save money on this step is to do as much of the labor as you can yourself. If that is not an option, focus on finding the best price you can on materials and looking for free or cheap delivery.
If you need to go back to Step 25 CLICK HERE
Once step 27 is up, I will link to it right HERE.
Happy framing!
~Farmer’s Wife
P.S. Don’t miss my other important framing post: “Things you don’t want to forget while framing”
FREE checklists and schedules
Access to the resources I created that helped Farmer and I save over $75,000 building our own custom dream home.
Just wanted to add a second voice saying that I wish we had made our barges larger, too. The splash-back from the rain dripping onto the ground has made the siding look so dirty! I think ours are 24″, and I wish we had done even 36″.
I don’t have any ideas for getting your fascia on faster…just more commiseration. We changed how much insulation was going to be in our roof at the last minute, and it lead to a funky step in our roofline. You can’t see it (unless you’re a bird/drone/butterfly), but it caused our roofer hours and hours of extra work, which of course cost us what felt like a bazillion extra dollars. We designed our roofline to be super simple, with the idea that putting the roof on wouldn’t be terribly expensive. Ha. Major fail.
I love your site! Such a great resource!